Toshiba Qosmio G30 PQG31C-HD202E Users Manual Canada; English - Page 101
DLA for TOSHIBA, Video, When using WinDVD Creator Platinum, start, Control Panel
 |
View all Toshiba Qosmio G30 PQG31C-HD202E manuals
Add to My Manuals
Save this manual to your list of manuals |
Page 101 highlights
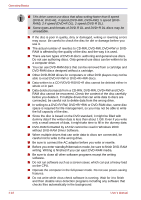
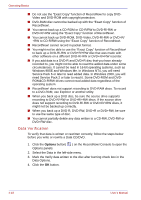
Operating Basics DLA for TOSHIBA Note the following limitations when you use DLA: ■ This software supports only rewritable discs (DVD+RW, DVD-RW, and CD-RW). It does not support DVD+R, DVD-R, and CD-R discs that are not rewritable. ■ DLA does not support formatting a DVD-RAM disc and writing to it, this function is performed by DVD-RAM Driver Software. You may find that the DLA Format menu appears when inserting a DVD-RAM disc, although you should use the 'DVDForm' utility to format this disc. You can run 'DVDForm' by clicking the Start button and then selecting 'All Programs', 'DVD-RAM', 'DVD-RAM Driver' and 'DVDForm' sequentially. ■ Do not use any discs that have been formatted with packet writing software other than DLA. Similarly, do not use any discs that have been formatted with DLA with any packet writing software other than DLA. When using a disc you are not familiar with, format it by selecting "Full Format" before using it. ■ Do not use the cut-and-paste function for files and folders. A file or folder that has been cut may be lost if writing fails due to an error on the disc. ■ When writing SETUP files for an application to a disc formatted by DLA, and then attempting to start SETUP from this disc, an error may occur. In this case, please copy the SETUP files to the hard disk and then run them from there. Video As for InterVideo WinDVD Creator Platinum. Only the model that can be written in to DVD is attached. When using WinDVD Creator Platinum You can record video back to your digital camcorder via i.LINK (IEEE1394) using WinDVD Creator Platinum. However, there is a case where you may find that playback sound is choppy -if this is the case follow the below instructions: 1. Click start and select the Control Panel. 2. Click the Performance and Maintenance icon in the Control Panel. 3. Click the System icon in the Performance and Maintenance window. 4. Click the Advanced tab in the System Properties window. 5. Click the Settings icon in the "Performance" section. 6. Click the Advanced tab in the Performance Options window. 7. Click the Change icon in the "virtual memory" section. 8. Select the Custom size button in the Virtual Memory window. 9. Specify much higher values for "Initial size" and "Maximum size." 10. Click the Set button in the Virtual Memory window. 11. Click the OK button in the Virtual Memory window. User's Manual 4-19
-
 1
1 -
2
-
3
-
4
-
5
-
6
-
7
-
8
-
9
-
10
-
11
-
12
-
13
-
14
-
15
-
16
-
17
-
18
-
19
-
20
-
21
-
22
-
23
-
24
-
25
-
26
-
27
-
28
-
29
-
30
-
31
-
32
-
33
-
34
-
35
-
36
-
37
-
38
-
39
-
40
-
41
-
42
-
43
-
44
-
45
-
46
-
47
-
48
-
49
-
50
-
51
-
52
-
53
-
54
-
55
-
56
-
57
-
58
-
59
-
60
-
61
-
62
-
63
-
64
-
65
-
66
-
67
-
68
-
69
-
70
-
71
-
72
-
73
-
74
-
75
-
76
-
77
-
78
-
79
-
80
-
81
-
82
-
83
-
84
-
85
-
86
-
87
-
88
-
89
-
90
-
91
-
92
-
93
-
94
-
95
-
 96
96 -
 97
97 -
 98
98 -
 99
99 -
 100
100 -
 101
101 -
 102
102 -
 103
103 -
 104
104 -
 105
105 -
 106
106 -
107
-
108
-
109
-
110
-
111
-
112
-
113
-
114
-
115
-
116
-
117
-
118
-
119
-
120
-
121
-
122
-
123
-
124
-
125
-
126
-
127
-
128
-
129
-
130
-
131
-
132
-
133
-
134
-
135
-
136
-
137
-
138
-
139
-
140
-
141
-
142
-
143
-
144
-
145
-
146
-
147
-
148
-
149
-
150
-
151
-
152
-
153
-
154
-
155
-
156
-
157
-
158
-
159
-
160
-
161
-
162
-
163
-
164
-
165
-
166
-
167
-
168
-
169
-
170
-
171
-
172
-
173
-
174
-
175
-
176
-
177
-
178
-
179
-
180
-
181
-
182
-
183
-
184
-
185
-
186
-
187
-
188
-
189
-
190
-
191
-
192
-
193
-
194
-
195
-
196
-
197
-
198
-
199
-
200
-
201
-
202
-
203
-
204
-
205
-
206
-
207
-
208
-
209
-
210
-
211
-
212
-
213
-
214
-
215
-
216
-
217
-
218
-
219
-
220
-
221
-
222
-
223
-
224
-
225
-
226
-
227
-
228
-
229
-
230
-
231
-
232
-
233
-
234
-
235
-
236
-
237
-
238
-
239
-
240
-
241
-
242
-
243
-
244
-
245
-
246
-
247
-
248
-
249
-
250
-
251
-
252
-
253
-
254
-
255
-
256
-
257
-
258
-
259
-
260
-
261
-
262
-
263
-
264
-
265
-
266
-
267
-
268
-
269
-
270
-
271
-
272
-
273
-
274
-
275
-
276
-
277
-
278
-
279
-
280
-
281
-
282
-
283
-
284
-
285
-
286
-
287
-
288
-
289
-
290
-
291
-
292
-
293
-
294
-
295
-
296
-
297
-
298
-
299
-
300
-
301
-
302
-
303
-
304
-
305
-
306
-
307
-
308
-
309
-
310
-
311
-
312
-
313
-
314
-
315
-
316
-
317
-
318
 |
 |