Toshiba RD-XS34SU Owners Manual - Page 41
Suggestions for the user picture quality setting
 |
View all Toshiba RD-XS34SU manuals
Add to My Manuals
Save this manual to your list of manuals |
Page 41 highlights
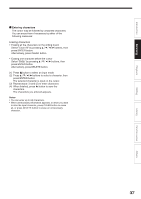
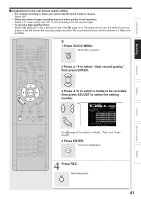
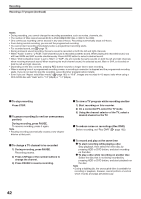
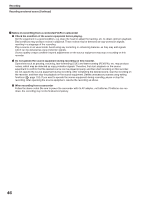
Introduction Recording Playback Editing Suggestions for the user picture quality setting • For normal recording or when you cannot decide which mode to choose. Select "SP". • When you need a longer recording time and video quality is not important Select "LP", lower quality than "SP" in picture quality, but it can record longer. • To record a high quality picture Select "MN (Manual)" to set a desired bit rate. (See page 161.) The higher the bit rate, the better the picture quality is, but the shorter the recording length becomes. We recommend that you set this between 6.0 Mbps and 6.8 Mbps. B 1 Press QUICK MENU. Quick Menu appears. QUICK MENU 2 Press / to select "User record quality," then press ENTER. ENTER 3 Press / to select a media to be recorded, then press ADJUST to select the setting number. ENTER e.g. /ADJUST User record quality HDD Setting 1 Manual 6.6 L-PCM DVD - - - SP 4.6 D/M1 Custom setting Setting Mode Rate Audio quality 1 Manual 6.6 L-PCM 2 SP 4.6 D/M1 3 LP 2.2 D/M1 4 Manual 6.0 D/M2 5 Manual 3.2 D/M1 Total recording time: approx. 71min. (with 4.7 GB unused) SETUP FRAME See page 53 for details on "Mode", "Rate" and "Audio Quality". 4 Press ENTER. The menu disappears. ENTER 4 Press REC. Recording starts. REC Library Function setup Others 41
-
 1
1 -
2
-
3
-
4
-
5
-
6
-
7
-
8
-
9
-
10
-
11
-
12
-
13
-
14
-
15
-
16
-
17
-
18
-
19
-
20
-
21
-
22
-
23
-
24
-
25
-
26
-
27
-
28
-
29
-
30
-
31
-
32
-
33
-
34
-
35
-
 36
36 -
 37
37 -
 38
38 -
 39
39 -
 40
40 -
 41
41 -
 42
42 -
 43
43 -
 44
44 -
 45
45 -
 46
46 -
47
-
48
-
49
-
50
-
51
-
52
-
53
-
54
-
55
-
56
-
57
-
58
-
59
-
60
-
61
-
62
-
63
-
64
-
65
-
66
-
67
-
68
-
69
-
70
-
71
-
72
-
73
-
74
-
75
-
76
-
77
-
78
-
79
-
80
-
81
-
82
-
83
-
84
-
85
-
86
-
87
-
88
-
89
-
90
-
91
-
92
-
93
-
94
-
95
-
96
-
97
-
98
-
99
-
100
-
101
-
102
-
103
-
104
-
105
-
106
-
107
-
108
-
109
-
110
-
111
-
112
-
113
-
114
-
115
-
116
-
117
-
118
-
119
-
120
-
121
-
122
-
123
-
124
-
125
-
126
-
127
-
128
-
129
-
130
-
131
-
132
-
133
-
134
-
135
-
136
-
137
-
138
-
139
-
140
-
141
-
142
-
143
-
144
-
145
-
146
-
147
-
148
-
149
-
150
-
151
-
152
-
153
-
154
-
155
-
156
-
157
-
158
-
159
-
160
-
161
-
162
-
163
-
164
-
165
-
166
-
167
-
168
-
169
-
170
-
171
-
172
-
173
-
174
-
175
-
176
-
177
-
178
-
179
 |
 |
