Toshiba Satellite P200D PSPBQC-SB308C Users Manual Canada; English - Page 85
Set up Procedure
 |
View all Toshiba Satellite P200D PSPBQC-SB308C manuals
Add to My Manuals
Save this manual to your list of manuals |
Page 85 highlights
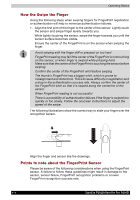
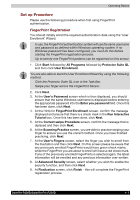
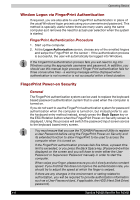
Operating Basics Set up Procedure Please use the following procedure when first using FingerPrint authentication. FingerPrint Registration You should initially enroll the required authentication data using the 'User Enrollment' Wizard. ■ In use, the FingerPrint authentication system will use the same username and password as defined within Windows operating system. If no Windows password has been configured, you must do this before starting the FingerPrint registration process. ■ Up to twenty-one FingerPrint patterns can be registered on this sensor. 1. Click Start followed by All Programs followed by Protector Suite QL and then click User Enrollment. You are also able to start the User Enrollment Wizard by using the following method. ■ Click the Protector Suite QL icon in the Task Bar. ■ Swipe your finger across the FingerPrint Sensor. 2. Click Next. 3. At the User's Password screen which is then displayed, you should ensure that the same Windows username is displayed before entering the appropriate password into the Enter you password field. Once this has been done, click Next. 4. At the Hints for FingerPrint Enrollment screen, confirm the message displayed and ensure that there is a check mark in the Run Interactive Tutorial box. Once this has been done, click Next. 5. At the Correct swipe Procedure screen, confirm the message that is diplayed and then click Next. 6. At the Scanning Practice screen, you are able to practice swiping your finger to ensure you use the correct method. Once you have finished practicing, click Next. 7. At the User's Fingers screen, select the finger you wish to enroll from the illustration and then click Next. On this screen please be aware that any previously enrolled FingerPrints would have green check marks, while the FingerPrint you are about to enroll will have a red check mark. If any of the previously enrolled FingerPrints is selected again, the latest information will be enrolled and any previous information over-written. 8. At Advanced Security screen, select whether you wish tto enable the security function, and then click Next. 9. At Finalization screen, click Finish - this will complete the FingerPrint registration process. Satellite P200D/Satellite Pro P200D 4-7
-
 1
1 -
2
-
3
-
4
-
5
-
6
-
7
-
8
-
9
-
10
-
11
-
12
-
13
-
14
-
15
-
16
-
17
-
18
-
19
-
20
-
21
-
22
-
23
-
24
-
25
-
26
-
27
-
28
-
29
-
30
-
31
-
32
-
33
-
34
-
35
-
36
-
37
-
38
-
39
-
40
-
41
-
42
-
43
-
44
-
45
-
46
-
47
-
48
-
49
-
50
-
51
-
52
-
53
-
54
-
55
-
56
-
57
-
58
-
59
-
60
-
61
-
62
-
63
-
64
-
65
-
66
-
67
-
68
-
69
-
70
-
71
-
72
-
73
-
74
-
75
-
76
-
77
-
78
-
79
-
 80
80 -
 81
81 -
 82
82 -
 83
83 -
 84
84 -
 85
85 -
 86
86 -
 87
87 -
 88
88 -
 89
89 -
 90
90 -
91
-
92
-
93
-
94
-
95
-
96
-
97
-
98
-
99
-
100
-
101
-
102
-
103
-
104
-
105
-
106
-
107
-
108
-
109
-
110
-
111
-
112
-
113
-
114
-
115
-
116
-
117
-
118
-
119
-
120
-
121
-
122
-
123
-
124
-
125
-
126
-
127
-
128
-
129
-
130
-
131
-
132
-
133
-
134
-
135
-
136
-
137
-
138
-
139
-
140
-
141
-
142
-
143
-
144
-
145
-
146
-
147
-
148
-
149
-
150
-
151
-
152
-
153
-
154
-
155
-
156
-
157
-
158
-
159
-
160
-
161
-
162
-
163
-
164
-
165
-
166
-
167
-
168
-
169
-
170
-
171
-
172
-
173
-
174
-
175
-
176
-
177
-
178
-
179
-
180
-
181
-
182
-
183
-
184
-
185
-
186
-
187
-
188
-
189
-
190
-
191
-
192
-
193
-
194
-
195
-
196
-
197
-
198
-
199
-
200
-
201
-
202
-
203
-
204
-
205
-
206
-
207
-
208
-
209
-
210
-
211
-
212
-
213
-
214
-
215
-
216
 |
 |