Toshiba Satellite P55-A5200 User Guide - Page 48
Installing a memory module, When the Windows - replacement screen
 |
View all Toshiba Satellite P55-A5200 manuals
Add to My Manuals
Save this manual to your list of manuals |
Page 48 highlights
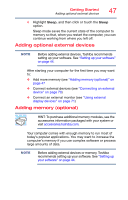
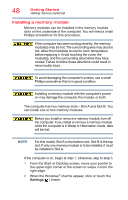
48 Getting Started Adding memory (optional) Installing a memory module Memory modules can be installed in the memory module slots on the underside of the computer. You will need a small Phillips screwdriver for this procedure. If the computer has been running recently, the memory module(s) may be hot. The surrounding area may also be hot. Allow the module(s) to cool to room temperature before replacing it. Avoid touching the cover, the module(s), and the surrounding area before they have cooled. Failure to follow these directions could result in minor bodily injury. To avoid damaging the computer's screws, use a small Phillips screwdriver that is in good condition. Installing a memory module with the computer's power on may damage the computer, the module, or both. The computer has two memory slots-Slot A and Slot B. You can install one or two memory modules. Before you install or remove a memory module, turn off the computer. If you install or remove a memory module while the computer is in Sleep or Hibernation mode, data will be lost. NOTE For this model, Slot A is the bottom slot. Slot B is the top slot. If only one memory module is to be installed, it must be installed in Slot A. If the computer is on, begin at step 1; otherwise, skip to step 5. 1 From the Start or Desktop screen, move your pointer to the upper-right corner of the screen or swipe in from the right edge. 2 When the Windows® charms appear, click or touch the Settings ( ) charm.
-
 1
1 -
2
-
3
-
4
-
5
-
6
-
7
-
8
-
9
-
10
-
11
-
12
-
13
-
14
-
15
-
16
-
17
-
18
-
19
-
20
-
21
-
22
-
23
-
24
-
25
-
26
-
27
-
28
-
29
-
30
-
31
-
32
-
33
-
34
-
35
-
36
-
37
-
38
-
39
-
40
-
41
-
42
-
 43
43 -
 44
44 -
 45
45 -
 46
46 -
 47
47 -
 48
48 -
 49
49 -
 50
50 -
 51
51 -
 52
52 -
 53
53 -
54
-
55
-
56
-
57
-
58
-
59
-
60
-
61
-
62
-
63
-
64
-
65
-
66
-
67
-
68
-
69
-
70
-
71
-
72
-
73
-
74
-
75
-
76
-
77
-
78
-
79
-
80
-
81
-
82
-
83
-
84
-
85
-
86
-
87
-
88
-
89
-
90
-
91
-
92
-
93
-
94
-
95
-
96
-
97
-
98
-
99
-
100
-
101
-
102
-
103
-
104
-
105
-
106
-
107
-
108
-
109
-
110
-
111
-
112
-
113
-
114
-
115
-
116
-
117
-
118
-
119
-
120
-
121
-
122
-
123
-
124
-
125
-
126
-
127
-
128
-
129
-
130
-
131
-
132
-
133
-
134
-
135
-
136
-
137
-
138
-
139
-
140
-
141
-
142
-
143
-
144
-
145
-
146
-
147
-
148
-
149
-
150
-
151
-
152
-
153
-
154
-
155
-
156
-
157
-
158
-
159
-
160
-
161
-
162
-
163
-
164
-
165
-
166
-
167
-
168
-
169
-
170
-
171
-
172
-
173
-
174
-
175
-
176
-
177
-
178
-
179
-
180
-
181
-
182
-
183
-
184
-
185
-
186
-
187
-
188
-
189
-
190
-
191
-
192
-
193
-
194
-
195
-
196
 |
 |
