Toshiba Satellite Pro S500 PSSE0C-08801L Users Manual Canada; English - Page 118
Removing discs, The CD/DVD extends slightly over the sides of the disc tray so you can
 |
View all Toshiba Satellite Pro S500 PSSE0C-08801L manuals
Add to My Manuals
Save this manual to your list of manuals |
Page 118 highlights
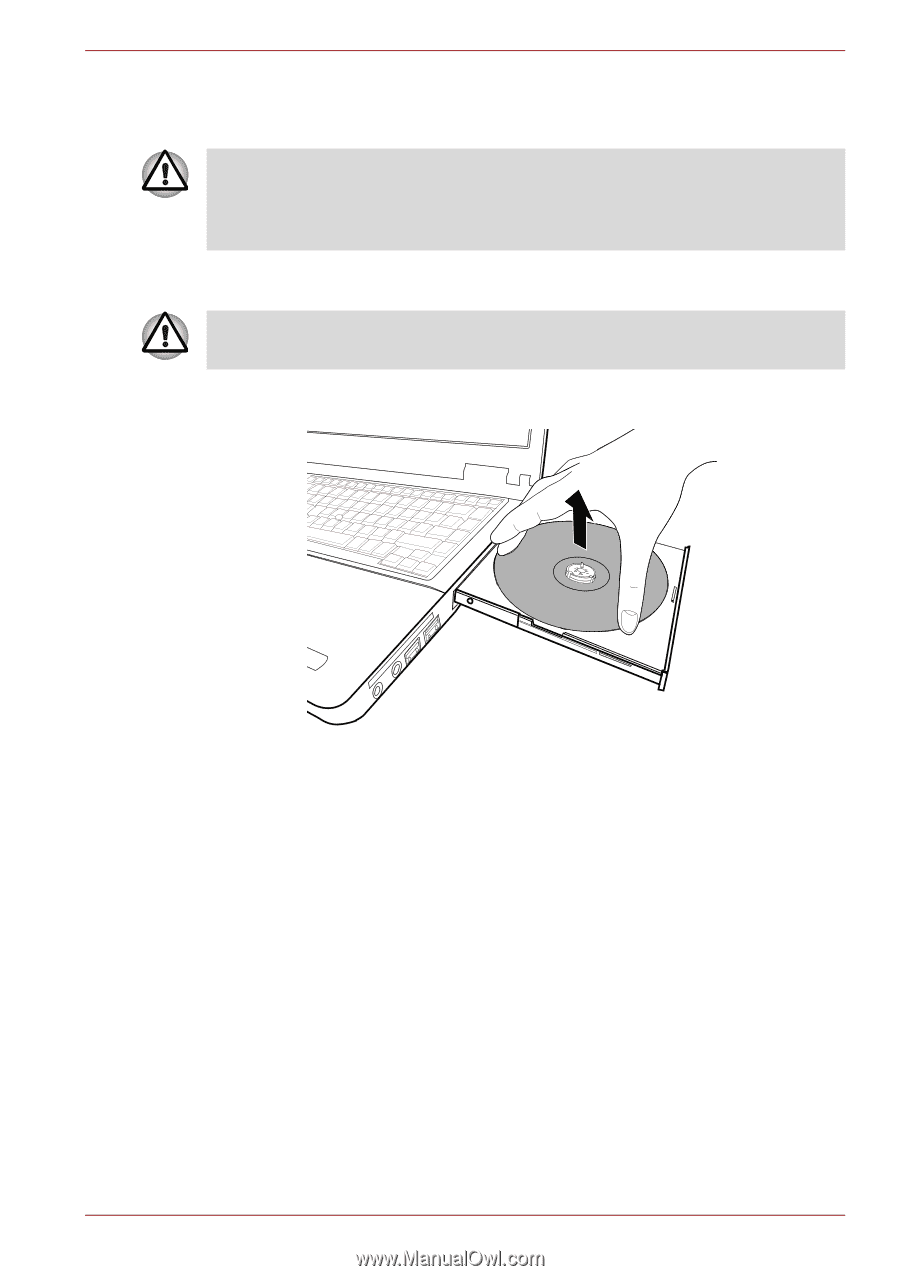
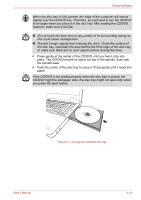
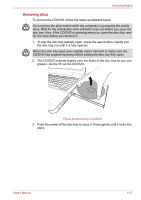
Operating Basics Removing discs To remove the CD/DVD, follow the steps as detailed below: Do not press the eject button while the computer is accessing the media drive. Wait for the optical disc drive indicator to go out before you open the disc tray. Also, if the CD/DVD is spinning when you open the disc tray, wait for it to stop before you remove it. 1. To pop the disc tray partially open, press the eject button. Gently pull the disc tray out until it is fully opened. When the disc tray pops open slightly, wait a moment to make sure the CD/DVD has stopped spinning before pulling the disc tray fully open. 2. The CD/DVD extends slightly over the sides of the disc tray so you can grasp it. Gently lift out the CD/DVD. Figure 4-8 Removing a CD/DVD 3. Push the center of the disc tray to close it. Press gently until it locks into place. User's Manual 4-17
-
 1
1 -
2
-
3
-
4
-
5
-
6
-
7
-
8
-
9
-
10
-
11
-
12
-
13
-
14
-
15
-
16
-
17
-
18
-
19
-
20
-
21
-
22
-
23
-
24
-
25
-
26
-
27
-
28
-
29
-
30
-
31
-
32
-
33
-
34
-
35
-
36
-
37
-
38
-
39
-
40
-
41
-
42
-
43
-
44
-
45
-
46
-
47
-
48
-
49
-
50
-
51
-
52
-
53
-
54
-
55
-
56
-
57
-
58
-
59
-
60
-
61
-
62
-
63
-
64
-
65
-
66
-
67
-
68
-
69
-
70
-
71
-
72
-
73
-
74
-
75
-
76
-
77
-
78
-
79
-
80
-
81
-
82
-
83
-
84
-
85
-
86
-
87
-
88
-
89
-
90
-
91
-
92
-
93
-
94
-
95
-
96
-
97
-
98
-
99
-
100
-
101
-
102
-
103
-
104
-
105
-
106
-
107
-
108
-
109
-
110
-
111
-
112
-
 113
113 -
 114
114 -
 115
115 -
 116
116 -
 117
117 -
 118
118 -
 119
119 -
 120
120 -
 121
121 -
 122
122 -
 123
123 -
124
-
125
-
126
-
127
-
128
-
129
-
130
-
131
-
132
-
133
-
134
-
135
-
136
-
137
-
138
-
139
-
140
-
141
-
142
-
143
-
144
-
145
-
146
-
147
-
148
-
149
-
150
-
151
-
152
-
153
-
154
-
155
-
156
-
157
-
158
-
159
-
160
-
161
-
162
-
163
-
164
-
165
-
166
-
167
-
168
-
169
-
170
-
171
-
172
-
173
-
174
-
175
-
176
-
177
-
178
-
179
-
180
-
181
-
182
-
183
-
184
-
185
-
186
-
187
-
188
-
189
-
190
-
191
-
192
-
193
-
194
-
195
-
196
-
197
-
198
-
199
-
200
-
201
-
202
-
203
-
204
-
205
-
206
-
207
-
208
-
209
-
210
-
211
-
212
-
213
-
214
-
215
-
216
-
217
-
218
-
219
-
220
-
221
-
222
-
223
-
224
-
225
-
226
-
227
-
228
-
229
-
230
-
231
-
232
-
233
-
234
-
235
-
236
-
237
-
238
 |
 |