Toshiba TLP-X4500U User Manual - Page 20
Connecting The Power Supply, Connecting to a monitor, Connecting to a speaker with amplifier
 |
View all Toshiba TLP-X4500U manuals
Add to My Manuals
Save this manual to your list of manuals |
Page 20 highlights
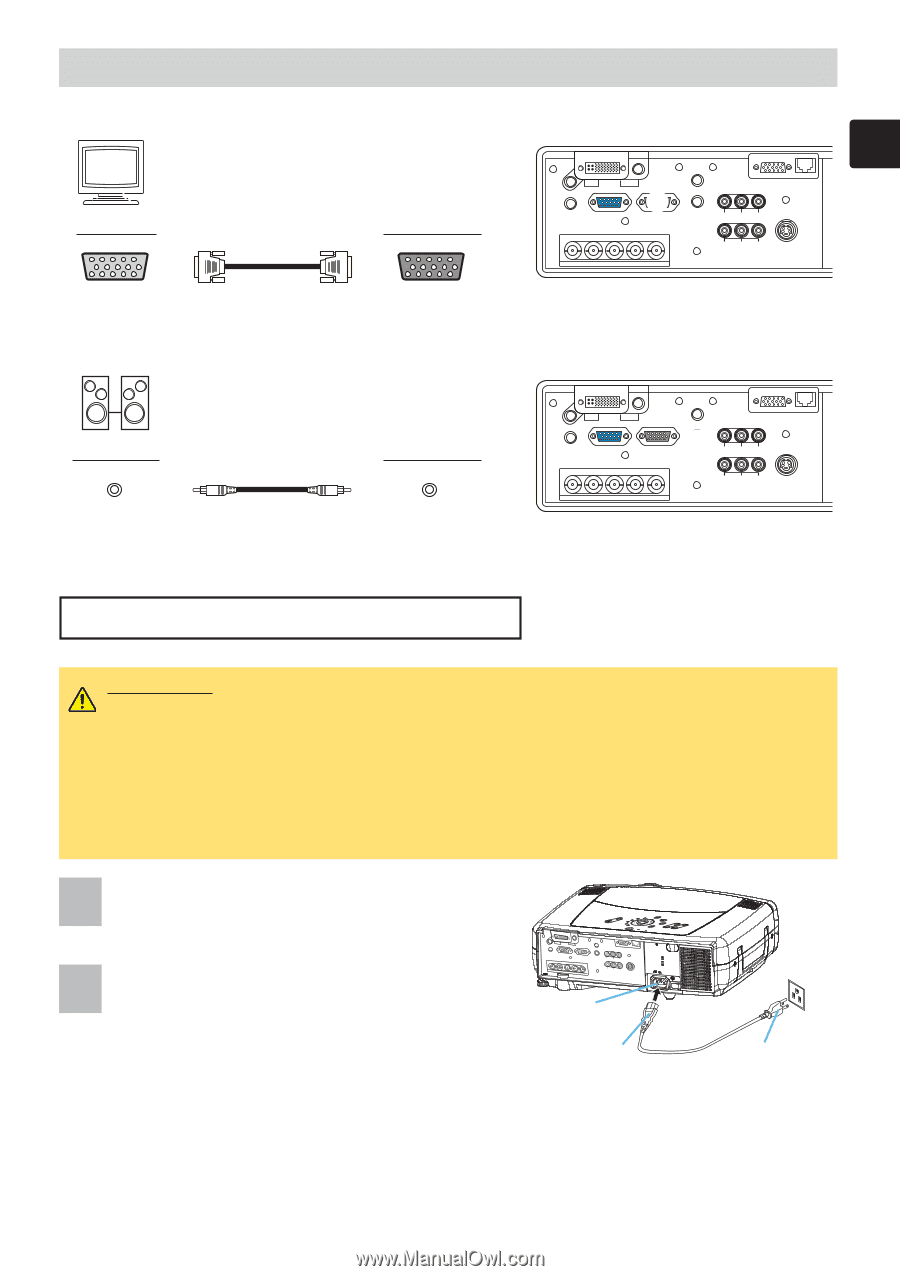
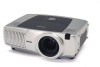
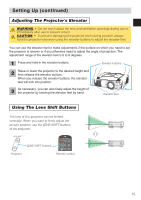
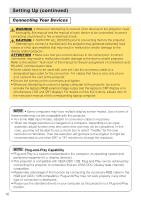
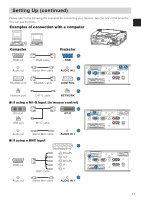
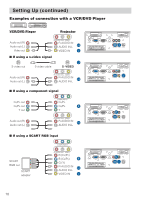
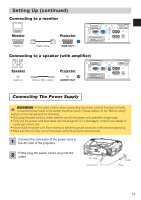
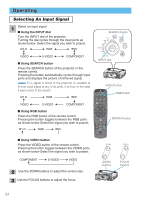
Setting Up (continued) Connecting to a monitor Monitor RGB in RGB cable Projector L RGB OUT AUDIO IN1 AUDIO IN2 RGB L RGB OUT REMOTE CONTROL AUDIO OUT CR/PR Ca/Pa CONTROL Y NETWORK R/CR/PR G/Y B/CB/PB H V BNC R-AUDIO IN-L VIDEO S-VIDEO Connecting to a speaker (with amplifier) Speaker Audio in Stereo Mini cable Projector M AUDIO OUT AUDIO IN1 AUDIO IN2 RGB RGB OUT REMOTE CONTROL M AUDIO OUT CR/PR Ca/Pa CONTROL Y NETWORK R/CR/PR G/Y B/CB/PB H V BNC R-AUDIO IN-L VIDEO S-VIDEO Connecting The Power Supply WARNING • Use extra caution when connecting the power cord as incorrect or faulty connections may result in fire and/or electrical shock. Please adhere to the "Before using" section of this manual and the following. • Only plug the power cord into outlets rated for use with the power cord's specified voltage range. • Only use the power cord that came with the projector. If it is damaged, contact your dealer to newly get correct one. • Never modify the power cord. Never attempt to defeat the ground connection of the three-pronged plug. • Make sure that you firmly connect the power cord to the projector and wall outlet. 1 Connect the connector of the power cord to the AC inlet of the projector. 2 Firmly plug the power cord's plug into the outlet. LENS SHIFT COMPONENTBNG S-VIDEO RGB M1-D INPUT INTER KEYSTONE SEARCH RESET VIDEO STANDBY/ON MENU TEMP LAMP FOCUS ZOOM AUDIO IN1 REMOTE CONTROL CONTROL NETWORK AUDIO IN2 RGB RGB OUT R/CR/PR G/Y B/CB/PB H V AUDIO OUT CR/PR Ca/Pa Y BNC R-AUDIO IN-L VIDEO S-VIDEO AC Inlet Connector Outlet Plug 19
-
 1
1 -
2
-
3
-
4
-
5
-
6
-
7
-
8
-
9
-
10
-
11
-
12
-
13
-
14
-
 15
15 -
 16
16 -
 17
17 -
 18
18 -
 19
19 -
 20
20 -
 21
21 -
 22
22 -
 23
23 -
 24
24 -
 25
25 -
26
-
27
-
28
-
29
-
30
-
31
-
32
-
33
-
34
-
35
-
36
-
37
-
38
-
39
-
40
-
41
-
42
-
43
-
44
-
45
-
46
-
47
-
48
-
49
-
50
-
51
-
52
-
53
-
54
-
55
-
56
-
57
-
58
-
59
-
60
-
61
-
62
-
63
-
64
-
65
-
66
-
67
-
68
-
69
-
70
-
71
-
72
-
73
 |
 |