Uniden BEARTRACKER 885 English Owners Manual - Page 15
Basic Operations
 |
View all Uniden BEARTRACKER 885 manuals
Add to My Manuals
Save this manual to your list of manuals |
Page 15 highlights
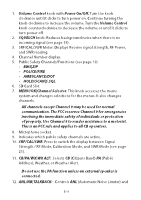
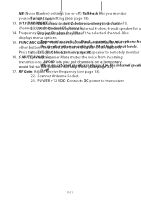
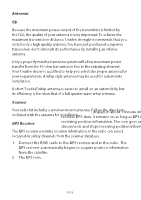
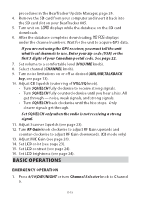
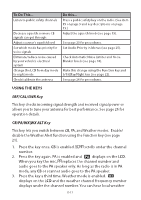
procedures in the BearTracker Update Manager, page 26. 4. Remove the SD card from your computer and insert it back into the SD card slot on your BearTracker 885. 5. Turn unit on. LOAD displays while the database on the SD card downloads. 6. After the database completes downloading, NO POS displays under the channel numbers. Wait for the unit to acquire GPS data. If you are not using the GPS receiver, you must tell the unit what local channels to use. Enter your zip code (USA) or the first 3 digits of your Canadian postal code. See page 22. 7. Set volume to a comfortable level (VOLUME knob). 8. Select channel (CHANNEL knob). 9. Turn noise limitations on or off as desired (ANL/NB|TALKBACK key, see page 13). 10. Adjust CB Squelch (outer ring of VOL/SQ knob). • Turn SQUELCH fully clockwise to receive strong signals. • Turn SQUELCH fully counterclockwise until you hear a hiss. All get through - noise, weak signals, and strong signals. • Turn SQUELCH back clockwise until the hiss stops. Only clearer signals get through. Set SQUELCH only when the radio is not receiving a strong signal. 11. Adjust Scanner Squelch (see page 23). 12. Turn RF Gain knob clockwise to adjust RF Gain upwards and counter-clockwise to adjust RF Gain downwards. (CB mode only) 13. Adjust MIC Gain (see page 20). 14. Set LCD color (see page 23). 15. Set LCD contrast (see page 24). 16. Set LCD brightness (see page 24). BASIC OPERATIONS EMERGENCY OPERATION 1. Press 9/19|DAY/NIGHT or turn Channel Selector knob to Channel 9. E-15
-
 1
1 -
2
-
3
-
4
-
5
-
6
-
7
-
8
-
9
-
 10
10 -
 11
11 -
 12
12 -
 13
13 -
 14
14 -
 15
15 -
 16
16 -
 17
17 -
 18
18 -
 19
19 -
 20
20 -
21
-
22
-
23
-
24
-
25
-
26
-
27
-
28
-
29
-
30
-
31
-
32
-
33
-
34
-
35
-
36
-
37
-
38
-
39
-
40
 |
 |