Uniden DXI8560-2 English Owners Manual - Page 9

Mounting the Base on a Wall, Troubleshooting and Maintenance - phone

Page 9 highlights

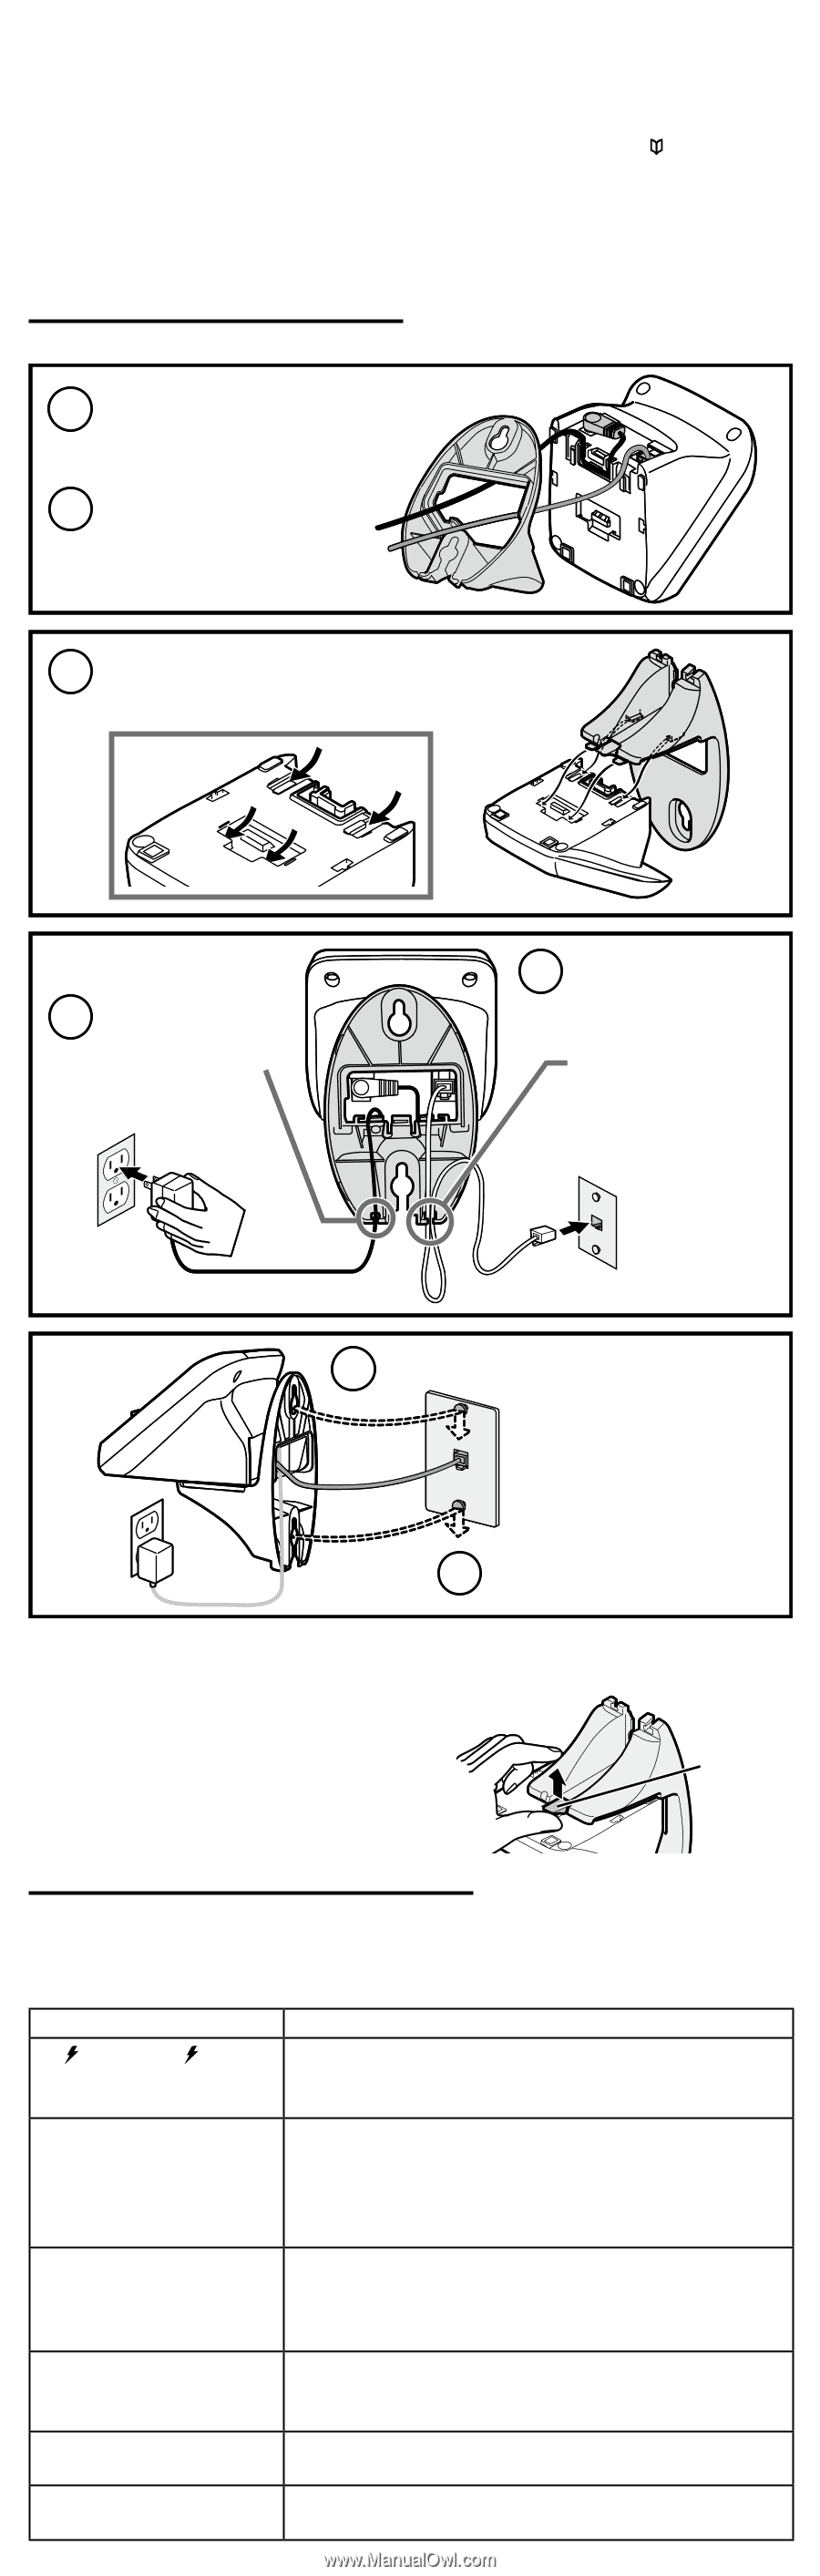
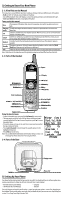
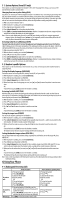
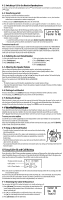
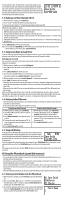
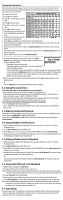
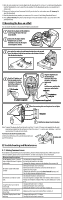
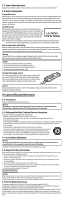
1) Enter the code number (up to twenty digits) into the phonebook (See section 6-1 on Entering a New Number into the Phonebook). Be sure to enter the code number into the phonebook exactly as you would enter it during a call. 2) During a call, when you hear the prompt that tells you to enter the code number, press [ /memory] to open the phonebook. 3) Find the phonebook entry number you want to use (See section 6-2 on Finding Phonebook Entries). 4) Press [select/channel]. The phone sends the digits of the code number exactly as you saved them in the phonebook entry. 7) Mounting the Base on a Wall You can mount the phone on any standard telephone jack wall plate. 1 Route the AC adapter and the telephone cords through the hole of the wall mount bracket. 2 Connect the AC adapter and the telephone cords as shown. Remember to route the AC adapter cord through the channel. 3 Line up the four tabs on the wall mount bracket (two at the top and two at the bottom) with the four notches on the bottom of the base. Slide the bracket into place. 4 Hook the AC adapter cord into the smaller notch at the bottom of the bracket, and let the cord hang below the bracket. To AC outlet AC adapter (supplied) 5 Plug the telephone cord into the wall jack. Hook both sides of the telephone cord into the larger notch OR tuck the excess cord into the open space in the bracket. Wall plate To telephone wall jack Telephone cord (supplied) 6 Place the mounting slots over the pins on the wall plate. Wall plate 7 Slide the base down to lock it into place. Note: To mount the phone directly on the wall, insert two 1 3/8 inch, #10 screws (not supplied) into the wall using anchors suitable for the wall material. Place the screws 3 15/16 inches apart, and allow 1/8 inch free space between the wall and screw heads. To remove the wall-mount bracket At the bottom of the base, lift up on the release latch and push the bracket up. Release latch 8) Troubleshooting and Maintenance 8-1. Solving Common Issues If your phone is not performing to your expectations, please try these simple steps first. If these steps do not solve your problem, please call our Customer Hotline. See back cover page for contact information. When you have this problem... Try... The /in use LED or LED won't • Checking the AC adapter connection. turn on when the handset is placed • Re-seating the handset in the cradle. in the cradle. • Cleaning the charging contacts on the handsets (See section 8-8). The audio sounds weak and/or scratchy. No handsets can make or receive calls. A single handset can't make or receive calls. • Moving the handset closer to the base. • Moving the handset and/or base away from metal objects or appliances and try again. • Changing the channel by pressing [select/channel] during a call. This can help eliminate background noise. • Checking the telephone cord connection. • Disconnecting the AC adapter. Wait a few minutes, then reconnect it. • Asking your telephone company if they use pulse dialing (See section 3-1). • Charging the battery for 15-20 hours. • Moving the handset closer to the base. • Changing the handset-to-base code (See section 8-3). A handset can make calls, but it doesn't ring. A handset's display doesn't show anything. • Making sure the ringer isn't turned off (see section 3-2). • Charging the battery for 15-20 hours. • Checking the battery pack connection.

  • 1
  • 2
  • 3
  • 4
  • 5
  • 6
  • 7
  • 8
  • 9
  • 10
  • 11
  • 12

Enter the code number (up to twenty digits) into the phonebook (See section 6-1 on Entering a New Number
into the Phonebook). Be sure to enter the code number into the phonebook exactly as you would enter it
during a call.
During a call, when you hear the prompt that tells you to enter the code number, press
[
/memory]
to
open the phonebook.
Find the phonebook entry number you want to use (See section 6-2 on Finding Phonebook Entries).
Press
[select/channel]
. The phone sends the digits of the code number exactly as you saved them in the
phonebook entry.
1)
2)
3)
4)
7) Mounting the Base on a Wall
You can mount the phone on any standard telephone jack wall plate.
1
Route the AC adapter and the telephone
cords through the hole of the wall
mount bracket.
2
Connect the AC adapter and the
telephone cords as shown.
Remember to route the AC adapter
cord through the channel.
3
Line up the four tabs on the wall mount bracket (two at the top and
two at the bottom) with the four notches on the bottom of the base.
Slide the bracket into place.
6
Place the mounting slots over the pins on the wall plate.
7
Slide the base down to lock it into place.
4
Hook the AC adapter cord
into the smaller notch at
the bottom of the bracket,
and let the cord hang
below the bracket.
5
Plug the telephone cord
into the wall jack.
Hook both sides of the
telephone cord into the
larger notch
OR
tuck the excess cord into the
open space in the bracket.
Wall plate
Wall plate
To AC outlet
AC adapter (supplied)
To telephone
wall jack
Telephone cord (supplied)
Note: To mount the phone directly on the wall, insert two 1
3
/
8
inch, #10 screws (not supplied) into the wall
using anchors suitable for the wall material. Place the screws 3
15
/
16
inches apart, and allow
1
/
8
inch free
space between the wall and screw heads.
To remove the wall-mount bracket
At the bottom of the base, lift up on the release latch and
push the bracket up.
Release latch
Release latch
8) Troubleshooting and Maintenance
8-1. Solving Common Issues
If your phone is not performing to your expectations, please try these simple steps first. If these steps do not
solve your problem, please call our Customer Hotline. See back cover page for contact information.
When you have this problem…
Try…
The
/in use
LED or
LED won't
turn on when the handset is placed
in the cradle.
Checking the AC adapter connection.
Re-seating the handset in the cradle.
Cleaning the charging contacts on the handsets (See section 8-8).
The audio sounds weak and/or
scratchy.
Moving the handset closer to the base.
Moving the handset and/or base away from metal objects or
appliances and try again.
Changing the channel by pressing
[select/channel]
during a call.
This can help eliminate background noise.
No handsets can make or receive
calls.
Checking the telephone cord connection.
Disconnecting the AC adapter. Wait a few minutes, then reconnect it.
Asking your telephone company if they use pulse dialing (See section
3-1).
A single handset can’t make or
receive calls.
Charging the battery for 15-20 hours.
Moving the handset closer to the base.
Changing the handset-to-base code (See section 8-3).
A handset can make calls, but it
doesn’t ring.
Making sure the ringer isn’t turned off (see section 3-2).
A handset’s display doesn’t show
anything.
Charging the battery for 15-20 hours.
Checking the battery pack connection.