Uniden EXA7250 English Owners Manual - Page 10
E. Choose the Dialing Mode
 |
View all Uniden EXA7250 manuals
Add to My Manuals
Save this manual to your list of manuals |
Page 10 highlights
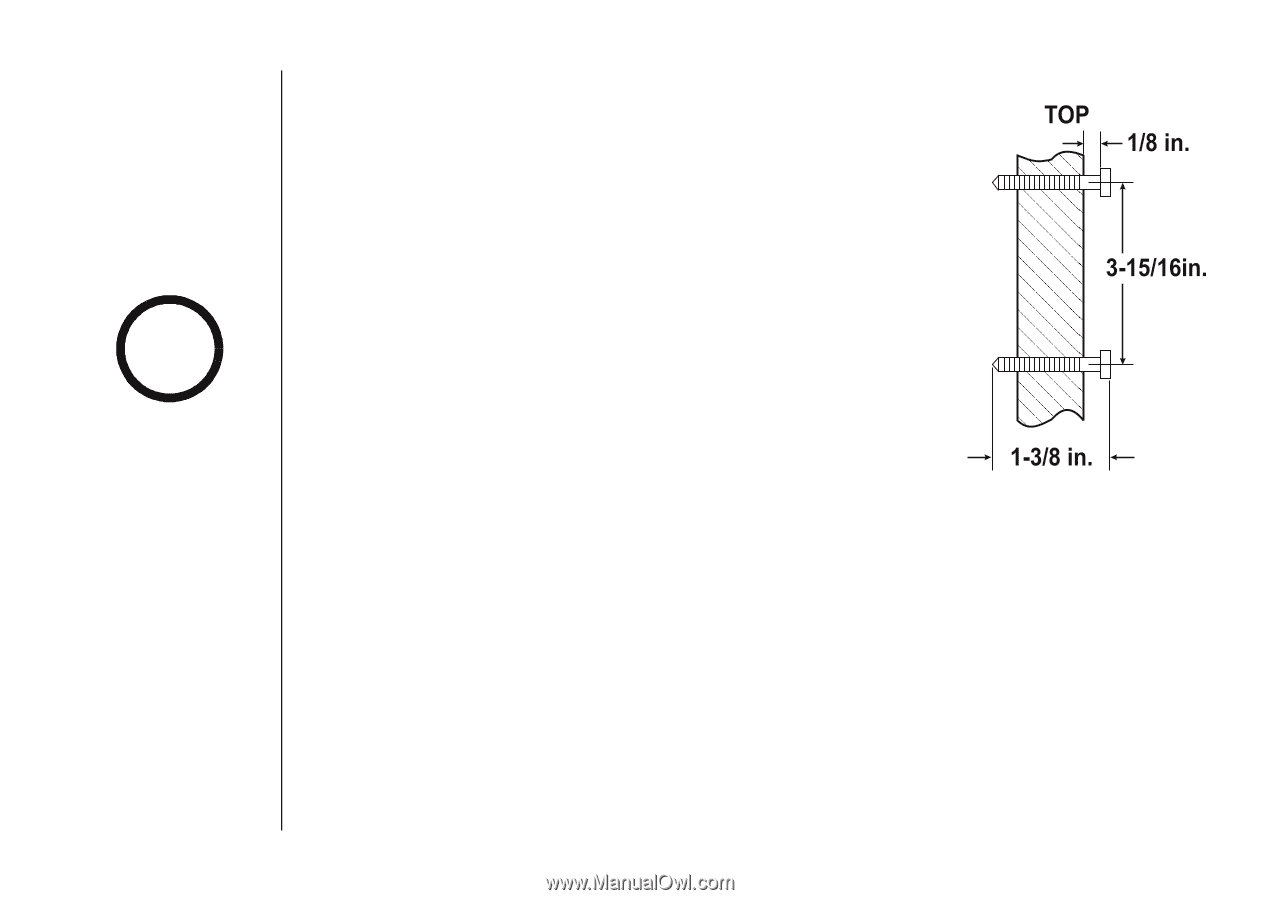
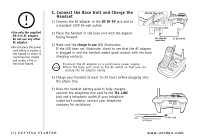
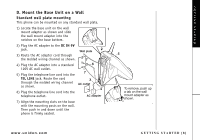
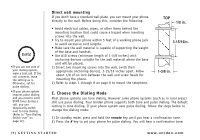
GETTING STARTED note •If you are not sure of your dialing system, make a trial call. If the call connects, leave the setting as is. Otherwise, set for pulse dialing. •If your phone system requires pulse dialing and you need to send DTMF tones during a call, you can temporarily switch over to tone dialing. (Refer to "Tone Dialing Switch-over" on page 12). Direct wall mounting If you don't have a standard wall plate, you can mount your phone directly to the wall. Before doing this, consider the following: • Avoid electrical cables, pipes, or other items behind the mounting location that could cause a hazard when inserting screws into the wall. • Try to mount your phone within 5 feet of a working phone jack to avoid excessive cord lengths. • Make sure the wall material is capable of supporting the weight of the base and handset. • Use #10 screws (minimum length of 1-3/8 inches) with anchoring devices suitable for the wall material where the base unit will be placed. 1) Insert two mounting screws into the wall, (with their appropriate anchoring device), 3-15/16 inches apart. Allow about 1/8 of an inch between the wall and screw heads for mounting the phone. 2) Refer to steps 1 through 8 on page 8 to mount the telephone. E. Choose the Dialing Mode Most phone systems use tone dialing. However some phone systems (such as in rural areas) still use pulse dialing. Your Uniden phone supports both tone and pulse dialing. The default setting is tone dialing. If your phone system uses pulse dialing, follow the steps below to change the dialing mode: 1) In standby mode, press and hold the remote key until you hear a confirmation tone. 2) Press the # key to set your phone for pulse dialing. You will hear a confirmation tone. [9] GETTING STARTED www.uniden.com
-
 1
1 -
2
-
3
-
4
-
 5
5 -
 6
6 -
 7
7 -
 8
8 -
 9
9 -
 10
10 -
 11
11 -
 12
12 -
 13
13 -
 14
14 -
 15
15 -
16
-
17
-
18
-
19
-
20
-
21
-
22
-
23
-
24
-
25
-
26
-
27
-
28
-
29
-
30
-
31
-
32
-
33
-
34
-
35
-
36
-
37
-
38
-
39
-
40
-
41
-
42
-
43
-
44
-
45
-
46
-
47
-
48
-
49
-
50
-
51
-
52
-
53
-
54
-
55
-
56
 |
 |