Uniden WDVR4-2 English Owner's Manual - Page 9
Installing Your System - hdd manual
 |
View all Uniden WDVR4-2 manuals
Add to My Manuals
Save this manual to your list of manuals |
Page 9 highlights
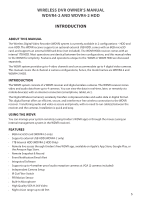
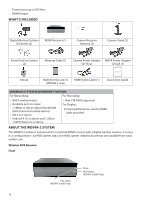
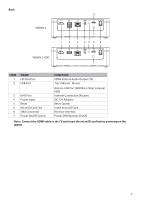
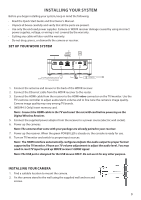
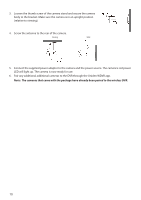
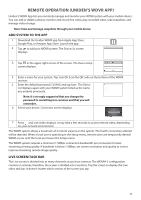
INSTALLING YOUR SYSTEM Before you begin installing your system, keep in mind the following: •• Read the Quick Start Guide and this Owner's Manual. •• Unpack all boxes carefully and verify that all the parts are present. •• Use only the enclosed power supplies. Camera or WDVR receiver damage caused by using incorrect power supplies, voltage, or wiring is not covered by the warranty. •• Cutting any cable will also void the warranty. •• Do not drop, pierce, or dismantle the camera or receiver. SET UP YOUR WDVR SYSTEM Router SD (not included) 12V 2A RESET ON OFF This image is the WDVR4-2 HDD. The WDVR4-2 has 2 USB ports. Plug the mouse into the top USB port. Power Antenna 1. Connect the antenna and mouse to the back of the WDVR receiver. 2. Connect the Ethernet cable from the WDVR receiver to the router. 3. Connect the HDMI cable from the receiver to the HDMI video connector on the TV/monitor. Use the TV's remote controller to adjust audio/alarm volume and to fine tune the camera's image quality. Camera image quality may vary among TV brands. 4. (WDVR4-2 Only) Insert memory card. Note: Connect the HDMI cable to the TV and insert the microSD card before powering on the Digital Wireless Receiver. 5. Connect the supplied power adaptor from the receiver to a power source (electric wall socket). 6. Power up the cameras. Note: The cameras that come with your package are already paired to your receiver. 7. Power up the receiver. When the green POWER LED is steady on, the console is ready for use. 8. Turn on TV/monitor and switch to proper input sources. Note: The HDMI interface automatically configures/adjusts the audio output to proper format supported by TV/monitor. Please use TV volume adjustment to adjust the audio level. You may need to reset TV input to pick up WDVR receiver's HDMI signal. Note: The USB port is designed for the USB mouse ONLY. Do not use it for any other purpose. INSTALLING YOUR CAMERA 1. Find a suitable location to mount the camera. 2. Fix the camera stand to the wall using the supplied wall anchors and screws. 9
-
 1
1 -
2
-
3
-
 4
4 -
 5
5 -
 6
6 -
 7
7 -
 8
8 -
 9
9 -
 10
10 -
 11
11 -
 12
12 -
 13
13 -
 14
14 -
15
-
16
-
17
-
18
-
19
-
20
-
21
-
22
-
23
-
24
-
25
-
26
-
27
-
28
-
29
-
30
-
31
-
32
 |
 |