Vantec NST-375LX-BK User Guide
Vantec NST-375LX-BK - NexStar LX Manual
 |
View all Vantec NST-375LX-BK manuals
Add to My Manuals
Save this manual to your list of manuals |
Vantec NST-375LX-BK manual content summary:
- Vantec NST-375LX-BK | User Guide - Page 1
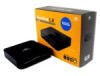
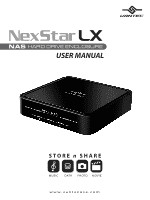
NAS HARD DRIVE ENCLOSURE USER MANUAL STORE n SHARE MUSIC DATA PHOTO MOVIE www.vantecusa.com - Vantec NST-375LX-BK | User Guide - Page 2
LX External 3.5" HDD NAS Enclosure: • User Manual • NexStar LX External 3.5" HDD NAS Enclosure • Power Adapter (Input: 100-240VAC; Output: 5V/1.5A, 12V/1.5A) • Power Cable • USB Cable • Ethernet Patch Cable • Screws • Driver CD ( - Vantec NST-375LX-BK | User Guide - Page 3
3.5" HDD Enclosure 5.1. Hardware Installation ...pg. 6 5.2. Driver Installation ...pg. 8 6. Disconnecting the NexStar LX NexStar LX External 3.5" HDD Enclosure pg. 19 7. Creating A New Partition ...pg. 20 8. Troubleshooting/FAQ NexStar LX External 3.5" HDD Enclosure pg. 23 9. Warranty ...pg. 25 10 - Vantec NST-375LX-BK | User Guide - Page 4
1. Introduction: Capacity meets flexibility with the NexStar LX from Vantec. Transforming any standard IDE hard drive into a NAS (Network Attached Storage) device, your files become easy to store and even easier to share. Now you - Vantec NST-375LX-BK | User Guide - Page 5
2. Specifications/Features: NexStar LX External 3.5" HDD Enclosure: Specifications: • Interface: IDE to USB 2.0 or RJ-45 Ethernet • Dimension: 206mm x 123mm x 33mm Features: • Active/Passive system cools down your hard - Vantec NST-375LX-BK | User Guide - Page 6
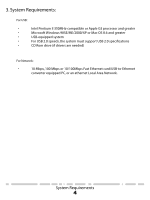
G3 processor and greater • Microsoft Windows 98SE/ME/2000/XP or Mac OS 8.6 and greater • USB-equipped system • For USB 2.0 speeds, the system must support USB 2.0 specifications • CD Rom drive (if drivers are needed) For Network: • 10 Mbps, 100 Mbps or 10/100Mbps Fast Ethernet card/USB-to - Vantec NST-375LX-BK | User Guide - Page 7
Settings There are 3 modes available for you to select the desired cooling. Automatic (A) / Manual Low (M/L) / Manual High (M/H). We recommend you leave your unit on the Auto setting. When this mode is selected, the NexStar LX automatically adjusts the fan speed up and down as necessary to keep the - Vantec NST-375LX-BK | User Guide - Page 8
refer to the documentation included with your hard drive for information on how to accomplish this. Preparing the NexStar LX: 1) Remove the lid of the NexStar LX Installing the hard drive into the NexStar LX: 1) Connect the IDE and power cables to the drive. Make sure drive is jumpered to master or - Vantec NST-375LX-BK | User Guide - Page 9
2) Screw the hard drive into place. 3) Fold the cables so that they are flat against the drive. Position the thermal probe in front of the hard drive. When finished, attach lid. Installation 7 - Vantec NST-375LX-BK | User Guide - Page 10
LX and plug the cable into an available outlet. 3) Connect the NexStar LX to the network using a straight through patch cable. 4) Turn on the NexStar LX via the power switch. 5.2. Logging in to the NexStar LX: 1) Windows ME/XP/2000 Open your browser and type STORAGE or if connected directly to - Vantec NST-375LX-BK | User Guide - Page 11
settings such as hostname, workgroup login password, time, and encoding (language). Network Information IP Address - The current IP address assigned to the NexStar LX DHCP Server - Enable or disable the enclosure's DHCP server. If you have another DHCP server on your network, for example a router - Vantec NST-375LX-BK | User Guide - Page 12
: Automatic IP If your network has a DHCP server such as a router, you can select Automatic IP and the NexStar LX will obtain its IP settings automatically. Static IP If your network does not have a DHCP server or you wish to specify IP settings manually, enter the information here. Installation 10 - Vantec NST-375LX-BK | User Guide - Page 13
5.2. Maintenance: Firmware Upload To update the firmware on the NexStar LX, browse for the firmware file on your computer and click Upload. System Reboot Click the Reboot button to have the device perform a software restart. - Vantec NST-375LX-BK | User Guide - Page 14
5.2. SMB Server: Folder List The directories on your hard drive are displayed here. You can create, rename, and delete folders. Folders only on this side are not visible on the network. Sharing List The shared directories of your hard drive are displayed here. These directories are visible on the - Vantec NST-375LX-BK | User Guide - Page 15
Apply to save changes NOTE: If you are behind a firewall or router, you may need to configure the firewall to forward this port to the NexStar LX. Allow anonymous Anonymous users are those without FTP accounts and do not need usernames or passwords to log in. Select Enable or Disable to - Vantec NST-375LX-BK | User Guide - Page 16
5.2. FTP Server (continued): Account List Add - Create a new FTP account. Modify - Change an existing FTP account. An account must first be selected from the list En/Disable - Enable or Disable an FTP account Delete - Delete an FTP account. When you add or modify an FTP account, you will be - Vantec NST-375LX-BK | User Guide - Page 17
hard drive. Make sure to backup you files BEFORE you click on Format! Sleep Time Specify the number of minutes of idle time before the NexStar LX goes into standby mode. Scan Disk Scans the disk for errors. Depending on the size of the disk, this may take several minutes. Installation - Vantec NST-375LX-BK | User Guide - Page 18
protected, you will be prompted for a password before access is given. File Access on a Mac Click on "Go"and choose "Network". Browse for the NexStar LX "STORAGE-xxxx", which by default can be found in the WORKGROUP folder. Alternatively, select "Go"and choose "Connect to Server".Type smb://STORAGE - Vantec NST-375LX-BK | User Guide - Page 19
9.0 or later. If the hard drive does not appear on the desktop, be sure to partition your hard drive. Mac OS 8.6: 1) Unplug the NexStar LX if you currently have it connected. 2) USB Mass Storage Support 1.3.5 must be installed on your system. If it is not, you can download the USB Mass Storage - Vantec NST-375LX-BK | User Guide - Page 20
LX, or computer. Windows 98SE/ME/XP/2000: 1) Make sure all operations using the hard drive within the NexStar LX has ceased. 2) Close any windows and programs pertaining to the NexStar LX. 3) If connected by USB, double click the green "Unplug or Eject Hardware" icon in the system tray and select - Vantec NST-375LX-BK | User Guide - Page 21
use the FDISK utility that is included under MS-DOS. Please refer to Microsoft Knowledge Base Article - 255867 for complete instructions on how to use FDISK. (http://support.microsoft.com/support/kb/articles/Q255/8/67.ASP) 2) Once complete, you should now be able to see the drive in Windows Explorer - Vantec NST-375LX-BK | User Guide - Page 22
Mac OS X 10.x.x: Initializing a Hard Drive: If you are using a new hard drive, you may need to initialize it first. You can initialize your internal hard drive using a program called Drive Setup, which is on the Mac OS CD that came with your computer. 1. Start up your computer from the Mac OS CD. 2. - Vantec NST-375LX-BK | User Guide - Page 23
the hard drive will not mount on your system, format the drive with a FAT32 or NTFS partition first through a PC system. Once formatted, connect the NexStar Enclosure to your Mac and run the Disk Utility tool again. You should now be able to format the drive into a Mac partition and mount - Vantec NST-375LX-BK | User Guide - Page 24
computer sometimes recognizes the NexStar LX, but sometimes gives me errors. A. If your computer is giving you problems with the NexStar 3, be sure to Microsoft's Windows 98 Support Center and download the large capacity drive patch. Else, verify that your motherboard supports large capacity drives. - Vantec NST-375LX-BK | User Guide - Page 25
device with Windows XP/2000 and Windows 98SE, you need to format the drive as FAT32. Q. Why can't I copy files larger than 4GB onto my NexStar LX? A.You have probably formatted the hard drive in the FAT32 file system. FAT32 limits the file sizes to 4GB maximum. The NTFS file system - Vantec NST-375LX-BK | User Guide - Page 26
9. Warranty: The NexStar LX comes with a 1 year limited warranty (90 day parts). If contact the retailer from which you purchased the unit immediately and ask for a replacement. 10. Contact: Vantec Thermal Technologies 43951 Boscell Rd. Fremont, CA 94538 tel: 510-668-0368 fax: 510-668-0367 website
-
 1
1 -
 2
2 -
 3
3 -
 4
4 -
 5
5 -
 6
6 -
 7
7 -
8
-
9
-
10
-
11
-
12
-
13
-
14
-
15
-
16
-
17
-
18
-
19
-
20
-
21
-
22
-
23
-
24
-
25
-
26
 |
 |

HARD DRIVE ENCLOSURE
NAS
MUSIC
DATA
PHOTO
MOVIE
STORE
n
SHARE
USER MANUAL
www.vantecusa.com