ViewSonic M1 User Guide - Page 27
M1+ FW Upgrade, Copy FW MstarUpgrade.bin and M1+.bin to FAT32 USB from ViewSonic website
 |
View all ViewSonic M1 manuals
Add to My Manuals
Save this manual to your list of manuals |
Page 27 highlights
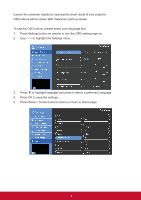
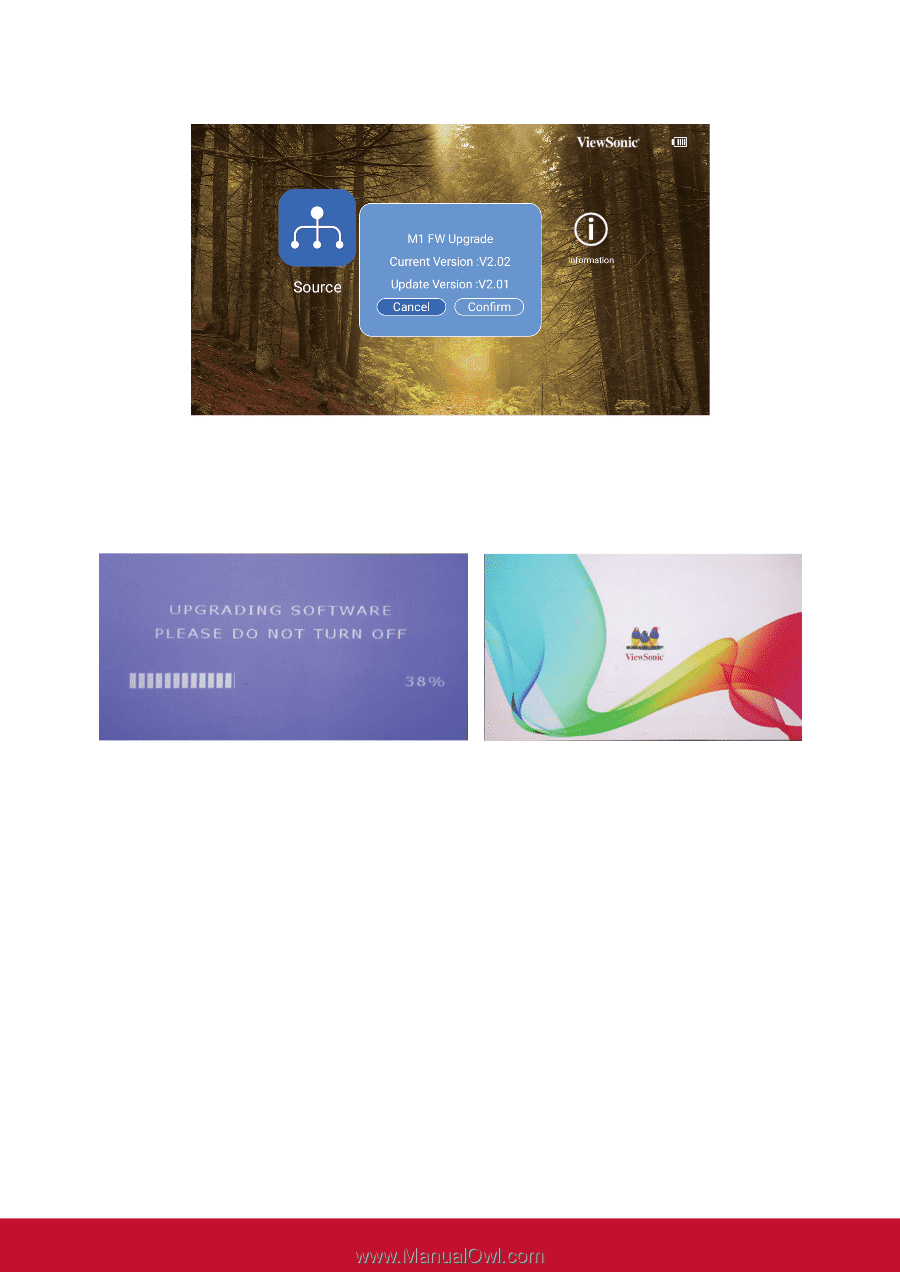
M1+ FW Upgrade 1. Copy FW "MstarUpgrade.bin and M1+.bin)" to FAT32 USB from ViewSonic website 2. Power on the projector 3. Plug in USB with new FW (USB Format: FAT32) 4. Auto detect and pop up FW upgrade confirmation message 5. Click "Confirm" 6. Page with the loading bar will be appeared 7. After reached 100%, will return to ViewSonic start up screen for loading again 8. The whole upgrading process will take around 5~10 mins 9. After finishing the process, will return to the Home page 20
-
 1
1 -
2
-
3
-
4
-
5
-
6
-
7
-
8
-
9
-
10
-
11
-
12
-
13
-
14
-
15
-
16
-
17
-
18
-
19
-
20
-
21
-
 22
22 -
 23
23 -
 24
24 -
 25
25 -
 26
26 -
 27
27 -
 28
28 -
 29
29 -
 30
30 -
 31
31 -
 32
32 -
33
-
34
-
35
-
36
-
37
-
38
-
39
-
40
-
41
-
42
-
43
-
44
-
45
-
46
-
47
-
48
-
49
-
50
-
51
-
52
 |
 |
20
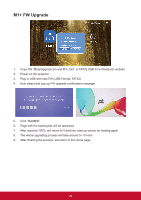
M1+ FW Upgrade
1.
Copy FW “MstarUpgrade.bin and M1+.bin)” to FAT32 USB from ViewSonic website
2.
Power on the projector
3.
Plug in USB with new FW (USB Format: FAT32)
4.
Auto detect and pop up FW upgrade confirmation message
5.
Click “
Confirm
”
6.
Page with the loading bar will be appeared
7.
After reached 100%, will return to ViewSonic start up screen for loading again
8.
The whole upgrading process will take around 5~10 mins
9.
After finishing the process, will return to the Home page