ViewSonic P225f User Manual - Page 8
Adjusting the Screen Image
 |
UPC - 766907672848
View all ViewSonic P225f manuals
Add to My Manuals
Save this manual to your list of manuals |
Page 8 highlights
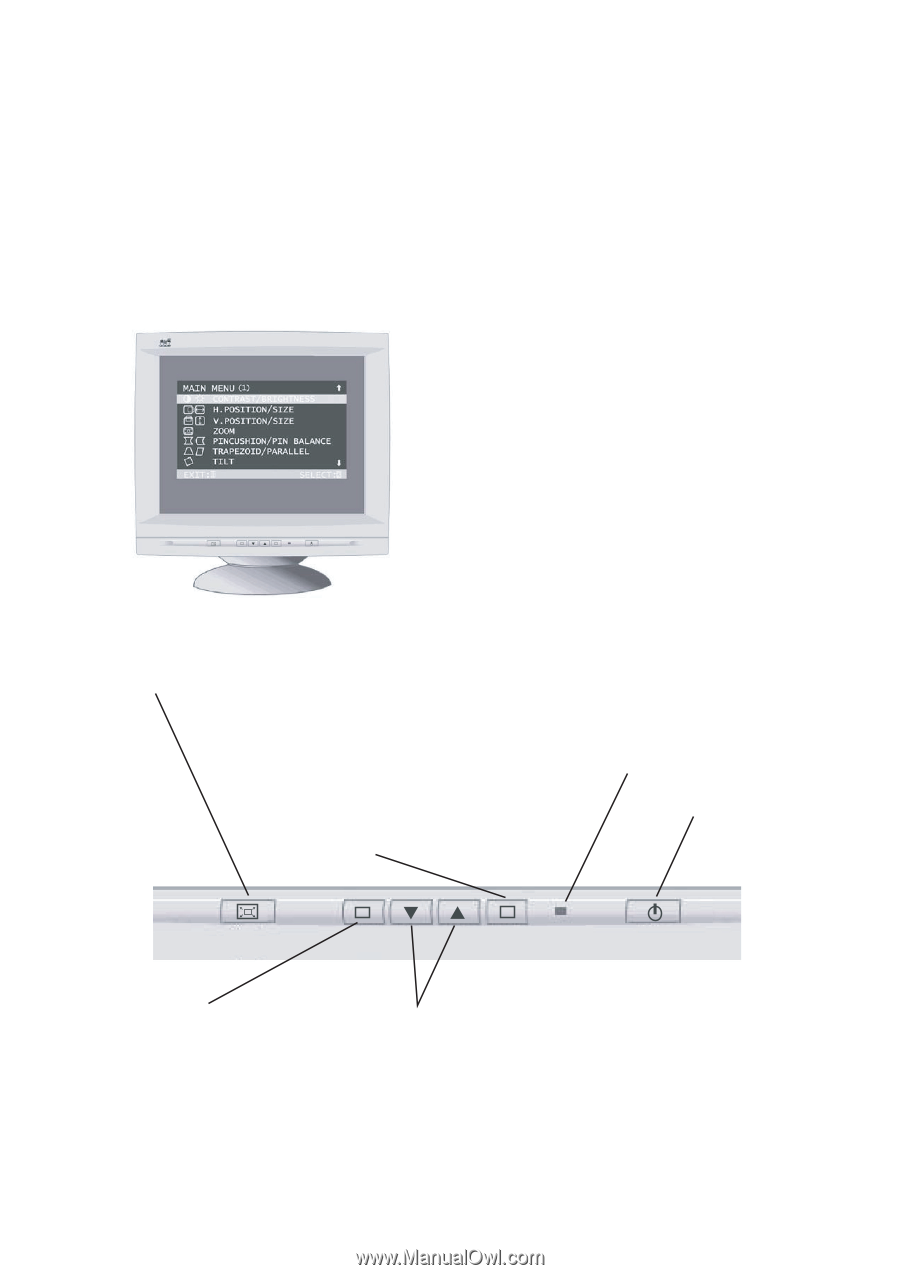
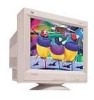
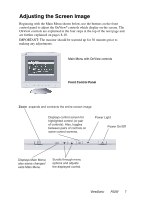
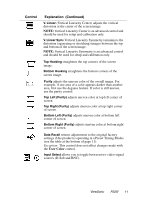
Adjusting the Screen Image Beginning with the Main Menu shown below, use the buttons on the front control panel to adjust the OnView® controls which display on the screen. The OnView controls are explained in the four steps at the top of the next page and are further explained on pages 8-10. IMPORTANT: The monitor should be warmed up for 30 minutes prior to making any adjustments. Main Menu with OnView controls 1 2 Front Control Panel Zoom expands and contracts the entire screen image Displays control screen for highlighted control (or pair of controls). Also, toggles between pairs of controls on some control screens. Power Light Power On/Off 1 2 Displays Main Menu; also saves changes/ exits Main Menu. Scrolls through menu options and adjusts the displayed control. ViewSonic P225f 7
-
 1
1 -
2
-
 3
3 -
 4
4 -
 5
5 -
 6
6 -
 7
7 -
 8
8 -
 9
9 -
 10
10 -
 11
11 -
 12
12 -
 13
13 -
14
-
15
-
16
-
17
-
18
-
19
-
20
 |
 |