ViewSonic PJD7326 PJD7526W User Guide English - Page 31
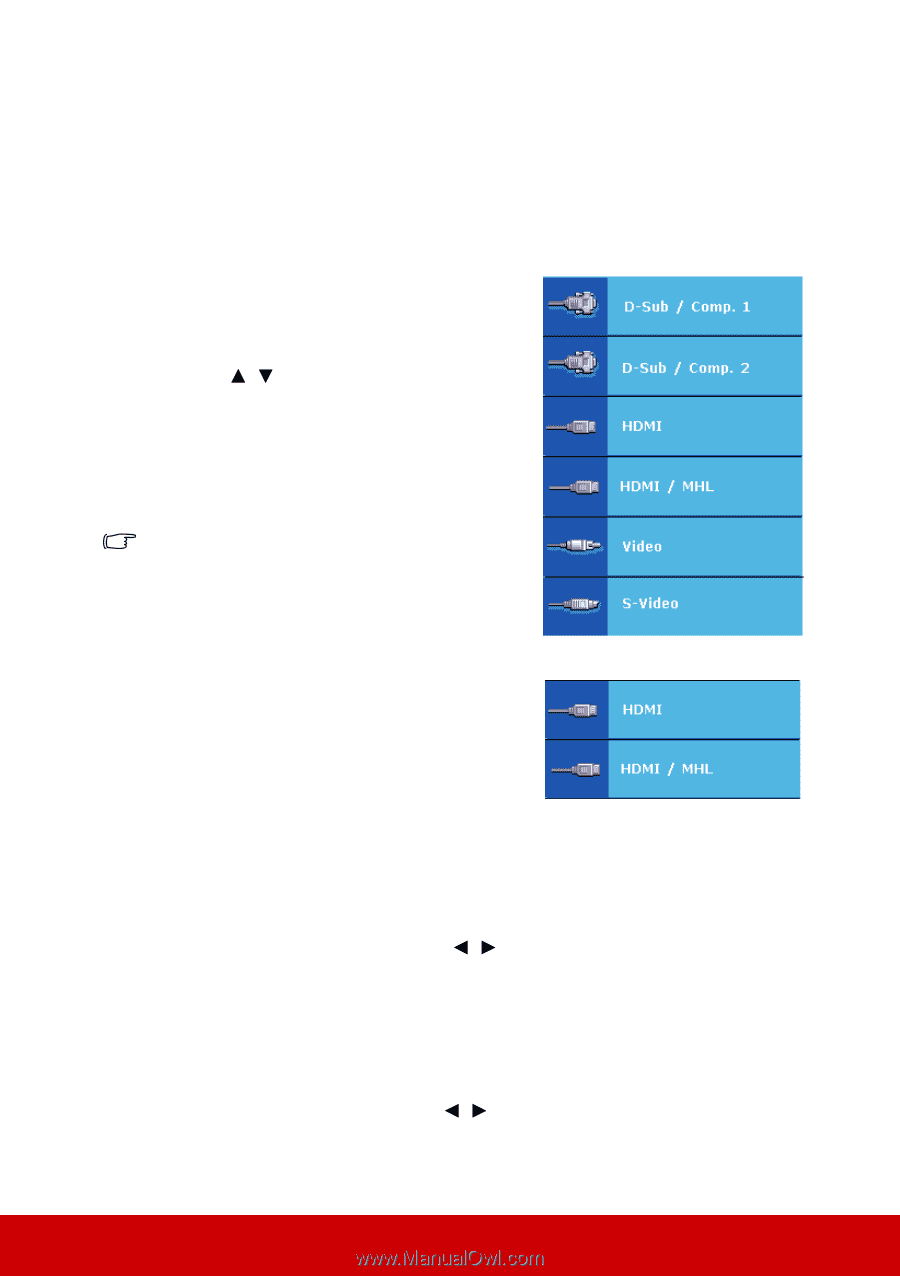
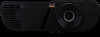
Switching input signal
 |
View all ViewSonic PJD7326 manuals
Add to My Manuals
Save this manual to your list of manuals |
Page 31 highlights
Switching input signal The projector can be connected to multiple devices at the same time. However, it can only display one full screen at a time. Be sure the Quick Auto Search function in the SOURCE menu is On if you want the projector to automatically search for the signals. You can also manually select the desired signal by pressing one of the source selection keys on the remote control, or cycle through the available input signals. PJD6252L/PJD6551W/ PJD7326/PJD7526W 1. Press Source. A source selection bar is displayed. 2. Press / until your desired signal is selected and press Enter. Once detected, the selected source information will be displayed on the screen for seconds. If there are multiple devices connected to the projector, repeat steps 1-2 to search for another signal. Please see "Projector specifications" on page 65 for the native display resolution of this projector. For best display picture results, you should select and use an input signal which outputs at this resolution. Any other resolutions will be scaled by the projector depending upon the 'aspect ratio' setting, which may cause some image distortion or loss of picture clarity. See "Selecting the aspect ratio" on page 30 for details. PJD7720HD Changing HDMI input settings In the unlikely event that you connect the projector to a device (like a DVD or Blu-ray player) via the projector's HDMI input and the projected picture displays wrong colors, please change the color space to an appropriate one that fits the color space setting of the output device. To do this: 1. Open the OSD menu and go to the PICTURE > HDMI Settings menu. 2. Press Enter. 3. Highlight HDMI Format and press / to select a suitable color space according to the color space setting of the output device connected. • RGB: Sets the color space as RGB. • YUV: Sets the color space as YUV. • Auto: Sets the projector to detect the color space setting of the input signal automatically. 4. Highlight HDMI Range and press / to select a suitable HDMI color range according to the color range setting of the output device connected. • Enhanced: Sets the HDMI color range as 0 - 255. 26
-
 1
1 -
2
-
3
-
4
-
5
-
6
-
7
-
8
-
9
-
10
-
11
-
12
-
13
-
14
-
15
-
16
-
17
-
18
-
19
-
20
-
21
-
22
-
23
-
24
-
25
-
 26
26 -
 27
27 -
 28
28 -
 29
29 -
 30
30 -
 31
31 -
 32
32 -
 33
33 -
 34
34 -
 35
35 -
 36
36 -
37
-
38
-
39
-
40
-
41
-
42
-
43
-
44
-
45
-
46
-
47
-
48
-
49
-
50
-
51
-
52
-
53
-
54
-
55
-
56
-
57
-
58
-
59
-
60
-
61
-
62
-
63
-
64
-
65
-
66
-
67
-
68
-
69
-
70
-
71
-
72
-
73
-
74
-
75
-
76
-
77
-
78
-
79
-
80
-
81
-
82
-
83
-
84
-
85
-
86
-
87
-
88
-
89
-
90
-
91
-
92
-
93
-
94
-
95
 |
 |