ViewSonic PLED-W600 PLED-W600, PLED-W800 User Guide (English) - Page 12
Installation, Power On/Off, Adjust Projected Image Height
 |
View all ViewSonic PLED-W600 manuals
Add to My Manuals
Save this manual to your list of manuals |
Page 12 highlights
Installation Power On/Off 1. Connect the power cord to the DC input jack of the projector. 2. Inset the plug at the end of the power cord into a power outlet. The status LED lights red in standby mode. 3. Press the Power button ( ) to turn the projector on or off. The status LED turns green when the projector is turned on. Adjust Projected Image Height The projector is equipped with an elevator foot for adjusting the projected image height. To adjust the height: Turn the elevator foot to adjust the projected image position to the desired height. If Auto Keystone is enabled and there are no changes within 2-3 seconds, the projector will automatically adjust the image display via the Auto Keystone function. 10
-
 1
1 -
2
-
3
-
4
-
5
-
6
-
 7
7 -
 8
8 -
 9
9 -
 10
10 -
 11
11 -
 12
12 -
 13
13 -
 14
14 -
 15
15 -
 16
16 -
 17
17 -
18
-
19
-
20
-
21
-
22
-
23
-
24
-
25
-
26
-
27
-
28
-
29
-
30
-
31
-
32
-
33
-
34
-
35
-
36
-
37
-
38
-
39
-
40
-
41
-
42
-
43
-
44
-
45
-
46
-
47
-
48
-
49
 |
 |
10
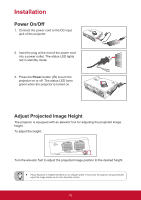
Installation
Power On/Off
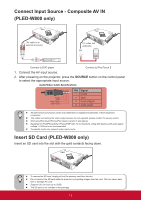
1. Connect the power cord to the DC input
jack of the projector.
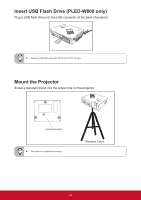
2. Inset the plug at the end of the power cord
into a power outlet. The status LED lights
red in standby mode.
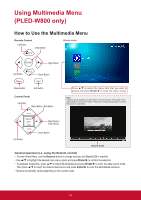
3. Press the
Power
button (
) to turn the
projector on or off. The status LED turns
green when the projector is turned on.
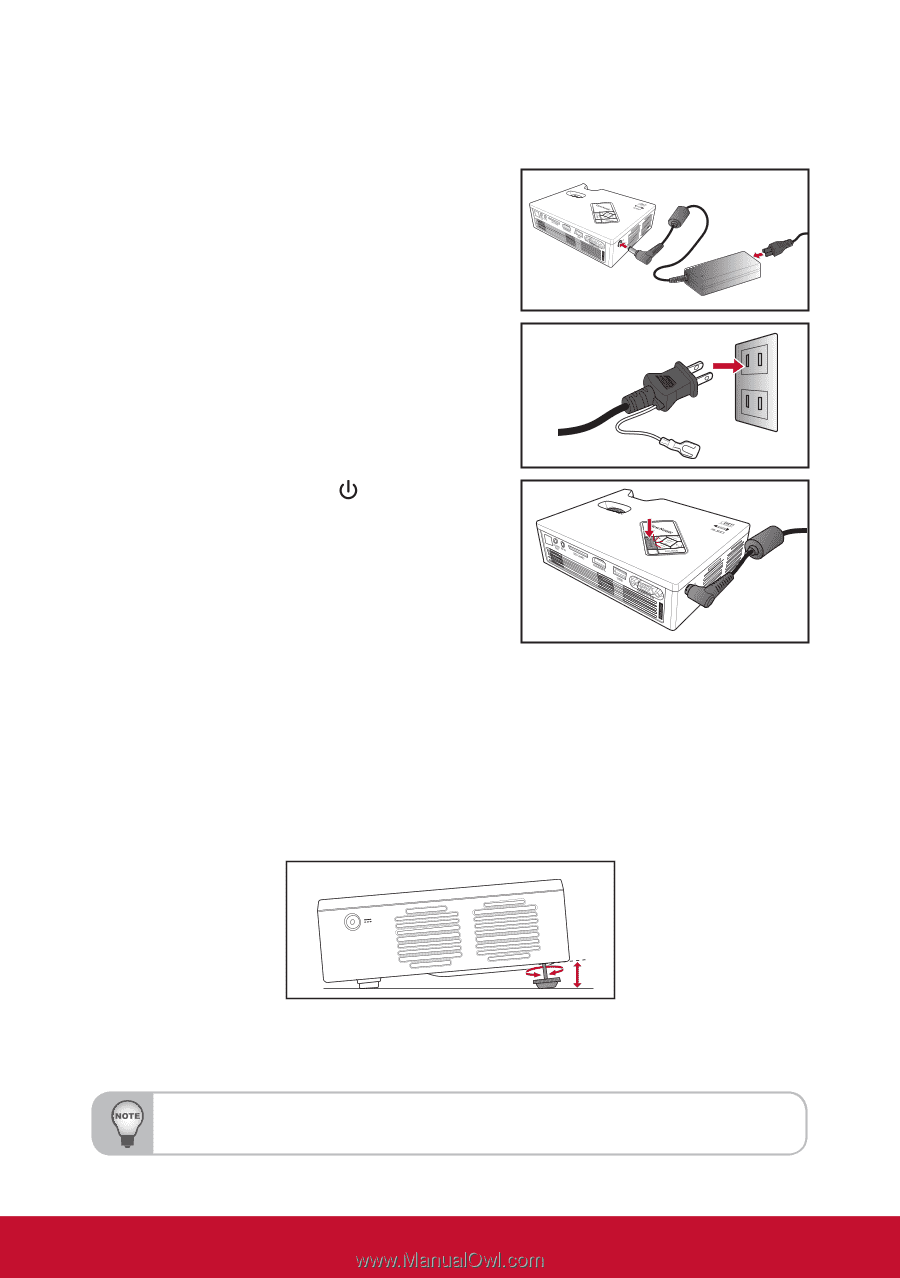
Adjust Projected Image Height
The projector is equipped with an elevator foot for adjusting the projected image
height.
To adjust the height:
Turn the elevator foot to adjust the projected image position to the desired height.
If Auto Keystone is enabled and there are no changes within 2-3 seconds, the projector will automatically
adjust the image display via the Auto Keystone function.