ViewSonic SC-T35 SC-T35 / SC-T45 ViewSonic Device Management (English) - Page 14
Initial Setup
 |
View all ViewSonic SC-T35 manuals
Add to My Manuals
Save this manual to your list of manuals |
Page 14 highlights
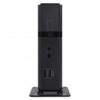
Installing and Upgrading ViewSonic Device Manager Initial Setup 2.3 Initial Setup When launching ViewSonic Device Manager for the first time, you need to complete the initial setup. Follow the instructions below to complete the required configuration: 1. Click Start > All Programs > ViewSonic > ViewSonic Device Manager to open the console. NOTE • This step may vary if you choose not to use the default Start menu folder for placing console shortcuts during the installation of ViewSonic Device Manager. 2. A window appears prompting you to choose the service IP address and create an administrator account. Click the drop-down menu to select the desired IP address from the list of available IP addresses, type the desired account name and password, and then click Save to continue. NOTE • It's strongly recommended to use a fixed IP address as the service IP of ViewSonic Device Manager. The change of the service IP may make all the managed clients become unmanageable. 3. The Login screen appears prompting you to sign in to ViewSonic Device Manager with your credentials (account name and password). 9
-
 1
1 -
2
-
3
-
4
-
5
-
6
-
7
-
8
-
 9
9 -
 10
10 -
 11
11 -
 12
12 -
 13
13 -
 14
14 -
 15
15 -
 16
16 -
 17
17 -
 18
18 -
 19
19 -
20
-
21
-
22
-
23
-
24
-
25
-
26
-
27
-
28
-
29
-
30
-
31
-
32
-
33
-
34
-
35
-
36
-
37
-
38
-
39
-
40
-
41
-
42
-
43
-
44
-
45
-
46
-
47
-
48
-
49
-
50
-
51
-
52
-
53
-
54
-
55
-
56
-
57
-
58
-
59
-
60
-
61
-
62
-
63
-
64
-
65
-
66
-
67
-
68
-
69
-
70
-
71
-
72
-
73
-
74
-
75
-
76
-
77
-
78
-
79
-
80
-
81
-
82
-
83
-
84
-
85
-
86
-
87
-
88
-
89
-
90
-
91
-
92
-
93
-
94
-
95
-
96
-
97
-
98
-
99
-
100
-
101
-
102
-
103
-
104
-
105
-
106
-
107
-
108
-
109
-
110
-
111
-
112
-
113
-
114
-
115
-
116
-
117
 |
 |
