ViewSonic XG2402 XG2402 User Guide English - Page 45
Black Stabilization, Step 1, Step 2, Step 3, Step 4, AMD FreeSync
 |
View all ViewSonic XG2402 manuals
Add to My Manuals
Save this manual to your list of manuals |
Page 45 highlights
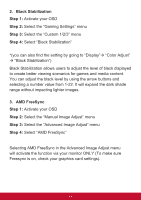
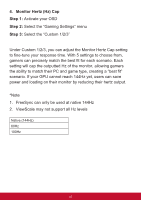
2. Black Stabilization Step 1: Activate your OSD Step 2: Select the "Gaming Settings" menu Step 3: Select the "Custom 1/2/3" menu Step 4: Select "Black Stabilization" *(you can also find the setting by going to "Display" "Color Adjust" "Black Stabilization") Black Stabilization allows users to adjust the level of black displayed to create better viewing scenarios for games and media content. You can adjust the black level by using the arrow buttons and selecting a number value from 1-22. It will expand the dark shade range without impacting lighter images. 3. AMD FreeSync Step 1: Activate your OSD Step 2: Select the "Manual Image Adjust" menu Step 3: Select the "Advanced Image Adjust" menu Step 4: Select "AMD FreeSync" Selecting AMD FreeSync in the Advanced Image Adjust menu will activate the function via your monitor ONLY (To make sure Freesync is on, check your graphics card settings). 41
-
 1
1 -
2
-
3
-
4
-
5
-
6
-
7
-
8
-
9
-
10
-
11
-
12
-
13
-
14
-
15
-
16
-
17
-
18
-
19
-
20
-
21
-
22
-
23
-
24
-
25
-
26
-
27
-
28
-
29
-
30
-
31
-
32
-
33
-
34
-
35
-
36
-
37
-
38
-
39
-
 40
40 -
 41
41 -
 42
42 -
 43
43 -
 44
44 -
 45
45 -
 46
46 -
 47
47 -
 48
48 -
 49
49 -
 50
50 -
51
-
52
-
53
-
54
-
55
-
56
-
57
-
58
-
59
-
60
-
61
-
62
-
63
-
64
-
65
-
66
-
67
-
68
-
69
-
70
-
71
-
72
-
73
-
74
-
75
 |
 |
