Viking DDSF136DSS Installation Instructions - Page 15
Level Refrigerator
 |
View all Viking DDSF136DSS manuals
Add to My Manuals
Save this manual to your list of manuals |
Page 15 highlights
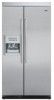
Installation Instructions Level Refrigerator IMPORTANT: All four leveling legs must contact the floor to support and stabilize the full weight of the refrigerator. Remove the Base Grille 1. Open the refrigerator doors to 90°. 2. Remove base grille. Grasp the grille with both hands. Lift up and tilt the top of the grille toward you. NOTE: Do not remove the Tech Sheets fastened behind the grille. Level the Refrigerator There is a set of two leveling bolts on each side of the refrigerator behind the base grille. The top bolts adjust the rear of the refrigerator, and the bottom bolts adjust the front of the refrigerator. A. Rear leveling bolt (top) A B. Front leveling bolt (bottom) B 1. Use a 1⁄2" (12.70 mm) socket wrench to adjust the leveling bolts. Turn the leveling bolts to the right to raise or to the left to lower the refrigerator. It may take several turns to adjust the tilt of the refrigerator. NOTE: Do not unscrew the leveling bolts too much when lowering the refrigerator. The bolt head will start to come away from the refrigerator when in the lowest position. 2. Adjust the front leveling bolts to bring the refrigerator top parallel with the cabinet above the refrigerator. • For standard cabinets, leave approximately 1⁄8" (3.18 mm) gap between the refrigerator's top hinges and the cabinets. • If you do not have a cabinet above the refrigerator, simply adjust the refrigerator to make it level. A A. Top hinges B B. Front of the refrigerator 13
-
 1
1 -
2
-
3
-
4
-
5
-
6
-
7
-
8
-
9
-
 10
10 -
 11
11 -
 12
12 -
 13
13 -
 14
14 -
 15
15 -
 16
16 -
 17
17 -
 18
18 -
 19
19 -
 20
20 -
21
-
22
-
23
-
24
-
25
-
26
-
27
-
28
-
29
-
30
-
31
-
32
-
33
-
34
-
35
-
36
-
37
-
38
-
39
-
40
-
41
-
42
-
43
-
44
-
45
-
46
-
47
-
48
 |
 |
