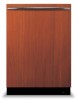
Viking FDW100 Installation Instructions
Viking FDW100 Manual
 |
View all Viking FDW100 manuals
Add to My Manuals
Save this manual to your list of manuals |
Viking FDW100 manual content summary:
- Viking FDW100 | Installation Instructions - Page 1
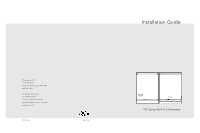
Installation Guide Viking Range, LLC 111 Front Street Greenwood, Mississippi 38930 USA (662) 455-1200 For product information, call 1-888-845-4641 or visit our web site in the US (www.vikingrange.com) or in Canada (www.brigade.ca). F21043 EN (041513) 100 Series Built-In Dishwasher - Viking FDW100 | Installation Instructions - Page 2
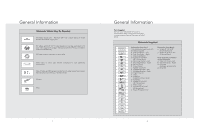
Adjusting Moveable Kickplate 20 Installing a Custom Panel 22 Installer Checklist 28 Final Instructions 28 Self-Help Hints 28 Service & Registration 29 1 IMPORTANT- Please Read and Follow • Please read this installation manual and particularly the safety instructions completely and carefully - Viking FDW100 | Installation Instructions - Page 3
missing or broken parts. • Also follow the safety instructions of the use and care guide. • To reduce the risk of electric shock, fire, or injury to persons, the installer must ensure that the dishwasher is completely enclosed at the time of installation. • Only connect the dishwasher to the power - Viking FDW100 | Installation Instructions - Page 4
IMPORTANT- Please Read and Follow • Inspect the Dishwasher: After unpacking the dishwasher and prior to installation, thoroughly inspect the dishwasher for possible freight or cosmetic damage. Report any damage immediately. NOTICE • Do not discard any bags or items that come with the original - Viking FDW100 | Installation Instructions - Page 5
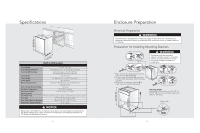
Parts Supplied Parts for your dishwasher will come in several plastic bags. Check your parts bags to make sure you have all the parts as listed below. Materials Supplied Dishwasher Parts Bag 1 Dishwasher Parts Bag 2 a. x1 This dishwasher x1 m. Edge Protector n. Clips k. x1 o. Kickplate ( - Viking FDW100 | Installation Instructions - Page 6
16" (59.8 cm) 33-7/8 (86.0 cm) min. to 35-7/8" (91.1 cm) max. without door panel - 21 5/8" (54.9 cm) with door panel - 22 3/16" (156.4 cm) 24" (61.0 cm) 34" (86.4 cm) min. to rated for 15 amperes. Preparation for Installing Mounting Brackets WARNING Dishwasher must be secured to adjacent cabinetry - Viking FDW100 | Installation Instructions - Page 7
back feet up. • Turning the screwdriver in the direction of the white arrows will take the dishwasher rear feet down. Installing the Side Trim Strips • Remove the adhesive tape (Figure A). • Place the trim strips on the front edge of the side walls (Figure B). A B NOTICE Make sure - Viking FDW100 | Installation Instructions - Page 8
• Every disposal has a hookup for a dishwasher; consult your disposer manual for correct connection (Figure C). C 13 Installation Preparation Steam Protection Foil Steam will form inside the dishwasher during operation. At the end of the cycle, when the dishwasher door is opened, it is required to - Viking FDW100 | Installation Instructions - Page 9
connection. 15 Installation Preparation of Water Supply Left Side Water Supply Connection • Before pushing the dishwasher into the cabinet the channel of the dishwasher (Figure A). • Place the supplied clips into the channel (Figure B) so that you can move these clips along the channel (Figure - Viking FDW100 | Installation Instructions - Page 10
into the cabinet, water supply hose must move in the channel to the front (Figure F). • Fix the second clip (Figure G). Installation Water supply may be connected to the dishwasher in one of two ways: • With metal braided hose. • With copper tubing. CAUTION • Hot water supply line: Use minimum - Viking FDW100 | Installation Instructions - Page 11
service representative if you are in doubt whether the appliance is properly grounded. Do not modify the plug provided with the appliance; if it will not fit the outlet, have a proper outlet installed by a qualified electrician. 19 Installation Readjusting Leveling Legs Now that the dishwasher - Viking FDW100 | Installation Instructions - Page 12
in the supply bags (C). A o p B t s C Installation Installing a Custom Panel ? ? A 2. To take the plastic bracket out, first remove 10.0cm), the door can not be taller than 29-15/16" (76.0cm). 1. Prepare the wooden door with the mounting brackets. Height: Height of the wooden door 30" (76.2cm - Viking FDW100 | Installation Instructions - Page 13
using the "V" cut in the bracket. (Figure D) 23 Installation Ø 1/8" (3,5mm) x4 v 5. Attach the two mounting brackets to the wooden door with 4 screws (Ø 1/8"x5/8" (Ø 3.55mmx14mm) (Figure A). A 6. Mount the wooden door onto the dishwasher with the plastic mounting brackets which you have attached - Viking FDW100 | Installation Instructions - Page 14
the wooden door to the dishwasher at position 1 and 4 (Figure A). A 9. Check the position of the wooden door and make sure it is aligned properly (Figure B). Ø 3/16" (4mm) x4 y B 10. Tighten the screws in position 1 and 4 completely after the final alignment (Figure C). C 25 Installation 11 - Viking FDW100 | Installation Instructions - Page 15
the warranty. 27 Installer Checklist and Final Instructions Your installer must have completed and checked the following: KThe dishwasher is square and level. KThe dishwasher is fastened securely to the cabinetry. KThe dishwasher door opens and closes freely. The dishwasher door must close without - Viking FDW100 | Installation Instructions - Page 16
side of the inner door. Record the following information indicated below. You will need it if service is ever required. Model number Serial number Date of purchase Date installed Dealer's name Address These installation instructions should remain with the dishwasher for future reference. 29
-
 1
1 -
 2
2 -
 3
3 -
 4
4 -
 5
5 -
 6
6 -
 7
7 -
8
-
9
-
10
-
11
-
12
-
13
-
14
-
15
-
16
 |
 |

Installation Guide
Viking Range, LLC
111 Front Street
Greenwood, Mississippi 38930 USA
(662) 455-1200
For product information,
call 1-888-845-4641
or visit our web site in the US
(www.vikingrange.com) or in Canada
(www.brigade.ca).
F21043 EN
(041513)
100 Series Built-In Dishwasher