Viking FDW100WS Installation Instructions - Page 14
Tighten the screws in position 1 and 4
 |
View all Viking FDW100WS manuals
Add to My Manuals
Save this manual to your list of manuals |
Page 14 highlights
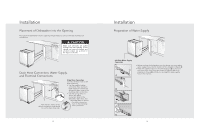
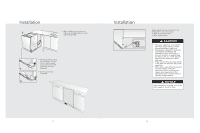
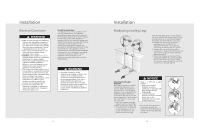
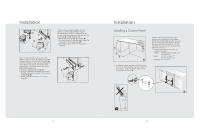
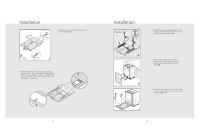
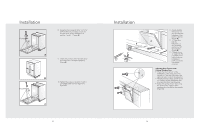
Installation x4 Ø 3/16" (4mm) y 8. Using the four screws Ø 3/16"x1-11/16" (Ø 4mmx43mm) provided, attach the wooden door to the dishwasher at position 1 and 4 (Figure A). A 9. Check the position of the wooden door and make sure it is aligned properly (Figure B). Ø 3/16" (4mm) x4 y B 10. Tighten the screws in position 1 and 4 completely after the final alignment (Figure C). C 25 Installation 11. Check whether the bottom of the door hits the kickplate of the kitchen cabinet (Figure A). 11. 1. If the door hits the kickplate, cut the necessary section out of the kickplate (Figure B). 11. 2 Apply silicon or sealant to the cut edge of the kitchen cabinet kickplate or paint so it does not absorb moisture. Adjusting Door Tension with Custom Wooden Door • Check the door tension of the dishwasher; if the door closes too quickly or if the door falls open, the spring tension needs to be adjusted. • The adjustment screws can be found on the front of the dishwasher after you open the door (see drawing). • Adjust the spring tension by turning the screw to the right for more weight and to the left for less weight. (Figure C). 26
-
 1
1 -
2
-
3
-
4
-
5
-
6
-
7
-
8
-
 9
9 -
 10
10 -
 11
11 -
 12
12 -
 13
13 -
 14
14 -
 15
15 -
 16
16
 |
 |
