Viking RVMHC Use and Care Manual - Page 15
Features
 |
View all Viking RVMHC manuals
Add to My Manuals
Save this manual to your list of manuals |
Page 15 highlights
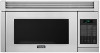
Product Controls Features Front View 12 11 10 6 1 2 13 3 4 567 89 Bottom View 14 (Front of Microwave) (Rear of Microwave) 15 16 17 18 19 1 Oven door with see-through window 2 Door hinges 3 Waveguide cover DO NOT REMOVE. 4 Turntable motor shaft 5 Oven light - on during operation and when the door is open. 6 Safety door latches - door must be securely closed for the oven to operate. 7 One touch DOOR OPEN button. Push to open door. 8 Fan Hi / Lo button. Push for high/low/off. 9 Light button. Push for on/off. 10 Auto-Touch control panel. 11 Time display: Digital display, 99 minutes 99 seconds. 12 Ventilation openings 13 Serial plate 14 Light cover. 15 Grease filters. 16 Removable ceramic turntable. The turntable will rotate clockwise or counterclockwise. Only remove for cleaning. 17 Removable turntable support. Place the turntable support on the floor of the oven cavity and the turntable on the turntable support. 18 Removable low rack for broiling and meat and poultry roasting. 19 Removable high rack for two level baking. Accessories The following accessories are designed especially for use in this oven only for convection, mix or broil cooking. DO NOT USE FOR MICROWAVE ONLY COOKING. Do not substitute similar types of racks for these specially designed ones. High rack (Baking rack)-for convection and low mix. • This rack is placed on the turntable for two-level cooking, such as layer cakes, muffins, etc. Low rack (Broiling rack)-for convection, broiling or high mix. • Place on the turntable and use for roasting or broiling to allow juices to drain away from food. 15 E
-
 1
1 -
2
-
3
-
4
-
5
-
6
-
7
-
8
-
9
-
 10
10 -
 11
11 -
 12
12 -
 13
13 -
 14
14 -
 15
15 -
 16
16 -
 17
17 -
 18
18 -
 19
19 -
 20
20 -
21
-
22
-
23
-
24
-
25
-
26
-
27
-
28
-
29
-
30
-
31
-
32
-
33
-
34
-
35
-
36
-
37
-
38
-
39
-
40
 |
 |
