Vivitar DVR 518 Camera Manual - Page 25
Shutter, Method 2, Up/Down, Driver Mode
 |
View all Vivitar DVR 518 manuals
Add to My Manuals
Save this manual to your list of manuals |
Page 25 highlights
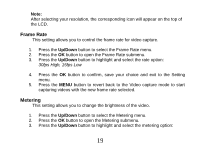
2 Seconds, snapshot) 10 Seconds, Burst (continuous 4. Press the Shutter button. 5. The digit time countdown appears on the LCD and the red LED next to the lens flashes for every second of the countdown. 6. After the selected time delay the photo will be taken. Method 2: 1. In the camera mode, press the MENU button. 2. Press the Up/Down button to select the Driver Mode menu option. 3. Press the OK button to enter the Driver Mode submenu. 4. Press the Up/Down button to highlight and select the Driver Mode option: Self-timer 2S, Self-timer 10S, Burst (continuous snapshot) 5. Press the OK button to save your choice. 24
-
 1
1 -
2
-
3
-
4
-
5
-
6
-
7
-
8
-
9
-
10
-
11
-
12
-
13
-
14
-
15
-
16
-
17
-
18
-
19
-
 20
20 -
 21
21 -
 22
22 -
 23
23 -
 24
24 -
 25
25 -
 26
26 -
 27
27 -
 28
28 -
 29
29 -
 30
30 -
31
-
32
-
33
-
34
-
35
-
36
-
37
-
38
-
39
-
40
-
41
-
42
-
43
-
44
-
45
-
46
-
47
-
48
-
49
-
50
-
51
-
52
-
53
-
54
-
55
-
56
-
57
-
58
-
59
-
60
-
61
-
62
-
63
-
64
-
65
-
66
-
67
-
68
-
69
-
70
-
71
-
72
-
73
-
74
 |
 |

24
2 Seconds,
10 Seconds,
Burst (continuous
snapshot)
4.
Press the
Shutter
button.
5.
The digit time countdown appears on the LCD and the red LED next to
the lens flashes for every second of the countdown.
6.
After the selected time delay the photo will be taken.
Method 2:
1.
In the camera mode, press the
MENU
button.
2.
Press the
Up/Down
button to select the
Driver Mode
menu option.
3.
Press the
OK
button to enter the Driver Mode submenu.
4.
Press the
Up/Down
button to highlight and select the Driver Mode
option:
Self-timer
2S,
Self-timer
10S,
Burst (continuous snapshot)
5.
Press the
OK
button to save your choice.