Vivitar DVR 990HD Camera Manual - Page 14
Options for Record Menu, Operations for Record Mode
 |
View all Vivitar DVR 990HD manuals
Add to My Manuals
Save this manual to your list of manuals |
Page 14 highlights
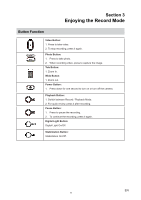
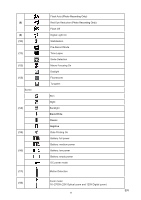
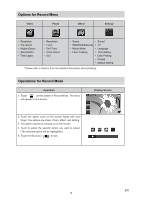
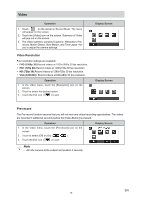
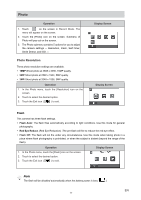
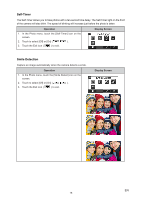
Options for Record Menu Video Photo Effect Setting* • Resolution • Pre-record • Motion Detect • Slow Motion • Time Lapse • Resolution • Flash • Self-Timer • Smile Detect • ISO • Scene • Sound • WB(White Balance) • TV • Macro Mode • Language • Face Tracking • Time Setting • Date Printing • Format • Default Setting * Please refer to Section 5 for the detailed information about [Setting]. Operations for Record Mode Operation 1. Touch on the screen in Record Mode. The menu will appear on the screen. Display Screen 2. Touch the option icons on the screen lightly with your finger. The options are Video, Photo, Effect, and Setting. 3. The option submenus will pop up on the screen. 4. Touch to select the specific option you want to adjust. (The selected option will be highlighted.) 5. Touch the Exit icon ( ) to exit. EN 14
-
 1
1 -
2
-
3
-
4
-
5
-
6
-
7
-
8
-
 9
9 -
 10
10 -
 11
11 -
 12
12 -
 13
13 -
 14
14 -
 15
15 -
 16
16 -
 17
17 -
 18
18 -
 19
19 -
20
-
21
-
22
-
23
-
24
-
25
-
26
-
27
-
28
-
29
-
30
-
31
-
32
-
33
-
34
-
35
-
36
-
37
-
38
-
39
 |
 |
