Vivitar DVR 990HD Camera Manual - Page 19
Effect
 |
View all Vivitar DVR 990HD manuals
Add to My Manuals
Save this manual to your list of manuals |
Page 19 highlights
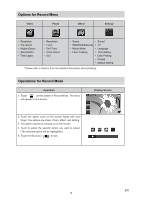
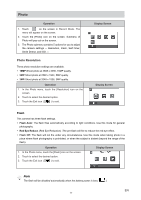
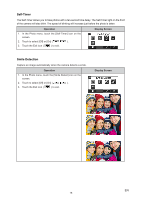
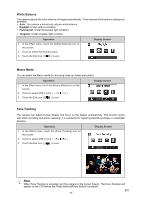
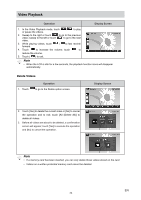
ISO The camera adjusts the ISO sensitivity of its images automatically. Four manual ISO sensitivity settings are available. (800/1600/3200/6400). The larger the number is, the higher the ISO sensitivity is set. Select a small number to shoot a smoother image. Select a large number to shoot an image in a dark location or to shoot a subject moving at high speed. Operation 1. In the Photo menu, touch the [ISO] icon on the screen. 2. Touch to select the desired option. 3. Touch the Exit icon ( ) to exit. Display Screen Note The image may become noisy when the ISO number is large. Effect Operation 1. Touch on the screen in Record Mode. The menu will appear on the screen. 2. Touch the [Effect] icon on the screen. Submenu of Effect will pop out on the screen. 3. The Effect submenu contains 4 options for you to adjust the camera settings -- Scene, White Balance, Macro Mode, and Face Tracking. Display Screen Scene You can select the mode according to the scene condition. • Auto: Shoot without any special effect on the image. • Skin: Shoot with an effect that makes skin tones more natural. • Night: Use Night Mode for night scenes or low light conditions. • Backlight: You can take shots when the bright light is behind the subject. • Black/White: The image is converted to black-and-white. • Classic: The image is converted to a sepia look. • Negative: The image is converted as the negative of the normal. Operation 1. In the Effect menu, touch the [Scene] icon on the screen. 2. Touch to select the desired option. 3. Touch the Exit icon ( ) to exit. Display Screen Note To avoid blurry photos, place the camera on a flat, steady surface, or use a tripod when taking shots in the Night Mode. EN 19
-
 1
1 -
2
-
3
-
4
-
5
-
6
-
7
-
8
-
9
-
10
-
11
-
12
-
13
-
 14
14 -
 15
15 -
 16
16 -
 17
17 -
 18
18 -
 19
19 -
 20
20 -
 21
21 -
 22
22 -
 23
23 -
 24
24 -
25
-
26
-
27
-
28
-
29
-
30
-
31
-
32
-
33
-
34
-
35
-
36
-
37
-
38
-
39
 |
 |
