Waring WJX80 Instruction Manual - Page 8
Manual Thermal Protection
 |
View all Waring WJX80 manuals
Add to My Manuals
Save this manual to your list of manuals |
Page 8 highlights
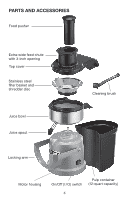
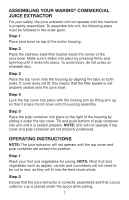
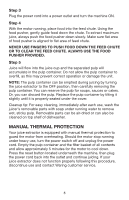
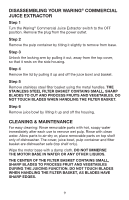
Step 3 Plug the power cord into a power outlet and turn the machine ON. Step 4 With the motor running, place food into the feed chute. Using the food pusher, gently guide food down the chute. To extract maximum juice, always push the food pusher down slowly. Make sure flat area of food pusher is aligned to flat area of feed chute. NEVER USE FINGERS TO PUSH FOOD DOWN THE FEED CHUTE OR TO CLEAR THE FEED CHUTE. ALWAYS USE THE FOOD PUSHER PROVIDED. Step 5 Juice will flow into the juice cup and the separated pulp will accumulate in the pulp container. Do not allow the pulp container to overfill, as this may prevent correct operation or damage the unit. NOTE: The pulp container can be emptied during juicing by turning the juice extractor to the OFF position, then carefully removing the pulp container. You can reserve the pulp for soups, sauces or cakes. Or, you can discard the pulp. Replace the pulp container by tilting it slightly until it is properly seated under the cover. Cleanup tip: For easy cleaning, immediately after each use, wash the juicer's removable parts with soap under running water to remove wet, sticky pulp. Removable parts can be air-dried or can also be cleaned on top shelf of dishwasher. MANUAL THERMAL PROTECTION Your juice extractor is equipped with manual thermal protection to guard the motor from overheating. Should the motor stop running under heavy use, turn the power switch off and unplug the power cord. Empty the pulp container and the filter basket of all contents and allow approximately 5 minutes for the motor to cool down. Press the reset button located underneath the machine, then plug the power cord back into the outlet and continue juicing. If your juice extractor does not function properly following this procedure, discontinue use and contact Waring customer service. 8
-
 1
1 -
2
-
 3
3 -
 4
4 -
 5
5 -
 6
6 -
 7
7 -
 8
8 -
 9
9 -
 10
10 -
 11
11 -
 12
12 -
 13
13 -
14
-
15
-
16
-
17
-
18
-
19
-
20
-
21
-
22
-
23
-
24
-
25
-
26
-
27
-
28
-
29
-
30
-
31
-
32
-
33
-
34
-
35
-
36
-
37
-
38
-
39
-
40
 |
 |
