Weider Pro 130 User Manual - Page 2

Warning Decal Placement, Table Of Contents - bench

Page 2 highlights

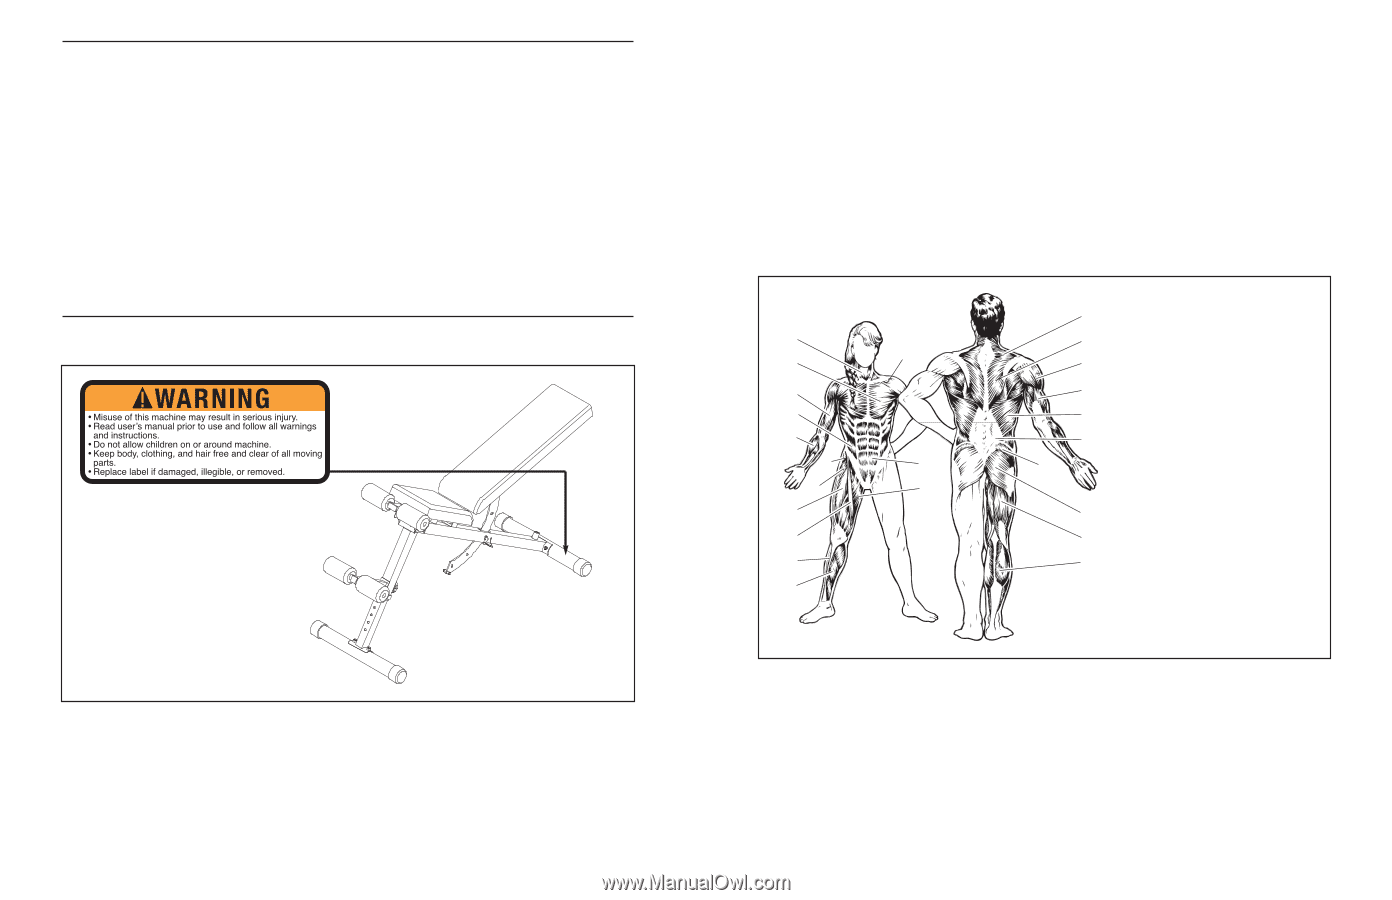
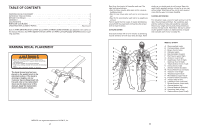
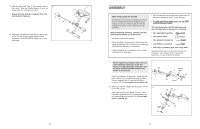
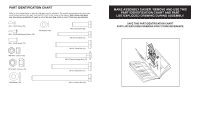
TABLE OF CONTENTS WARNING DECAL PLACEMENT 2 IMPORTANT PRECAUTIONS 3 BEFORE YOU BEGIN 4 ASSEMBLY 5 ADJUSTMENTS 9 EXERCISE GUIDELINES 10 ORDERING REPLACEMENT PARTS Back Cover Note: A PART IDENTIFICATION CHART and a PART LIST/EXPLODED DRAWING are attached in the center of this manual. Remove the PART IDENTIFICATION CHART and PART LIST/EXPLODED DRAWING before beginning assembly. WARNING DECAL PLACEMENT The decal shown here has been placed on the weight bench in the indicated location. If the decal is missing or illegible, call our Customer Service Department tollfree and order a free replacement decal (see the back cover of this manual). Apply the replacement decal in the location shown. Rest for a short period of time after each set. The ideal resting periods are: • Rest for three minutes after each set for a muscle building workout. • Rest for one minute after each set for a toning work- out. • Rest for 30 seconds after each set for a weight loss workout. Plan to spend the first couple of weeks familiarizing yourself with the equipment and learning the proper form for each exercise. COOLING DOWN End each workout with 5 to 10 minutes of stretching. Include stretches for both your arms and legs. Move slowly as you stretch and do not bounce. Ease into each stretch gradually and go only as far as you can without strain. Stretching at the end of each workout is an effective way to increase flexibility. STAYING MOTIVATED For motivation, keep a record of each workout. List the date, the exercises performed, the resistance used, and the numbers of sets and repetitions completed. Record your weight and key body measurements at the end of every month. Remember, the key to achieving the greatest results is to make exercise a regular and enjoyable part of your everyday life. A B C D E F G H I J K L M N O P Q R S T U V W X MUSCLE CHART A. Sternomastoid (neck) B. Pectoralis Major (chest) C. Biceps (front of arm) D. Obliques (waist) E. Brachioradials (forearm) F. Hip Flexors (upper thigh) G. Abductor (outer thigh) H. Quadriceps (front of thigh) I. Sartorius (front of thigh) J. Tibialis Anterior (front of calf) K. Soleus (front of calf) L. Anterior Deltoid (shoulder) M. Rectus Abdominus (stomach) N. Adductor (inner thigh) O. Trapezius (upper back) P. Rhomboideus (upper back) Q. Posterior Deltoid (shoulder) R. Triceps (back of arm) S. Latissimus Dorsi (mid back) T. Spinae Erectors (lower back) U. Gluteus Medius (hip) V. Gluteus Maximus (buttocks) W. Hamstring (back of leg) X. Gastrocnemius (back of calf) WEIDER is a registered trademark of ICON IP, Inc. 2 11

  • 1
  • 2
  • 3
  • 4
  • 5
  • 6
  • 7
  • 8

11
Rest for a short period of time after each set. The
ideal resting periods are:
• Rest for three minutes after each set for a muscle
building workout.
• Rest for one minute after each set for a toning work-
out.
• Rest for 30 seconds after each set for a weight loss
workout.
Plan to spend the first couple of weeks familiarizing
yourself with the equipment and learning the proper
form for each exercise.
COOLING DOWN
End each workout with 5 to 10 minutes of stretching.
Include stretches for both your arms and legs. Move
slowly as you stretch and do not bounce. Ease into
each stretch gradually and go only as far as you can
without strain. Stretching at the end of each workout
is an effective way to increase flexibility.
STAYING MOTIVATED
For motivation, keep a record of each workout. List the
date, the exercises performed, the resistance used,
and the numbers of sets and repetitions completed.
Record your weight and key body measurements at
the end of every month. Remember, the key to achiev-
ing the greatest results is to make exercise a regular
and enjoyable part of your everyday life.
O
P
Q
R
S
T
U
V
X
W
N
M
J
G
F
H
I
K
E
C
D
B
A
L
MUSCLE CHART
A.
Sternomastoid (neck)
B.
Pectoralis Major (chest)
C.
Biceps (front of arm)
D.
Obliques (waist)
E.
Brachioradials (forearm)
F.
Hip Flexors (upper thigh)
G.
Abductor (outer thigh)
H.
Quadriceps (front of thigh)
I.
Sartorius (front of thigh)
J.
Tibialis Anterior (front of calf)
K.
Soleus (front of calf)
L.
Anterior Deltoid (shoulder)
M.
Rectus Abdominus (stomach)
N.
Adductor (inner thigh)
O.
Trapezius (upper back)
P.
Rhomboideus (upper back)
Q.
Posterior Deltoid (shoulder)
R.
Triceps (back of arm)
S.
Latissimus Dorsi (mid back)
T.
Spinae Erectors (lower back)
U.
Gluteus Medius (hip)
V.
Gluteus Maximus (buttocks)
W.
Hamstring (back of leg)
X.
Gastrocnemius (back of calf)
2
WARNING DECAL PLACEMENT
WARNING DECALPLACEMENT . . . . . . . . . . . . . . . . . . . . . . . . . . . . . . . . . . . . . . . . . . . . . . . . . . . . . . . . . . . . .2
IMPORTANT PRECAUTIONS . . . . . . . . . . . . . . . . . . . . . . . . . . . . . . . . . . . . . . . . . . . . . . . . . . . . . . . . . . . . . . . . 3
BEFORE YOU BEGIN . . . . . . . . . . . . . . . . . . . . . . . . . . . . . . . . . . . . . . . . . . . . . . . . . . . . . . . . . . . . . . . . . . . . . .4
ASSEMBLY . . . . . . . . . . . . . . . . . . . . . . . . . . . . . . . . . . . . . . . . . . . . . . . . . . . . . . . . . . . . . . . . . . . . . . . . . . . . . . .5
ADJUSTMENTS . . . . . . . . . . . . . . . . . . . . . . . . . . . . . . . . . . . . . . . . . . . . . . . . . . . . . . . . . . . . . . . . . . . . . . . . . . .9
EXERCISE GUIDELINES
. . . . . . . . . . . . . . . . . . . . . . . . . . . . . . . . . . . . . . . . . . . . . . . . . . . . . . . . . . . . . . . . . . 10
ORDERING REPLACEMENT PARTS . . . . . . . . . . . . . . . . . . . . . . . . . . . . . . . . . . . . . . . . . . . . . . . . . .Back Cover
Note: APART IDENTIFICATION CHART and a PART LIST/EXPLODED DRAWING are attached in the center of
this manual. Remove the PART IDENTIFICATION CHART and PART LIST/EXPLODED DRAWING before begin-
ning assembly.
WEIDER is a registered trademark of ICON IP, Inc.
TABLE OF CONTENTS
The decal shown here has been
placed on the weight bench in the
indicated location. If the decal is
missing or illegible, call our
Customer Service Department toll-
free and order a free replacement
decal (see the back cover of this
manual). Apply the replacement
decal in the location shown.