Weider Pro Xt55 English Manual - Page 12
Adjusting the Weight Rack - pro weight
 |
View all Weider Pro Xt55 manuals
Add to My Manuals
Save this manual to your list of manuals |
Page 12 highlights
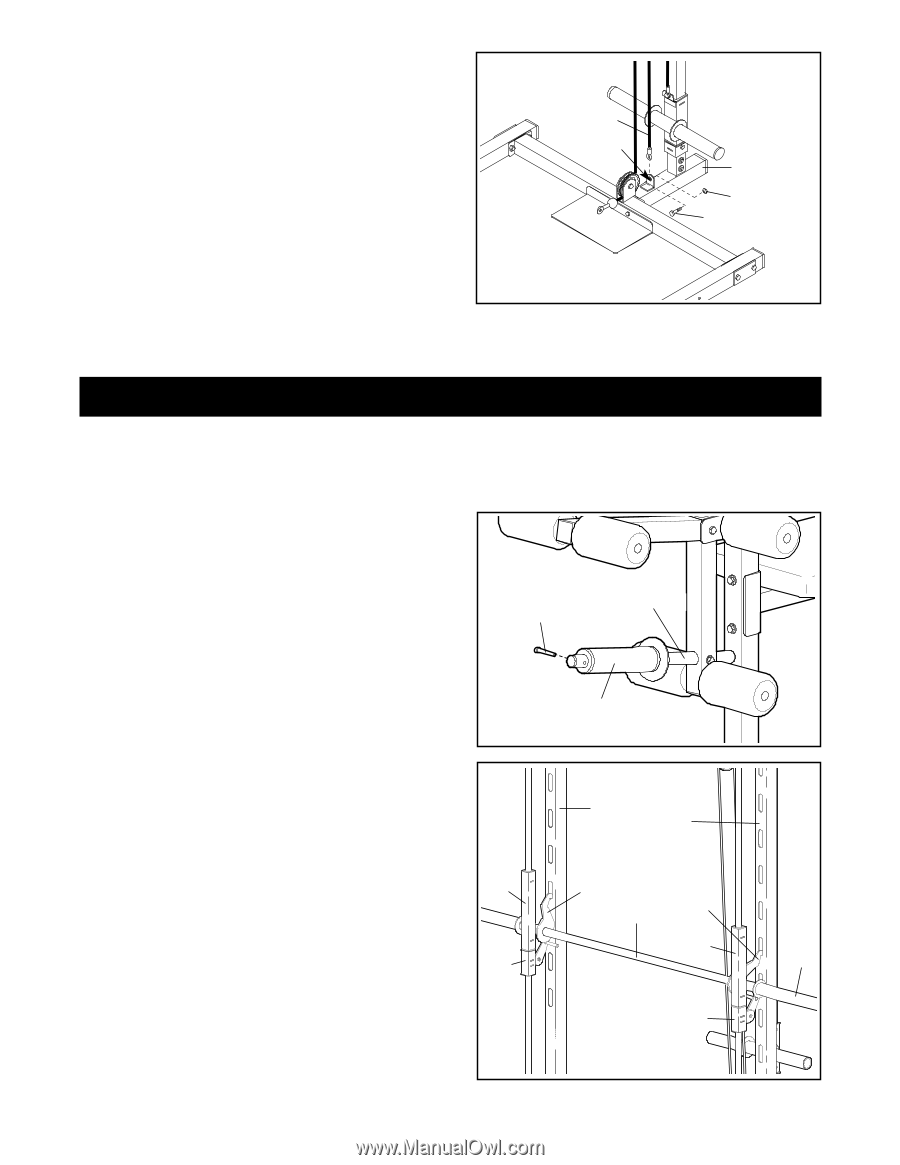
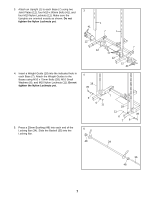
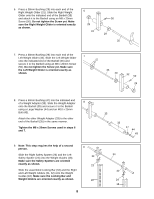
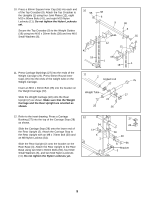
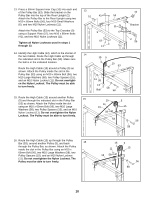
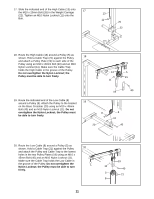
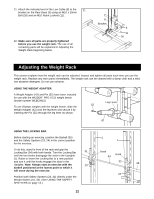
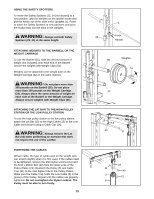
21. Attach the indicated end of the Low Cable (8) to the 21 bracket on the Rear Base (3) using an M10 x 20mm Bolt (26) and an M10 Nylon Locknut (11). 8 Bracket 22. Make sure all parts are properly tightened before you use the weight rack. The use of all remaining parts will be explained in Adjusting the Weight Rack beginning below. 3 11 26 Adjusting the Weight Rack This section explains how the weight rack can be adjusted. Inspect and tighten all parts each time you use the weight rack. Replace any worn parts immediately. The weight rack can be cleaned with a damp cloth and a mild, non-abrasive detergent. Do not use solvents. USING THE WEIGHT ADAPTER A Weight Adapter (42) and Pin (52) have been included for use with the WEIDER® PRO XT15 weight bench (model number WEBE0910). To use Olympic weights with the weight bench, slide the Weight Adapter (42) onto the leg lever and secure it by inserting the Pin (52) through the leg lever as shown. Leg Lever 52 42 USING THE LOCKING BAR Before starting an exercise, position the Barbell (35) and the Safety Spotters (23, 24) in the correct position for the exercise. 1 1 To do this, stand in front of the rack and grip the Locking Bar (34) with both hands. Turn the Locking Bar 31 until the two hooks disengage the slots in the Uprights Hook 34 Hook (1). Raise or lower the Locking Bar to a new position and turn it until the hooks engage the slots in the Uprights. Note: Always start an exercise with the 23 32 35 barbell positioned at the lowest point to which it will move during the exercise. 24 Position both Safety Spotters (23, 24) directly under the Weight Gliders (31, 32). (See USING THE SAFETY SPOTTERS on page 13.) 12
-
 1
1 -
2
-
3
-
4
-
5
-
6
-
 7
7 -
 8
8 -
 9
9 -
 10
10 -
 11
11 -
 12
12 -
 13
13 -
 14
14 -
 15
15 -
 16
16 -
 17
17 -
18
-
19
 |
 |