Weslo Cadence 200 Instruction Manual - Page 7
How To Fold And Move The Treadmill
 |
View all Weslo Cadence 200 manuals
Add to My Manuals
Save this manual to your list of manuals |
Page 7 highlights
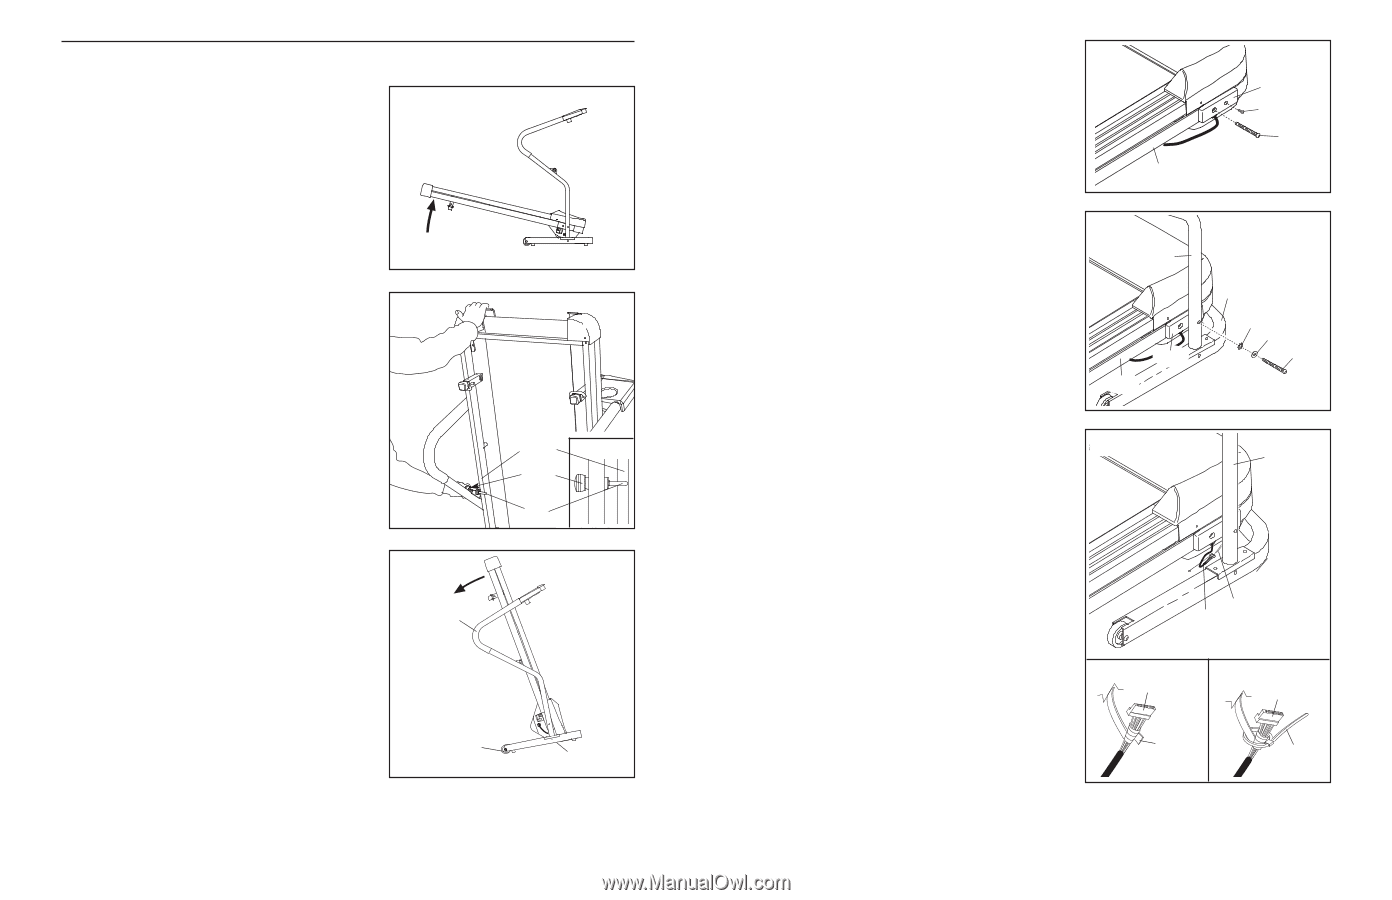
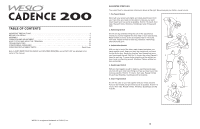
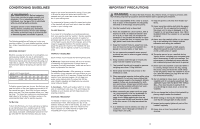
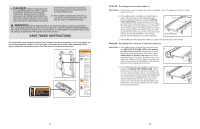
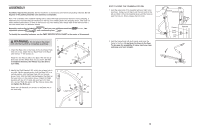
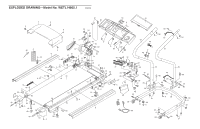
HOW TO FOLD AND MOVE THE TREADMILL HOW TO FOLD THE TREADMILL FOR STORAGE Before folding the treadmill, unplug the power cord. CAUTION: You must be able to safely lift 45 pounds (20 kg) to raise, lower or move the treadmill. 1. Hold the treadmill with your hands in the location shown by the arrow at the right. To decrease the possibility of injury, bend your legs and keep your back straight. As you raise the frame, make sure to lift with your legs rather than your back. Raise the frame about halfway to the vertical position. 2. Move your right hand to the position shown and hold the treadmill firmly. Using your left hand, pull the lock knob to the left and hold it. Raise the treadmill until the frame passes the lock pin. Slowly release the lock knob. Make sure that the frame is securely held by the lock pin. To protect the floor or carpet from damage, place a mat under the treadmill. Keep the treadmill out of direct sunlight. Do not leave the treadmill in the storage position in temperatures above 30° C (85° F). HOW TO MOVE THE TREADMILL Before moving the treadmill, convert the treadmill to the storage position as described above. Make sure that the frame is securely held by the lock pin. 1. Hold the handrails, and place one foot against one of the wheels. 2. Tilt the treadmill back until it rolls freely on the wheels. Carefully move the treadmill to the desired location. To reduce the risk of injury, use extreme caution while moving the treadmill. Do not move the treadmill over an uneven surface. 3. Place one foot against one of the wheels, and carefully lower the treadmill to the storage position. Handrails Wheel Frame Lock Knob Lock Pin Closed Base 14 3. Hold a Frame Spacer (27) against the right side of the 3 Frame (79) as shown. Insert a 3 1/2" Bolt (70) into the indicated hole in the Frame Spacer and the Frame. Next, tighten a 3/4" Tek Screw (3) into the Frame Spacer and the Frame. Then, remove the Bolt. Repeat this step on the other side of the Frame. 79 4. Raise the Right Handrail (59) and the Left Handrail (not 4 shown) so the Base (46) is flat on the floor. Position the Right Handrail (59) and the Left Handrail 59 (not shown) near the Frame (79). With the help of a sec- ond person, lift and hold the Frame between the Handrails. Finger tighten a 3 1/2" Bolt (70) with a 3/8" Washer (66) and a 3/8" Star Washer (29) through the Right Handrail and the Frame Spacer (27) into the Frame. Do not tighten the Bolt yet. Repeat this step on the left side of the treadmill. 27 79 27 3 70 46 29 66 70 5. Locate the Wire Harness (60). Next, locate the long 5 piece of tape in the large hole near the lower end of the Right Handrail (59). Wrap the end of the tape around the 59 end of the Wire Harness as shown in drawing 5a. Then, tighten the included plastic tie securely around the tape and the Wire Harness as shown in drawing 5b. Tape 60 5a 5b 60 Tape 60 Tie 7
-
 1
1 -
 2
2 -
 3
3 -
 4
4 -
 5
5 -
 6
6 -
 7
7 -
 8
8 -
 9
9 -
 10
10 -
 11
11 -
 12
12
 |
 |