Weslo Cadence 715 Treadmill Uk Manual - Page 8
Wesio
 |
View all Weslo Cadence 715 Treadmill manuals
Add to My Manuals
Save this manual to your list of manuals |
Page 8 highlights
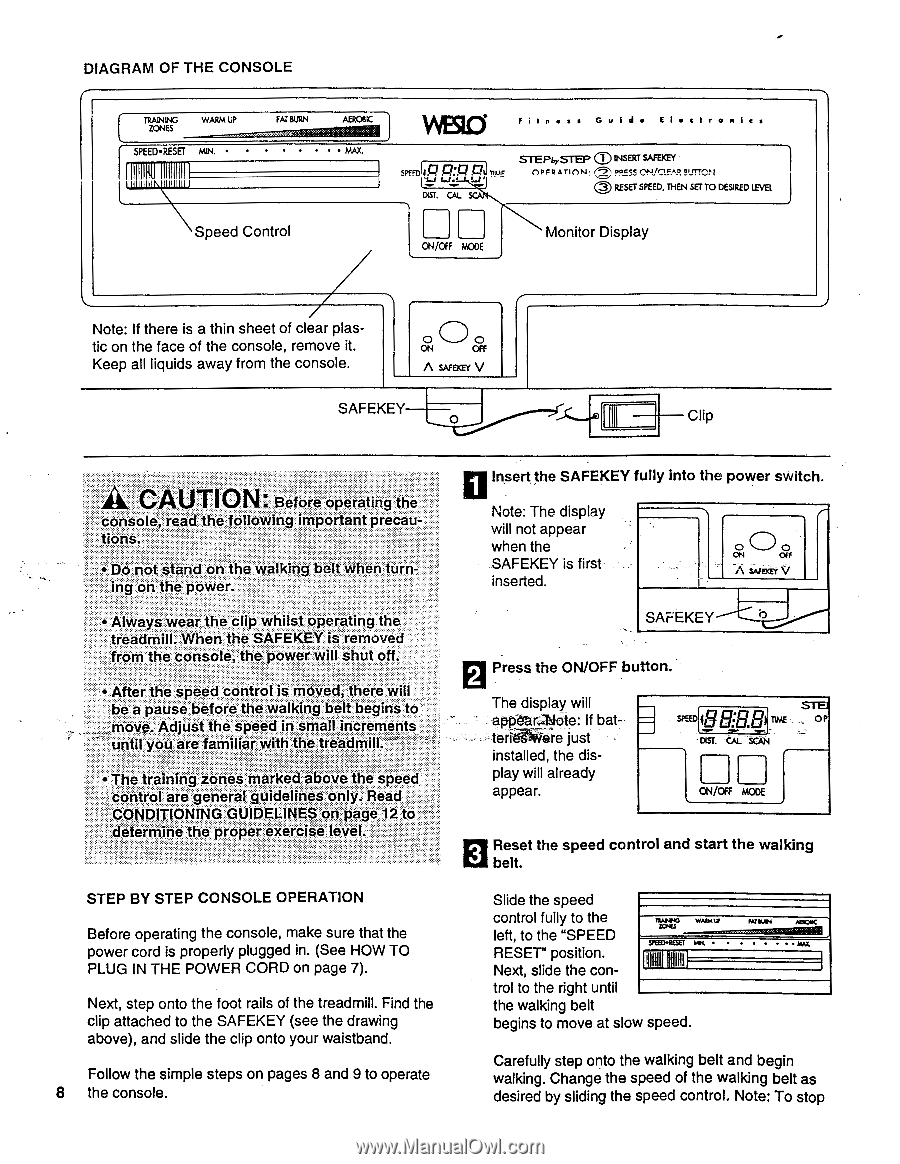
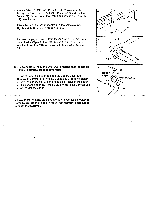
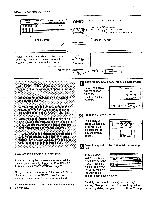
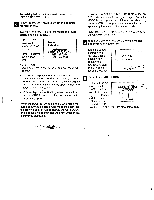
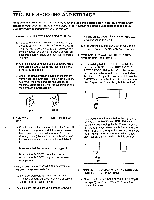
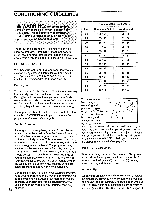
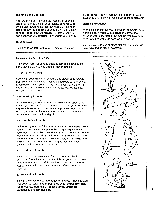
DIAGRAM OF THE CONSOLE (- TRAINING ZONES WARM UP SPEED•RESET MN. • . FAT BURN AEROBIC MAX Speed Control WESIO F i e n•s s Gu i d• E l •c i ren i e s SPFFI4IP P:P DST. CAL njur ) STEPbySTEP 0 (10FR A TION 0 INSERT SAFELY ppocc ni,VrionA jrrnti RESET SPEED, THEN SET TO DESIRED LEVEL ON/OFF MODE Monitor Display Note: If there is a thin sheet of clear plastic on the face of the console, remove it. Keep all liquids away from the console. 0 ON OFF A smacer V SAFEKEY Clip CAUTION. Before operating the console, tions. read the following . . important precau-• 0 not stand on the walking belt when turning on the power. Always wear the clip whilst operating the treadmill. When the SAFEKEY is removed from the console, the power.will shut off. After the speed control is moved, there will be a pause before the walking belt begins to move. Adjust the speed in small increments until you:are familiar with the treadmill The training zones marked ebpve the spee control are generarguidelines only. Read CONDITIONING;GUIDELINES ori page 12 to etermine the proper exercise level. STEP BY STEP CONSOLE OPERATION Before operating the console, make sure that the power cord is properly plugged in. (See HOW TO PLUG IN THE POWER CORD on page 7). Next, step onto the foot rails of the treadmill. Find the clip attached to the SAFEKEY (see the drawing above), and slide the clip onto your waistband. Follow the simple steps on pages 8 and 9 to operate 8 the console. Insert the SAFEKEY fully into the power switch. Note: The display will not appear when the SAFEKEY is first inserted. 0 0 0 ON CfF A unix!, V SAFEKEY- -----2 EI Press the ON/OFF button. The display will apptaHalote: If bat- =-7 teritr ere just installed, the display will already appear. STEI (8BES) SPEED TIME ., OP oisr. tAi. Sari ON/OFF MCC* in Reset the speed control and start the walking CA belt. Slide the speed control fully to the left, to the "SPEED RESET" position. Next, slide the con- MZMONHESG WASINUIP rem-mu • iIIVhIIIIIII trol to the right until the walking belt begins to move at slow speed. Mt WIN 14ZA Carefully step onto the walking belt and begin walking. Change the speed of the walking belt as desired by sliding the speed control. Note: To stop
-
 1
1 -
2
-
 3
3 -
 4
4 -
 5
5 -
 6
6 -
 7
7 -
 8
8 -
 9
9 -
 10
10 -
 11
11 -
 12
12 -
 13
13 -
14
-
15
-
16
 |
 |