Weslo Pursuit 618s English Manual - Page 8
How To Use The Exercise Cycle
 |
View all Weslo Pursuit 618s manuals
Add to My Manuals
Save this manual to your list of manuals |
Page 8 highlights
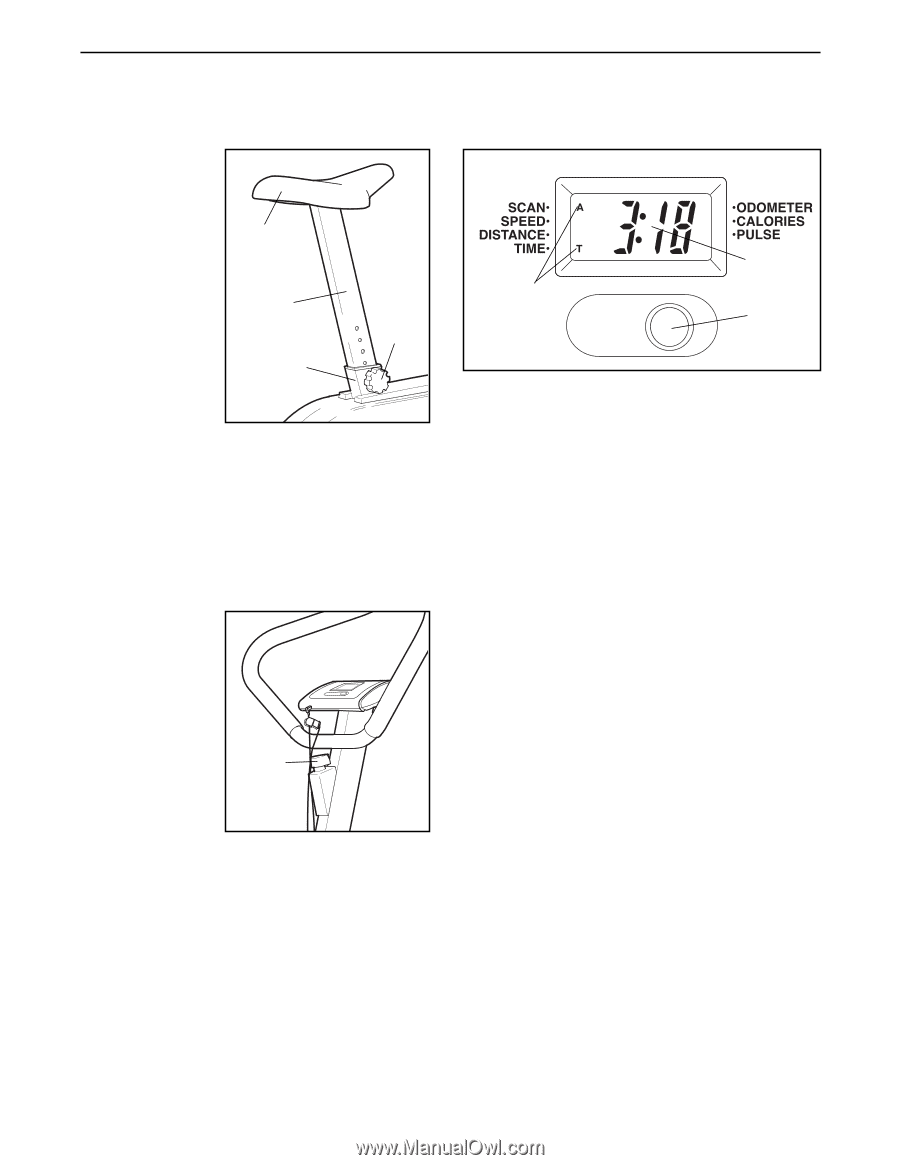
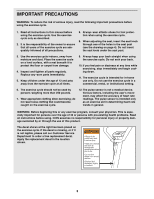
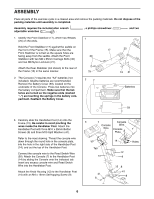
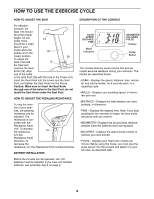
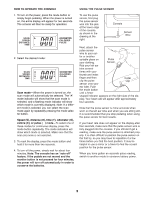
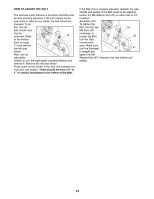
HOW TO USE THE EXERCISE CYCLE HOW TO ADJUST THE SEAT For effective exercise, the Seat (19) should be at the proper height. As you 19 pedal, there should be a slight bend in your knees when the 20 pedals are in the lowest position. 29 To adjust the Seat, first hold 15 the Seat and unscrew the Seat Knob (29). Align one of the holes in the Seat Post (20) with the hole in the Frame (15). Insert the Seat Knob into the Frame and the Seat Post, and tighten the Seat Knob into the Frame. Caution: Make sure to insert the Seat Knob through one of the holes in the Seat Post; do not insert the Seat Knob under the Seat Post. HOW TO ADJUST THE PEDALING RESISTANCE To vary the inten- sity of your exer- cise, the pedaling resistance can be adjusted. The resistance is con- trolled with the Resistance Knob (10). To increase the resistance, 10 turn the Resistance Knob clockwise; to decrease the resistance, turn the Resistance Knob counterclockwise. BATTERY INSTALLATION Before the console can be operated, two ÒAAÓ batteries must be installed. If you have not installed batteries, see assembly step 2 on page 6. DESCRIPTION OF THE CONSOLE Mode Indicators Display Mode Button The console features seven modes that provide instant exercise feedback during your workouts. The modes are described below. ¥ SCANÑDisplays the speed, distance, time, odometer and calorie modes, for 6 seconds each, in a repeating cycle. ¥ SPEEDÑDisplays your pedaling speed, in kilometers per hour. ¥ DISTANCEÑDisplays the total distance you have pedaled, in kilometers. ¥ TIMEÑDisplays the elapsed time. Note: If you stop pedaling for ten seconds or longer, the time mode will pause until you resume. ¥ ODOMETERÑDisplays the accumulated distance pedaled since the batteries were last replaced ¥ CALORIESÑDisplays the approximate number of calories you have burned. ¥ PULSEÑDisplays your heart rate in beats per minute. Before using this mode, you must plug the pulse sensor into the console and attach it to your ear lobe, as described later. 8
-
 1
1 -
2
-
 3
3 -
 4
4 -
 5
5 -
 6
6 -
 7
7 -
 8
8 -
 9
9 -
 10
10 -
 11
11 -
 12
12 -
 13
13 -
14
-
15
-
16
 |
 |