Whirlpool LRF4001RY Use and Care Manual - Page 11
Cycle Cup Replacement, Six-Month Cleaning, Closing the Fabric Freshener for Storage, Start/Steaming - fabric freshener dry cleaning system
 |
View all Whirlpool LRF4001RY manuals
Add to My Manuals
Save this manual to your list of manuals |
Page 11 highlights
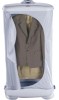
Cycle Cup Replacement It is recommended that the cycle cup be replaced every 6 months. For replacement parts, see "Accessories." Six-Month Cleaning It is recommended that the Fabric Freshener be cleaned with vinegar every 6 months. 1. Remove cycle cup from cup receptacle and place to the side for later use. 2. Remove any garment(s) that may remain in the Fabric Freshener. 3. Fill cleaning cup (provided) to Fill Line with vinegar. Closing the Fabric Freshener for Storage NOTE: Fabric freshener should be completely dry before storing. Running a Dry cycle before closing the Fabric Freshener is recommended. 1. Unplug Fabric Freshener from outlet and wrap cord on cord storage wrap located on the back of the unit. 2. Remove any garment(s) that may remain in Fabric Freshener. 3. Zip bag approximately halfway open to allow for air to escape as you close Fabric Freshener. 4. Hold the top of Fabric Freshener while, at the same time, pulling the handle toward you to disengage the handle pin from the slot in the pole top support. Cleaning cup for vinegar only. 4. Place cleaning cup into cup receptacle. Press down on the cleaning cup to be sure cleaning cup is firmly in place. 5. Close the bag zipper completely. 6. Press and hold the ON/OFF button for approximately 1 second while the Start/Steaming indicator light glows. The cleaning cycle will begin. 7. After the Complete indicator light is lit and the cleaning cycle is finished, unzip bag and remove cleaning cup from Fabric Freshener. 8. Fill cycle cup to Normal level with room temperature, distilled water. 9. Place cycle cup into cup receptacle. Press down on the cycle cup to be sure cycle cup is firmly in place. 10. Close bag zipper completely. 11. Press and hold the ON/OFF button for approximately 1 second while the Start/Steaming indicator light glows. The cycle will begin. Start/Steaming, Gentle Drying, Cooling, and Complete indicator lights will light as each cycle progresses through each stage. Once the Complete indicator light is lit, the cycle is complete and the Fabric Freshener has completed the cleaning process. The unit is now ready for normal operation. NOTES: s For cleaning, use vinegar only. s Do not place clothing items in Fabric Freshener during the cleaning cycle. s Sounds from the internal fan are normal during operation. s The temperature and humidity in the immediate surrounding area may increase slightly. 5. Lower top of Fabric Freshener onto bottom of Fabric Freshener. NOTE: Be sure that the bag is completely tucked under top of Fabric Freshener to avoid damage. 11
-
 1
1 -
2
-
3
-
4
-
5
-
 6
6 -
 7
7 -
 8
8 -
 9
9 -
 10
10 -
 11
11 -
 12
12 -
 13
13 -
 14
14 -
 15
15 -
 16
16 -
17
-
18
-
19
-
20
-
21
-
22
-
23
-
24
-
25
-
26
-
27
-
28
-
29
-
30
-
31
-
32
-
33
-
34
-
35
-
36
-
37
-
38
-
39
-
40
 |
 |
