Whirlpool SF462LXS Use and Care Manual - Page 8
Elec Onic, Controls
 |
View all Whirlpool SF462LXS manuals
Add to My Manuals
Save this manual to your list of manuals |
Page 8 highlights
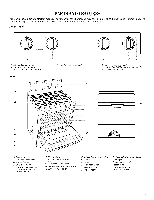
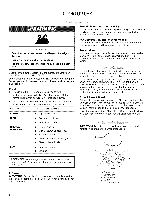
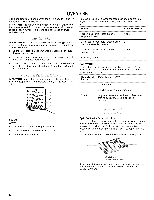
ELEC ONIC OVENCONTROLS Style 1 - Electronic Oven Controls (on some models) AB C DEF G Style 3 - Electronic Oven Controls (on some models) A B C D E ii !! ON ML K J / H A. PREClSECLEAN TM B. Start time C. Oven display D. Clock E. Timer set/off F. Add a minute G. Start H. Off/Cancel I. Hour/minute J. Temperature K. Cooking functions L. Cook time M. Control lockout iV. Night light/Cooktop O. Oven light lockout Style 2 - Electronic Oven Controls (on some models) A B C D E AUTO CLEAN TIMER TEMP/HOUR A. Oven light B. Clock C. Display D. Start E. Cancel/Off H G F F. Temp/hour G. Broil H. Bake L Timer J. Auto clean When power is first supplied to the appliance, a flashing time will appear on the display. Press OFF/CANCEL to clear flashing time from the display. If flashing time appears, a power failure has occurred. Press OFF/CANCEL and reset the clock if needed. When the oven is not in use, the display shows the time of day. When performing a timed cook function, the display will show either hours and minutes, or minutes and seconds. A. Oven light B. Clock C. Display D. Start E. Cancel/Off F F Temp/hour G. Cooking functions H. Control lockout L Auto Clean J. Timer The Start pad begins any oven function. If the Start pad is not pressed within 5 seconds after pressing a function pad, the "START?" indicator light will flash as a reminder. On some models, "START?" will appear on the display. If the Start pad is not pressed within 5 minutes after pressing a function pad, the oven display will return to the time of day mode and the programmed function will be canceled. The Off/Cancel pad stops any function except the Clock, Timer and Control Lock. On some models, this is a 12-hour clock that shows a.m. and p.m. To Set: Before setting, make sure the oven and Timer are off. 1. Press CLOCK. 2. Depending on your model, press the HR or MIN or TEMP/HOUR "up" or "down" arrow pads to set the time of day, including a.m. or p.m. 3. Press CLOCK or START.
-
 1
1 -
2
-
 3
3 -
 4
4 -
 5
5 -
 6
6 -
 7
7 -
 8
8 -
 9
9 -
 10
10 -
 11
11 -
 12
12 -
 13
13 -
14
-
15
-
16
-
17
-
18
-
19
-
20
-
21
-
22
-
23
-
24
 |
 |
