Whirlpool WDT705PAK Owners Manual - Page 18
Secure Dishwasher in Cabinet, Opening, Direct Wire Connection
 |
View all Whirlpool WDT705PAK manuals
Add to My Manuals
Save this manual to your list of manuals |
Page 18 highlights
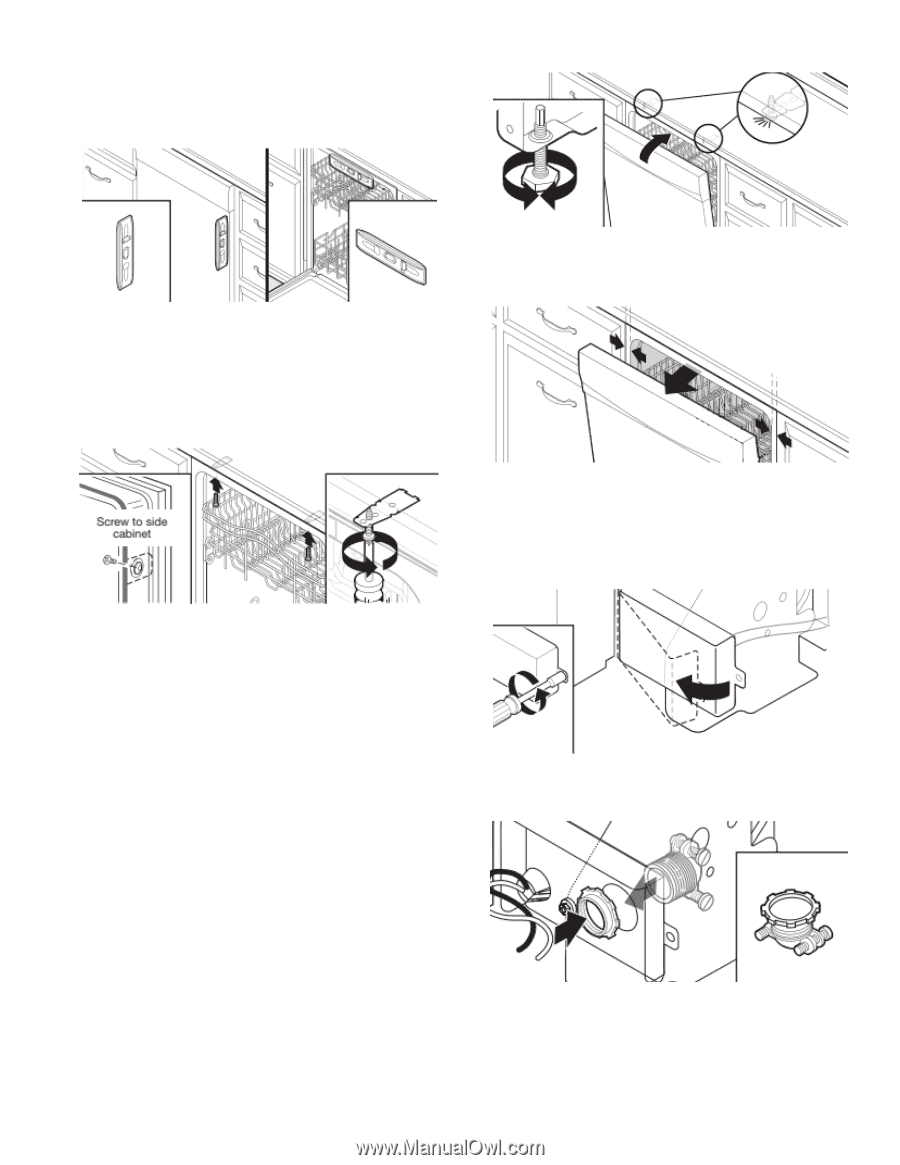
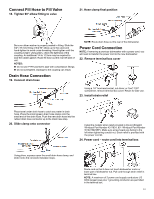
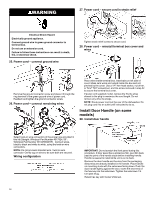
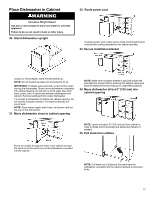
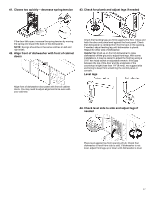
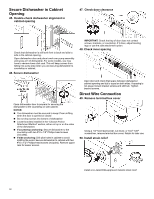
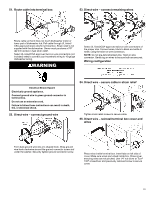
Secure Dishwasher in Cabinet Opening 45. Double-check dishwasher alignment in cabinet opening 47. Check door clearance Check that dishwasher is still level front to back and side to side in the cabinet opening. Open dishwasher door and place towel over pump assembly and spray arm of dishwasher. For some models, you may have to remove lower dish rack. This will keep screws from falling into pump area when you are securing dishwasher to countertop or cabinet. 46. Secure dishwasher IMPORTANT: Check that top of door does not contact screws, brackets, or countertop. If it does, adjust leveling legs or use the side attachment option. 48. Check inner spacing Open dishwasher door to prepare for securing the dishwasher to the countertop or side cabinet. NOTES: � The dishwasher must be secured to keep it from shifting when the door is opened or closed. � Do not drop screws into bottom of dishwasher. � Locate brackets installed in the "Choose Anchor Attachment Method" section, either on top or on the sides of the dishwasher. � If countertop anchoring: Secure dishwasher to the countertop with two #10 x 1/2" Phillips-head screws (included). � If side anchoring: Drill pilot holes in cabinet to avoid splitting the wood. Secure dishwasher to cabinet with two #10 x 1/2" Phillips-head screws (included). Remove upper rack for easier access. Open door and check that space between dishwasher cabinet opening and tub is equal on both sides. If spacing is not equal, loosen bracket screws and shift tub. Tighten bracket screws. Direct Wire Connection 49. Remove terminal box cover Using a 1/4" hex-head socket, nut driver, or Torx® T20® screwdriver, remove terminal box cover. Retain for later use. 50. Install strain relief Install a UL-listed/CSA-approved metallic strain relief. 18
-
 1
1 -
2
-
3
-
4
-
5
-
6
-
7
-
8
-
9
-
10
-
11
-
12
-
 13
13 -
 14
14 -
 15
15 -
 16
16 -
 17
17 -
 18
18 -
 19
19 -
 20
20 -
 21
21 -
 22
22 -
 23
23 -
24
-
25
-
26
-
27
-
28
-
29
-
30
-
31
-
32
-
33
-
34
-
35
-
36
-
37
-
38
-
39
-
40
-
41
-
42
-
43
-
44
-
45
-
46
 |
 |