Whirlpool WDT705PAK Owners Manual - Page 7
Location Requirements, Cabinet Opening Dimensions, Drain Requirements
 |
View all Whirlpool WDT705PAK manuals
Add to My Manuals
Save this manual to your list of manuals |
Page 7 highlights
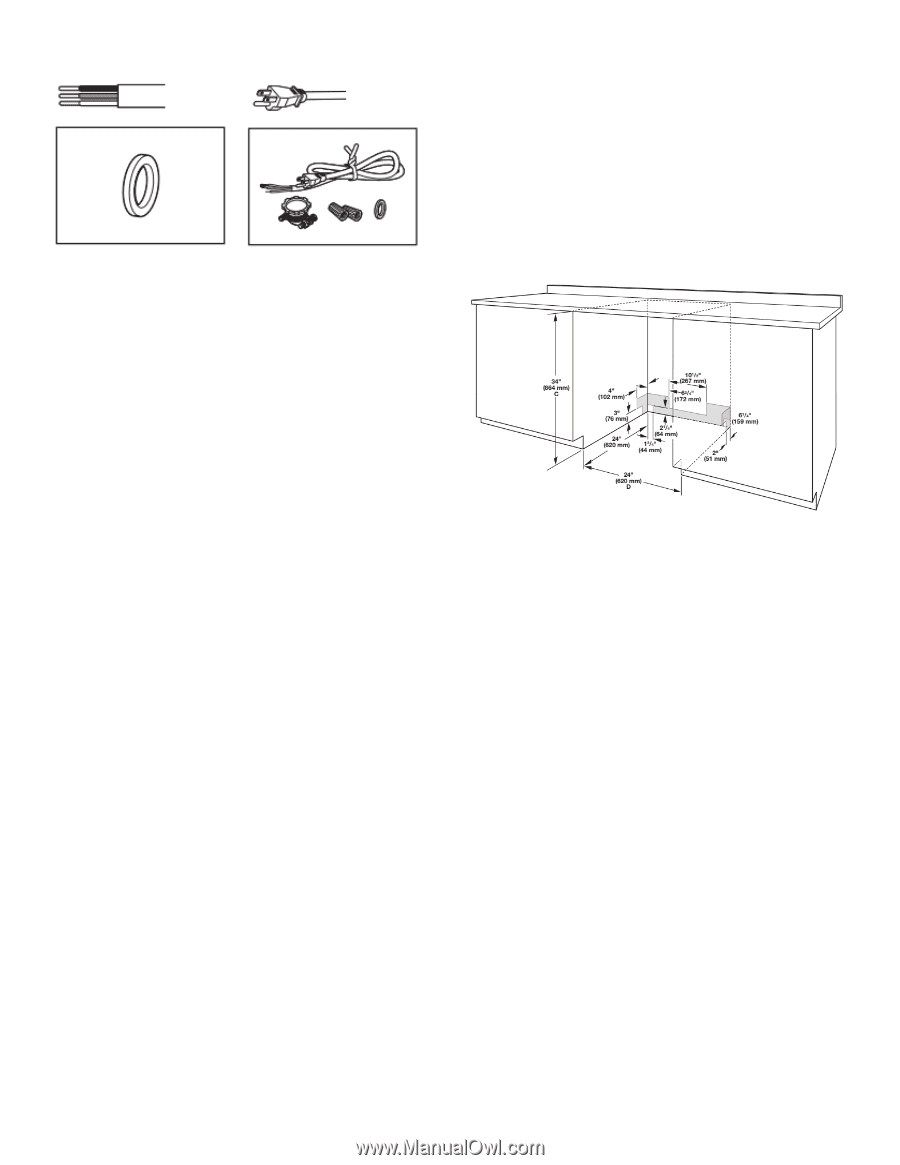
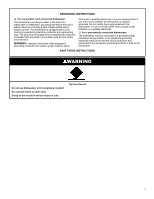
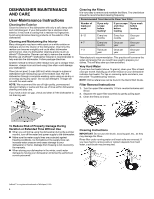
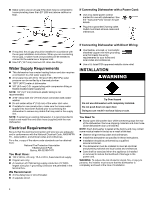
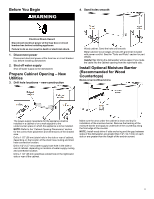
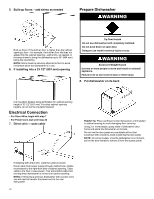
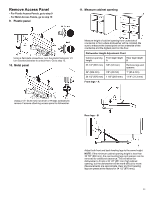
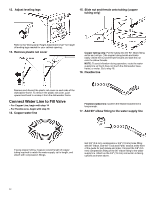
For Direct Wire For Power Cord Cabinet Grommet For 1 1/2" (38 mm) hole in cabinet NOTE: Required for metal cabinets Power Cord Kit Kit typically includes power cord, metallic strain relief, grommet, and twist-on wire connectors (Straight: Whirlpool Part Number 4317824, 90°: Whirlpool Part Number W10278923RP). For proper installation, refer to the installation instructions provided with the kit. NOTE: Be sure to purchase only Whirlpool factory-certified parts and accessories for your appliance. Your installation may require additional parts. To order, refer to the contact information referenced in your Quick Start Guide. Location Requirements Dishwasher must be fully enclosed (top, sides, back, and floor) upon installation. A side panel kit is available from your dealer for installing your dishwasher at the end of your cabinetry. An optional moisture barrier accessory is also available for installing underneath a wooden countertop. Check location where dishwasher will be installed. The location must provide: � Convenient access for loading and unloading dishes. Corner locations require a 2" (51 mm) minimum clearance between the side of the dishwasher door and the wall or cabinet. � Easy access to water, electricity, and drain: • Grounded electrical supply is required. • This dishwasher has a water-heating feature and also requires a connection to a hot water supply line. • Make sure pipes, wires, and drain hose are within the shaded area shown in the "Cabinet Opening Dimensions" section. • Do not run drain lines, water lines, or electrical wiring where they can interfere with or contact dishwasher motor or legs. • Shelter dishwasher and water lines leading to dishwasher against freezing. Damage from freezing is not covered by the warranty. NOTE: If dishwasher will be left unused for a period of time or in a location where it may be subject to freezing, have it winterized by authorized service personnel. • If installed in new construction, flush the water supply line of debris before connecting it to the fill valve. If it is not flushed, debris from the water supply could plug the fill valve screen. � A square opening for proper operation and appearance. � The cabinet front to be perpendicular to floor. � A level floor. Helpful Hint: If floor at front of opening is not level with floor at rear of opening, shims may be used to level dishwasher. NOTE: To avoid shifting during dishwasher operation, shims must be securely attached to the floor. � The location where the dishwasher will be installed must provide clearance between motor and flooring. Motor should not touch the floor. � Do not install dishwasher over carpeted flooring. Cabinet Opening Dimensions Clearances Check that all surfaces have no protrusions that would prohibit dishwasher installation. C. Measured from the lowest point on the underside of the countertop. May be reduced to 33 1/2" (851 mm) by removing the wheels and perforated area of insulation (blanket) on dishwasher. D. Minimum, measured from narrowest point of opening. NOTE: Shaded areas of cabinet walls show where utility connections may be installed. Drain Requirements � A new drain hose is supplied with your dishwasher. If drain hose is not long enough, use a new drain hose with a maximum length of 12 ft. (3.7 m) that meets all current AHAM/ IAPMO test standards, is resistant to heat and detergent, and fits the 1" (25 mm) drain connector of the dishwasher. NOTE: Do not connect multiple drain hoses together. � Make sure to connect drain hose to waste tee or disposer inlet above drain trap in house plumbing and 20" (508 mm) minimum above the floor. It is recommended that the drain hose either be looped up and securely fastened to the underside of the counter or be connected to an air gap. 7
-
 1
1 -
 2
2 -
 3
3 -
 4
4 -
 5
5 -
 6
6 -
 7
7 -
 8
8 -
 9
9 -
 10
10 -
 11
11 -
 12
12 -
13
-
14
-
15
-
16
-
17
-
18
-
19
-
20
-
21
-
22
-
23
-
24
-
25
-
26
-
27
-
28
-
29
-
30
-
31
-
32
-
33
-
34
-
35
-
36
-
37
-
38
-
39
-
40
-
41
-
42
-
43
-
44
-
45
-
46
 |
 |