Whirlpool WDT710PAYM Installation Guide - Page 12
Helpful Tip, NOTES - model
 |
View all Whirlpool WDT710PAYM manuals
Add to My Manuals
Save this manual to your list of manuals |
Page 12 highlights
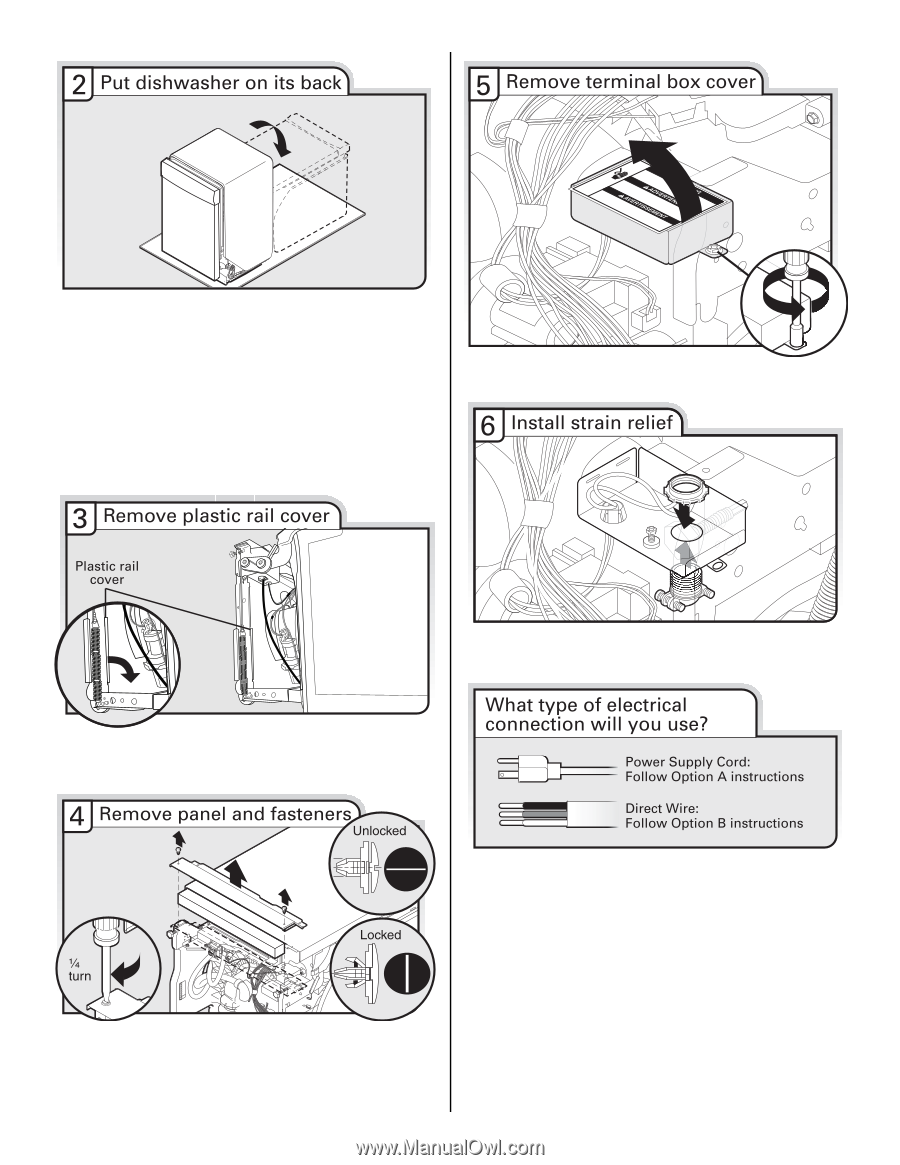
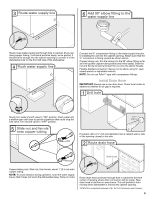
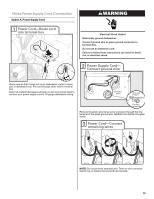
Helpful Tip: Place cardboard under dishwasher until installed in cabinet opening to avoid damaging floor covering. Do not use door panel as a worktable without first covering with a towel to avoid scratching the door panel. Using 2 or more people, grasp sides of dishwasher door frame and place dishwasher on its back. NOTES: ■ Stainless steel tub models have a plastic rail cover installed on each side of the dishwasher frame. ■ If you have a stainless steel tub model, complete Step 3. ■ If you have a plastic tub model, proceed to Step 4. Using a ¹⁄₄" hex head socket, nut driver or Torx T20 screwdriver, remove terminal box cover. Retain for later use. Install a UL Listed/CSA Approved strain relief. Make sure screw heads are facing to the left when tightening conduit nut. Strain relief is provided with the power supply cord kit. Remove and discard the plastic rail cover on each side of the dishwasher frame. To remove the plastic rail cover, push upward and back to unsnap it from the dishwasher frame. NOTE: If using Option B, proceed to "Determine Cabinet Opening," to continue with the installation of your dishwasher. Using a flat-blade screwdriver, turn the plastic fasteners ¹⁄₄ turn to unlock them. Remove panel. Do not remove tech sheet from access panel. 12
-
 1
1 -
2
-
3
-
4
-
5
-
6
-
 7
7 -
 8
8 -
 9
9 -
 10
10 -
 11
11 -
 12
12 -
 13
13 -
 14
14 -
 15
15 -
 16
16 -
 17
17 -
18
-
19
-
20
-
21
-
22
-
23
-
24
-
25
-
26
-
27
-
28
-
29
-
30
-
31
-
32
-
33
-
34
-
35
-
36
-
37
-
38
-
39
-
40
-
41
-
42
-
43
-
44
-
45
-
46
-
47
-
48
 |
 |