Whirlpool WDT710PAYM Installation Guide - Page 22
Complete Installation - door panel
 |
View all Whirlpool WDT710PAYM manuals
Add to My Manuals
Save this manual to your list of manuals |
Page 22 highlights
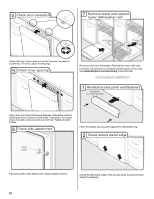
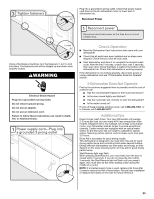
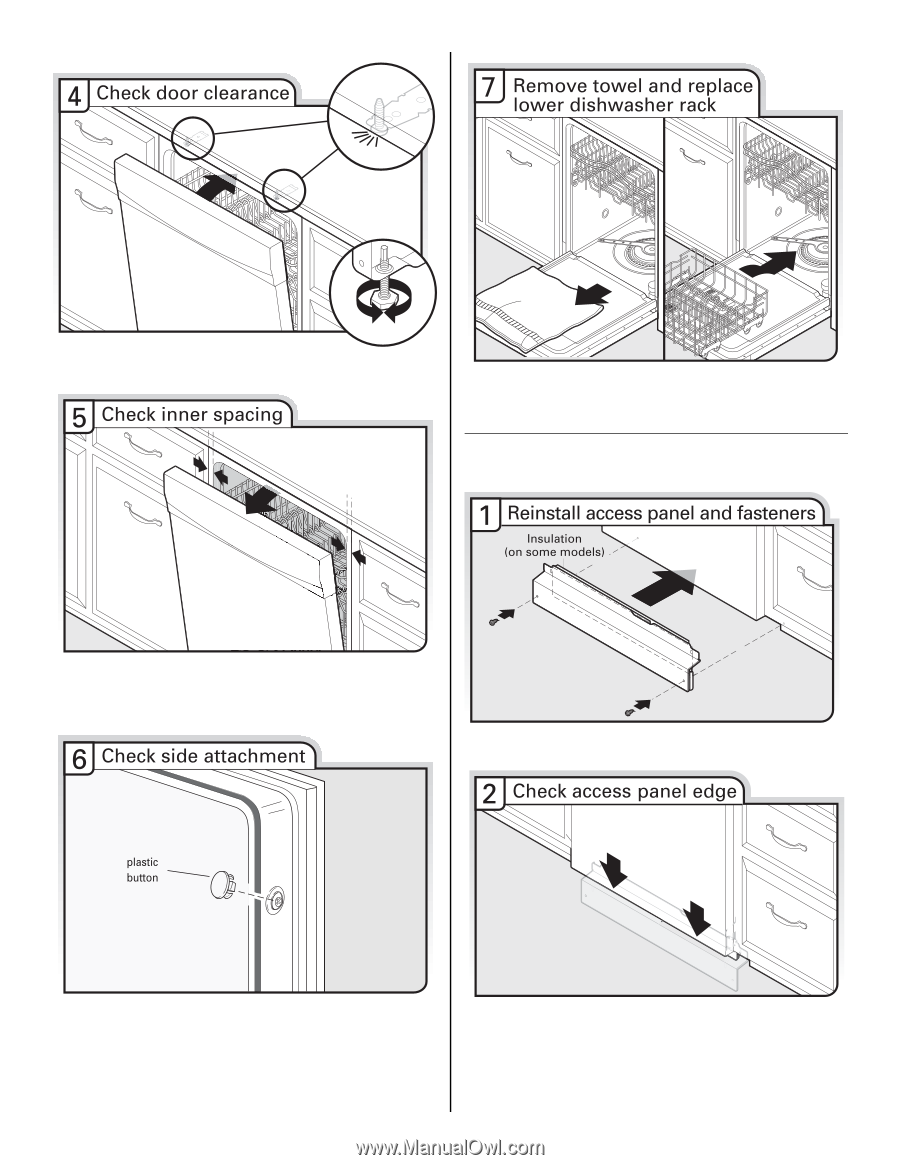
Check that top of door does not contact screws, brackets or countertop. If it does, adjust leveling legs. Remove towel from dishwasher. Reinstall the lower dish rack. If needed, see website for animated representation of this step. Visit www.whirlpool.com/anchoring under FAQ tab. Complete Installation Open door and check that space between dishwasher cabinet opening and tub is equal on both sides. If spacing is not equal, loosen bracket screws secured and shift tub. Tighten bracket screws. Place the plastic access panel against the dishwasher leg. If securing with a side attachment, replace plastic buttons. Check that the lower edge of the access panel touches the floor. Adjust if necessary. 22
-
 1
1 -
2
-
3
-
4
-
5
-
6
-
7
-
8
-
9
-
10
-
11
-
12
-
13
-
14
-
15
-
16
-
 17
17 -
 18
18 -
 19
19 -
 20
20 -
 21
21 -
 22
22 -
 23
23 -
 24
24 -
 25
25 -
 26
26 -
 27
27 -
28
-
29
-
30
-
31
-
32
-
33
-
34
-
35
-
36
-
37
-
38
-
39
-
40
-
41
-
42
-
43
-
44
-
45
-
46
-
47
-
48
 |
 |
22
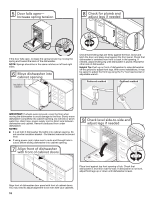
Check that top of door does not contact screws, brackets or
countertop. If it does, adjust leveling legs.
Open door and check that space between dishwasher cabinet
opening and tub is equal on both sides. If spacing is not equal,
loosen bracket screws secured and shift tub. Tighten bracket
screws.
If securing with a side attachment, replace plastic buttons.
Remove towel from dishwasher. Reinstall the lower dish rack.
If needed, see website for animated representation of this step.
Visit
www.whirlpool.com/anchoring
under FAQ tab.
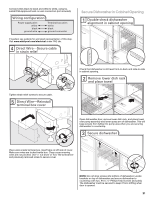
Complete Installation
Place the plastic access panel against the dishwasher leg.
Check that the lower edge of the access panel touches the floor.
Adjust if necessary.