Whirlpool WDT710PAYM Installation Guide - Page 19
Connect to Water Supply, Connect to Drain
 |
View all Whirlpool WDT710PAYM manuals
Add to My Manuals
Save this manual to your list of manuals |
Page 19 highlights
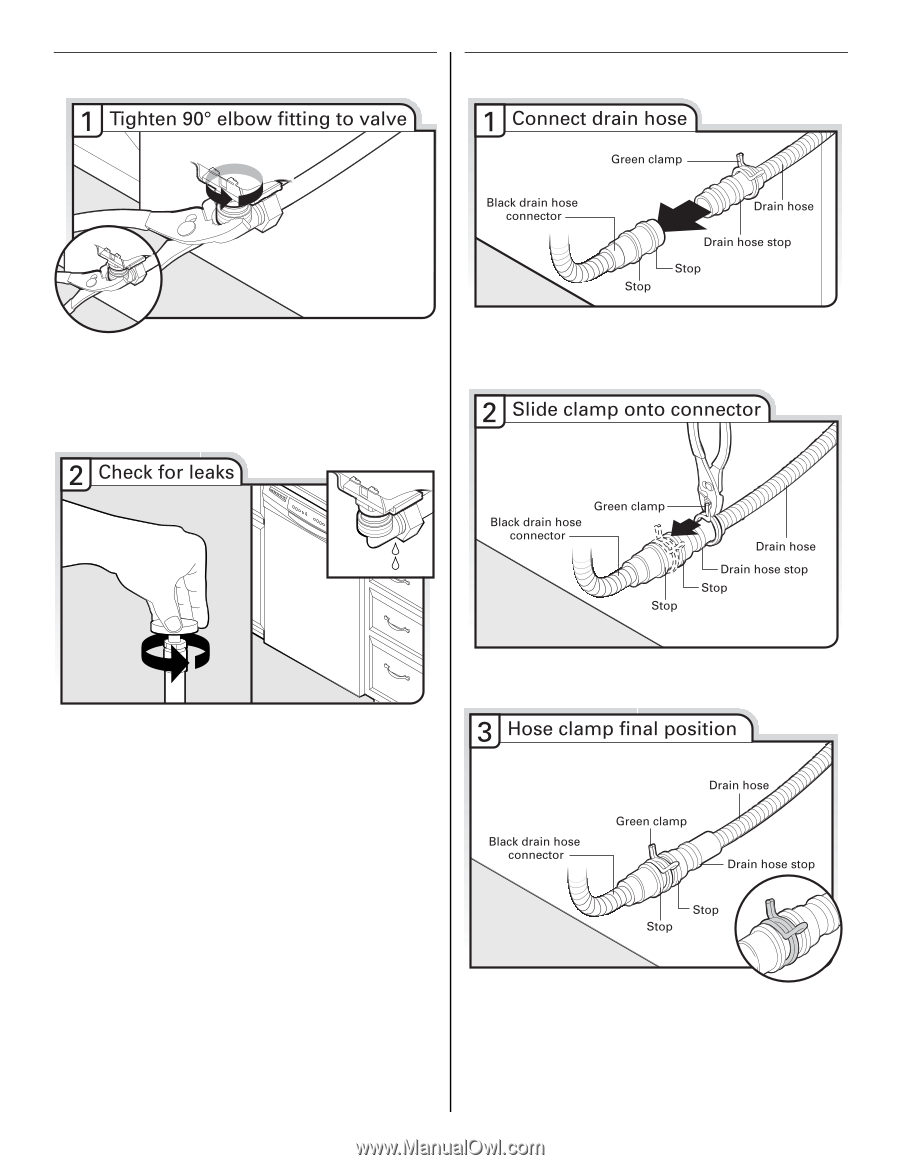
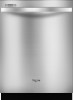
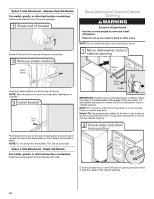
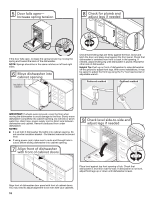
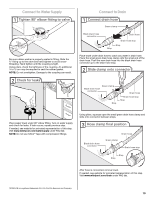
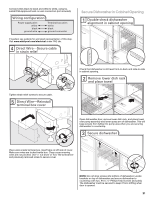
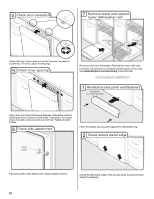
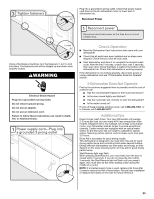
Connect to Water Supply Connect to Drain Be sure rubber washer is properly seated in fitting. Slide the ³⁄₄" fitting up to the valve and hand tighten to avoid crossthreading. Hand tighten until the coupling is tight. Using pliers, check the tightness of the coupling. An additional ¹⁄₄ to ¹⁄₂ turn may be required to seal the rubber gasket. NOTE: Do not overtighten. Damage to the coupling can result. Place towel under drain hose to catch any water in drain hose. Place the small green drain hose clamp onto the small end of the drain hose. Push the new drain hose into the black drain hose connector up to the drain hose stop. Place paper towel under 90° elbow fitting. Turn on water supply and check for leaks. If leak occurs, repeat previous step. If needed, see website for animated representation of this step. Visit www.whirlpool.com/watersupply under FAQ tab. NOTE: Do not use Teflon®† tape with compression fittings. Using pliers, squeeze open the small green drain hose clamp and slide onto connector between stops. After hose is connected, remove towel. If needed, see website for animated representation of this step. Visit www.whirlpool.com/drain under FAQ tab. †®TEFLON is a registered trademark of E.I. Du Pont De Nemours and Company. 19
-
 1
1 -
2
-
3
-
4
-
5
-
6
-
7
-
8
-
9
-
10
-
11
-
12
-
13
-
 14
14 -
 15
15 -
 16
16 -
 17
17 -
 18
18 -
 19
19 -
 20
20 -
 21
21 -
 22
22 -
 23
23 -
 24
24 -
25
-
26
-
27
-
28
-
29
-
30
-
31
-
32
-
33
-
34
-
35
-
36
-
37
-
38
-
39
-
40
-
41
-
42
-
43
-
44
-
45
-
46
-
47
-
48
 |
 |