Xerox 4500N Reference Guide - Page 104
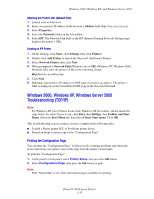
Windows NT 4.x Troubleshooting (TCP/IP), Verifying Settings, Verifying Installation
 |
View all Xerox 4500N manuals
Add to My Manuals
Save this manual to your list of manuals |
Page 104 highlights
Windows NT 4.x Windows NT 4.x Troubleshooting (TCP/IP) This troubleshooting section assumes you have completed the following tasks: ■ Loaded a Phaser printer PCL or PostScript printer driver. ■ Printed and kept a current copy of the "Configuration Page". For information about printing a "Configuration Page", go to Reference/Features/Front Panel on the User Documentation CD-ROM. Verifying Settings 1. Verify the settings in the "Configuration Page." ■ IP Address Source is set to: DHCP, Front Panel, BOOTP, or Auto IP (depending on your network configuration). ■ Current IP Address is set correctly. (Note this address if it is assigned by Auto IP, DHCP, or BOOTP.) ■ Subnet Mask is set correctly (if used). ■ Default Gateway is set correctly (if used). ■ LPR is enabled. Verify that the LPR and AppSocket settings are set as desired. ■ Interpreters: Auto, PCL, or PostScript (depending on your driver). 2. Verify that the client is logged into the network and printing to the correct print queue. The user should also have access to the Phaser print queue. Verifying Installation 1. Right-click the My Network Places icon on the desktop and select Properties. 2. Click the Protocols tab to verify that the TCP/IP protocol has been installed. 3. Click Add to install any components not listed, then restart your computer. 4. Click Start, click Settings, then click Control Panel. 5. Double-click Services. 6. Locate TCP/IP Print Server, then verify these column entries: ■ Status column: Started ■ Startup column: Automatic 7. Click Start, click Settings, then click Printers. 8. Right-click the printer icon, then select Properties. Verify that you have installed the correct driver for your printer. 9. Select the Ports tab. Verify that the IP Address in the Print to the Following Port list is identical to the one on the "Configuration Page." You may need to click the Configure Port button to view the IP address. If necessary, re-select the TCP/IP number used for your printer. Phaser™ 4500 Laser Printer 3-23
-
 1
1 -
2
-
3
-
4
-
5
-
6
-
7
-
8
-
9
-
10
-
11
-
12
-
13
-
14
-
15
-
16
-
17
-
18
-
19
-
20
-
21
-
22
-
23
-
24
-
25
-
26
-
27
-
28
-
29
-
30
-
31
-
32
-
33
-
34
-
35
-
36
-
37
-
38
-
39
-
40
-
41
-
42
-
43
-
44
-
45
-
46
-
47
-
48
-
49
-
50
-
51
-
52
-
53
-
54
-
55
-
56
-
57
-
58
-
59
-
60
-
61
-
62
-
63
-
64
-
65
-
66
-
67
-
68
-
69
-
70
-
71
-
72
-
73
-
74
-
75
-
76
-
77
-
78
-
79
-
80
-
81
-
82
-
83
-
84
-
85
-
86
-
87
-
88
-
89
-
90
-
91
-
92
-
93
-
94
-
95
-
96
-
97
-
98
-
 99
99 -
 100
100 -
 101
101 -
 102
102 -
 103
103 -
 104
104 -
 105
105 -
 106
106 -
 107
107 -
 108
108 -
 109
109 -
110
-
111
-
112
-
113
-
114
-
115
-
116
-
117
-
118
-
119
-
120
-
121
-
122
-
123
-
124
-
125
-
126
-
127
-
128
-
129
-
130
-
131
-
132
-
133
-
134
-
135
-
136
-
137
-
138
-
139
-
140
-
141
-
142
-
143
-
144
-
145
-
146
-
147
-
148
-
149
-
150
-
151
-
152
-
153
-
154
-
155
-
156
-
157
-
158
-
159
-
160
-
161
-
162
-
163
-
164
-
165
-
166
-
167
-
168
-
169
-
170
-
171
-
172
-
173
-
174
-
175
-
176
-
177
-
178
-
179
-
180
-
181
 |
 |