Xerox 4500N Reference Guide - Page 108
Enter a Printer Name or IP, Add Xerox TCP/IP Port
 |
View all Xerox 4500N manuals
Add to My Manuals
Save this manual to your list of manuals |
Page 108 highlights
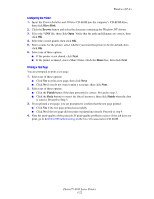
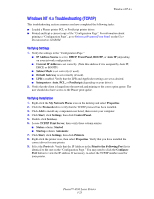
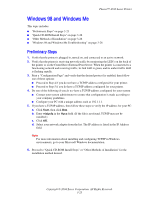
Windows 98 and Windows Me Configuring a Port The Xerox TCP/IP Printer Port Wizard guides you step-by-step through the following procedures: ■ Choosing a name for the new port ■ Identifying a printer by its DNS Name or IP Address ■ (Alternatively) Identifying a printer using the automatic Printer Discovery feature 1. Click Next to proceed with the port installation. The wizard verifies the port name and printer address, then automatically configures the remaining port settings. Any errors detected in printer identification are displayed in a dialog box requesting Additional Information. 2. In the Add Xerox TCP/IP Port window: ■ Enter a unique name for the port being added in the Enter a Port Name section. ■ Enter the printer's host name or IP Address in the Enter a Printer Name or IP Address section. 3. Click Next. Note To locate Xerox printers on your local area network, select Auto Printer Discovery, then click Refresh. The Xerox TCP/IP Port Monitor searches the network for Xerox printers and displays them in a list. Select your desired printer from the list, then click OK. Completing the Printer Port TCP/IP After the port settings have been configured and verified, a Completing dialog box appears summarizing all the settings. You can change or select printer port settings. 1. Select one of these options: ■ Click Finish to complete the printer port setup. ■ Click Back to change the settings. When you have completed the changes, click Finish to complete the printer-port setup. 2. Click OK to exit Printer Properties. PhaserPort Software Note PhaserPort is the preferred utility for PostScript installations. For PCL installations, go to "Xerox TCP/IP Port Monitor" in this section. The Windows installer installs PhaserPort for Windows (for those installations using PostScript drivers). PhaserPort for Windows is a Xerox print monitor for printing over Windows 98 or Windows Me TCP/IP peer-to-peer networks. Phaser™ 4500 Laser Printer 3-27
-
 1
1 -
2
-
3
-
4
-
5
-
6
-
7
-
8
-
9
-
10
-
11
-
12
-
13
-
14
-
15
-
16
-
17
-
18
-
19
-
20
-
21
-
22
-
23
-
24
-
25
-
26
-
27
-
28
-
29
-
30
-
31
-
32
-
33
-
34
-
35
-
36
-
37
-
38
-
39
-
40
-
41
-
42
-
43
-
44
-
45
-
46
-
47
-
48
-
49
-
50
-
51
-
52
-
53
-
54
-
55
-
56
-
57
-
58
-
59
-
60
-
61
-
62
-
63
-
64
-
65
-
66
-
67
-
68
-
69
-
70
-
71
-
72
-
73
-
74
-
75
-
76
-
77
-
78
-
79
-
80
-
81
-
82
-
83
-
84
-
85
-
86
-
87
-
88
-
89
-
90
-
91
-
92
-
93
-
94
-
95
-
96
-
97
-
98
-
99
-
100
-
101
-
102
-
 103
103 -
 104
104 -
 105
105 -
 106
106 -
 107
107 -
 108
108 -
 109
109 -
 110
110 -
 111
111 -
 112
112 -
 113
113 -
114
-
115
-
116
-
117
-
118
-
119
-
120
-
121
-
122
-
123
-
124
-
125
-
126
-
127
-
128
-
129
-
130
-
131
-
132
-
133
-
134
-
135
-
136
-
137
-
138
-
139
-
140
-
141
-
142
-
143
-
144
-
145
-
146
-
147
-
148
-
149
-
150
-
151
-
152
-
153
-
154
-
155
-
156
-
157
-
158
-
159
-
160
-
161
-
162
-
163
-
164
-
165
-
166
-
167
-
168
-
169
-
170
-
171
-
172
-
173
-
174
-
175
-
176
-
177
-
178
-
179
-
180
-
181
 |
 |