Xerox 6400S WorkCentre 6400 User Guide - Page 111
Sending an Internet Fax - scan email
 |
UPC - 095205743579
View all Xerox 6400S manuals
Add to My Manuals
Save this manual to your list of manuals |
Page 111 highlights
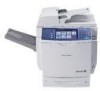
Faxing Sending an Internet Fax If you have an SMTP (email) server connected to your network, you can send a document to an email address. This feature eliminates the need for a dedicated telephone line and the associated service costs. When you send an internet fax, the document is scanned and sent to an email address. Note: Before you can send an Internet Fax, the Internet Fax service must be enabled in CentreWare IS, and an SMTP server must be configured. For more information see the System Administrator Guide and CentreWare IS help. To send an Internet Fax: 1. Load your document. • Document Glass: Place the first page of the document you are faxing facedown on the document glass with the top of the page toward the left side of the printer. • Document Feeder: Remove any staples and paper clips from pages and insert them face up in the document feeder with the top of the page entering the document feeder first. • On the control panel, press the Services Home button. 2. Select the Internet Fax icon. 3. Select New Recipient. 4. Enter the recipient's email address using the key pad, or select Dialing Characters to use the touch screen. 5. Select Add. 6. Adjust fax options. For more information, see Selecting Fax Options on page 113. 7. Press the Start button. The printer scans the pages and sends the document as an email attachment (PDF or TIFF format) when all pages have been scanned. 8. To print a confirmation page displaying the fax transmission status, turn on the confirmation report option. For more information see Printing a Confirmation Report on page 118. WorkCentre 6400 Multifunction Printer 111 User Guide
-
 1
1 -
2
-
3
-
4
-
5
-
6
-
7
-
8
-
9
-
10
-
11
-
12
-
13
-
14
-
15
-
16
-
17
-
18
-
19
-
20
-
21
-
22
-
23
-
24
-
25
-
26
-
27
-
28
-
29
-
30
-
31
-
32
-
33
-
34
-
35
-
36
-
37
-
38
-
39
-
40
-
41
-
42
-
43
-
44
-
45
-
46
-
47
-
48
-
49
-
50
-
51
-
52
-
53
-
54
-
55
-
56
-
57
-
58
-
59
-
60
-
61
-
62
-
63
-
64
-
65
-
66
-
67
-
68
-
69
-
70
-
71
-
72
-
73
-
74
-
75
-
76
-
77
-
78
-
79
-
80
-
81
-
82
-
83
-
84
-
85
-
86
-
87
-
88
-
89
-
90
-
91
-
92
-
93
-
94
-
95
-
96
-
97
-
98
-
99
-
100
-
101
-
102
-
103
-
104
-
105
-
 106
106 -
 107
107 -
 108
108 -
 109
109 -
 110
110 -
 111
111 -
 112
112 -
 113
113 -
 114
114 -
 115
115 -
 116
116 -
117
-
118
-
119
-
120
-
121
-
122
-
123
-
124
-
125
-
126
-
127
-
128
-
129
-
130
-
131
-
132
-
133
-
134
-
135
-
136
-
137
-
138
-
139
-
140
-
141
-
142
-
143
-
144
-
145
-
146
-
147
-
148
-
149
-
150
-
151
-
152
-
153
-
154
-
155
-
156
-
157
-
158
-
159
-
160
-
161
-
162
-
163
-
164
-
165
-
166
-
167
-
168
-
169
-
170
-
171
-
172
-
173
-
174
-
175
-
176
-
177
-
178
-
179
-
180
-
181
-
182
-
183
-
184
-
185
-
186
-
187
-
188
-
189
-
190
-
191
-
192
-
193
-
194
-
195
-
196
-
197
-
198
-
199
-
200
-
201
-
202
-
203
-
204
-
205
-
206
-
207
-
208
-
209
-
210
-
211
-
212
-
213
-
214
-
215
-
216
-
217
-
218
-
219
-
220
-
221
-
222
-
223
-
224
-
225
-
226
-
227
-
228
-
229
-
230
-
231
-
232
-
233
-
234
-
235
-
236
-
237
-
238
-
239
-
240
-
241
-
242
-
243
-
244
-
245
-
246
-
247
-
248
 |
 |