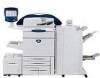
Xerox DC240 DocuColor 240/250 Training and Information Guide in PDF format. - Page 16
Simple Copying, Load the documents, Press the Copy button, Select the Features, Enter the Quantity
 |
View all Xerox DC240 manuals
Add to My Manuals
Save this manual to your list of manuals |
Page 16 highlights
DocuColor 240/250 Simple Copying Before making copies on your machine, you need to determine what you want to copy and how many copies you want to make. In this section, you will learn the 6 simple steps to follow when making copies: 1. Load the documents A choice of document input areas is available. These are: • A Document Handler for multiple documents. Up to 250 documents can be scanned at one time using the Document Handler. Ensure the documents are of the same size, in good condition and all staples and paper clips are removed. Load the documents face up with the first page on top with the headings towards the back or left of the machine. Position the guides to just touch the edge of the documents. • A document glass: Used to scan only one original at a time and suitable for any type of document up to a maximum size of 11"x17". Place the document face down, align with the top of the registration arrow near the upper left hand corner of the document glass. Lower the document handler. 2. Press the Copy button Pressing the Clear All (AC) button once will cancel any previous screen programming selections. Press the Copy button and select the Basic Copying tab. 3. Select the Features The features available on the Basic Copying tab are the ones used most often. They allow you to program the standard features for a copy job. On touching the button for the required feature, the button changes to blue. If a More... button is selected additional options for that feature become available. 4. Enter the Quantity On your machine the maximum copy quantity is 9999. Use the numeric keypad to enter the number of copies. The number entered is displayed in the top right hand corner of the touch screen. To cancel an incorrect entry, press the C button and enter the correct quantity. 5. Press Start Once you have pressed Start, each document is scanned once. A screen is displayed showing information about your copy job. 6. Identify your job in the Queue. Press the Job Status button on the control panel to display the print queue. Your job will be displayed in the queue. If there are no jobs in the queue your job may have already been processed. DocuColor 240/250 Training and Information Guide 16
-
 1
1 -
2
-
3
-
4
-
5
-
6
-
7
-
8
-
9
-
10
-
 11
11 -
 12
12 -
 13
13 -
 14
14 -
 15
15 -
 16
16 -
 17
17 -
 18
18 -
 19
19 -
 20
20 -
 21
21 -
22
-
23
-
24
-
25
-
26
-
27
-
28
-
29
-
30
-
31
-
32
-
33
-
34
-
35
-
36
-
37
-
38
-
39
-
40
-
41
-
42
-
43
-
44
-
45
-
46
-
47
-
48
-
49
-
50
-
51
-
52
-
53
-
54
-
55
-
56
-
57
-
58
-
59
-
60
-
61
-
62
-
63
-
64
-
65
-
66
-
67
-
68
-
69
-
70
-
71
-
72
-
73
-
74
-
75
-
76
-
77
-
78
-
79
-
80
-
81
-
82
-
83
-
84
-
85
-
86
-
87
-
88
-
89
-
90
-
91
-
92
-
93
-
94
-
95
-
96
-
97
-
98
-
99
-
100
-
101
-
102
-
103
-
104
-
105
-
106
-
107
-
108
-
109
-
110
-
111
-
112
-
113
-
114
-
115
-
116
-
117
-
118
-
119
-
120
-
121
-
122
-
123
-
124
-
125
-
126
-
127
-
128
-
129
-
130
-
131
-
132
-
133
-
134
-
135
-
136
-
137
-
138
-
139
-
140
-
141
-
142
-
143
-
144
-
145
-
146
-
147
-
148
-
149
-
150
-
151
-
152
-
153
-
154
-
155
-
156
-
157
-
158
-
159
-
160
-
161
-
162
-
163
-
164
-
165
-
166
-
167
-
168
-
169
-
170
-
171
-
172
-
173
-
174
-
175
-
176
-
177
-
178
-
179
-
180
-
181
-
182
-
183
-
184
-
185
-
186
-
187
-
188
-
189
-
190
-
191
 |
 |
