Yamaha CDC-735 Owner's Manual - Page 18
Random sequential tape programming, Display information during programming
 |
View all Yamaha CDC-735 manuals
Add to My Manuals
Save this manual to your list of manuals |
Page 18 highlights
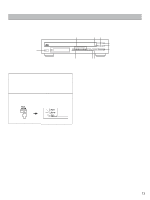
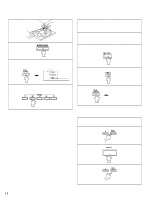
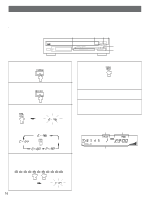
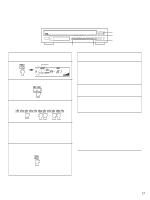
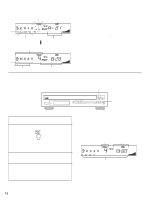
Display information during programming Œ Œ Shows the side of the tape and the program number for the track to be set next. Shows the selected disc and track number. Ž Shows the total remaining time on the side of the tape. Programmed track numbers illuminate and unprogrammed ones flash on and off. * If "A-01" does not appear in the display after the PROG button is pressed, press the TIME display mode-select button. Ž s Random sequential tape programming The unit will automatically program tracks on a disc in random sequential order for recording to tape. 3,4 2 1 Follow step 1 - 4 on page 16. 2 RANDOM * The unit will automatically program tracks for side A and side B separately considering the tape's total time. 3 Begin recording on the tape deck and press the PLAY/PAUSE button on this unit at the same time. 4 The unit will pause at the end of side A of the tape. Turn the tape over to side B. Resume recording and, at the same time, press the PLAY/PAUSE button on this unit. Notes q Because the programmed data changes every time the RANDOM button is pressed, the amount of time remaining at the end of the tape also changes accordingly. q If the tape's length is not enough, all tracks cannot be programmed. In this case, exchange the tape for a longer one. q In step 2, you can check the program data for side A and side B. Œ Ž Œ Shows the number of programmed tracks for each side. Shows the total time of programmed tracks for each side. Ž Shows the programmed track numbers for each side. 18
-
 1
1 -
2
-
3
-
4
-
5
-
6
-
7
-
8
-
9
-
10
-
11
-
12
-
 13
13 -
 14
14 -
 15
15 -
 16
16 -
 17
17 -
 18
18 -
 19
19 -
 20
20
 |
 |
