Yamaha CDX-480 Owner's Manual - Page 16
Manual tape-programming, PAUSE, Notes, SYNCHRO, Notes on tape programming
 |
View all Yamaha CDX-480 manuals
Add to My Manuals
Save this manual to your list of manuals |
Page 16 highlights
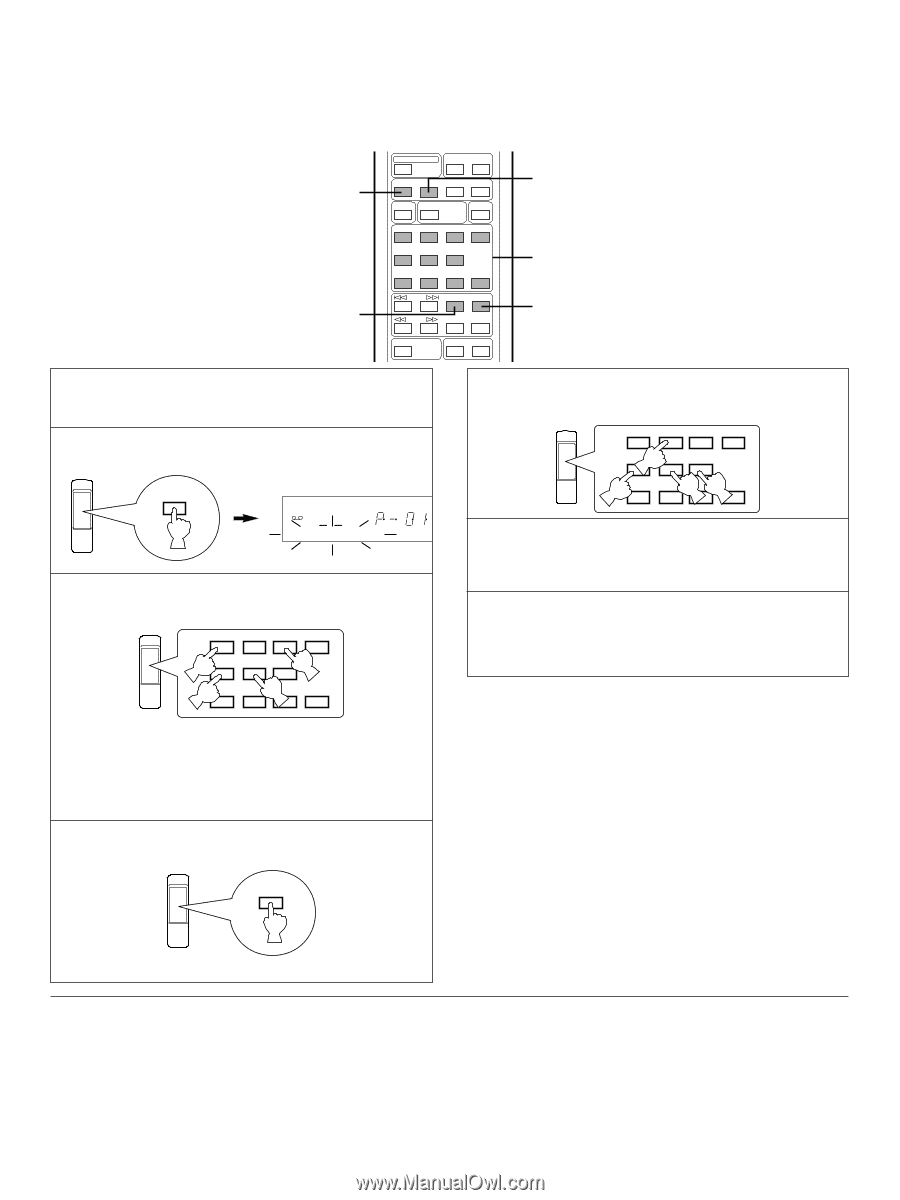
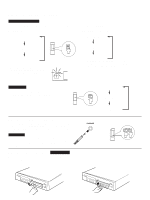
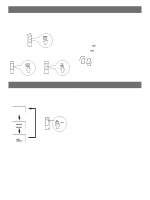
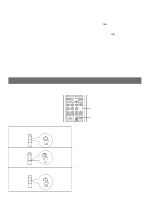
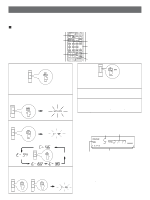
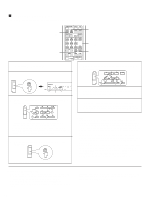
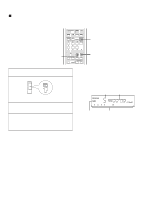
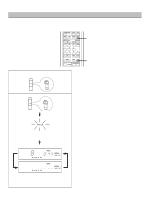
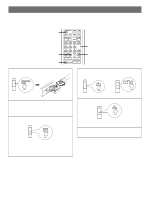
Ⅲ Manual tape-programming This is for recording desired tracks in any desired order onto a tape. 2 7 OPEN/CLOSE DIMMER TIME PROG TAPE CLEAR PEAK SPACE 1 S/F 2 RANDOM REPEAT 3 +10 4 5 6 7 8 9 0 SKIP PAUSE PLAY SEARCH INDEX STOP - OUTPUT LEVEL + SYNCHRO 4 3, 5 6, 7 1 Follow steps 1 - 4 on page 15. 2 PROG PROGRAM A TOTAL REMAIN 1 2 3 4 5 6 7 8 9 10 11 12 3 Select the track numbers (to be recorded on side A) in the desired order. 1 2 3 + 10 4 5 6 7 8 9 0 * Programmed track numbers are illuminated on the display. You can select a track which can be programmed for the remaining time of (the side of) the tape from track numbers flashing on the display, but you cannot select any darkened track number. 4 When track selection for side A is finished, press the TAPE button. TAPE 5 Select the track numbers (to be recorded on side B) in the desired order. 1 2 3 + 10 4 5 6 7 8 9 0 6 Begin recording on the tape deck and press the PLAY button on this unit at the same time. 7 The unit will pause at the end of side A of the tape. Turn the tape over to side B. Resume recording and, at the same time, press the PLAY or PAUSE button on this unit. Notes • If, in step 3 or 5, "E rr" appears in the display, the track number just selected cannot be programmed because there is not enough time remaining on the tape. However, at this time, if any other track number is flashing continuously in the display, you can program it instead of the unprogrammable one. • In step 3 or 5, each time a selection is made, the track number and the tape's remaining time will be displayed, and then the display will change to indicate the number of the next program. • CD synchronized recording function can be used if your tape deck is compatible with it. In this case, in step 6 and 7, press the SYNCHRO button and then press the PLAY button on this unit's remote control transmitter. Recording automatically begins. (For details, refer to page 19.) A pause mode is programmed. Notes on tape programming • To check, cancel or correct program data, refer to page 14. * In checking the program data, note that "Pu" appears between track numbers for side A and side B. • Up to a maximum of 25 tracks can be programmed. If, however, the PAUSE mode is inserted, it is counted as one track. 16 • This function can be used to program up to track number 24. If the disc has more than 24 tracks, track number 25 and thereafter will not be programmed.
-
 1
1 -
2
-
3
-
4
-
5
-
6
-
7
-
8
-
9
-
10
-
 11
11 -
 12
12 -
 13
13 -
 14
14 -
 15
15 -
 16
16 -
 17
17 -
 18
18 -
 19
19 -
 20
20 -
 21
21 -
22
 |
 |