Yamaha DJX-II Owner's Manual - Page 9
Panel Controls
 |
View all Yamaha DJX-II manuals
Add to My Manuals
Save this manual to your list of manuals |
Page 9 highlights
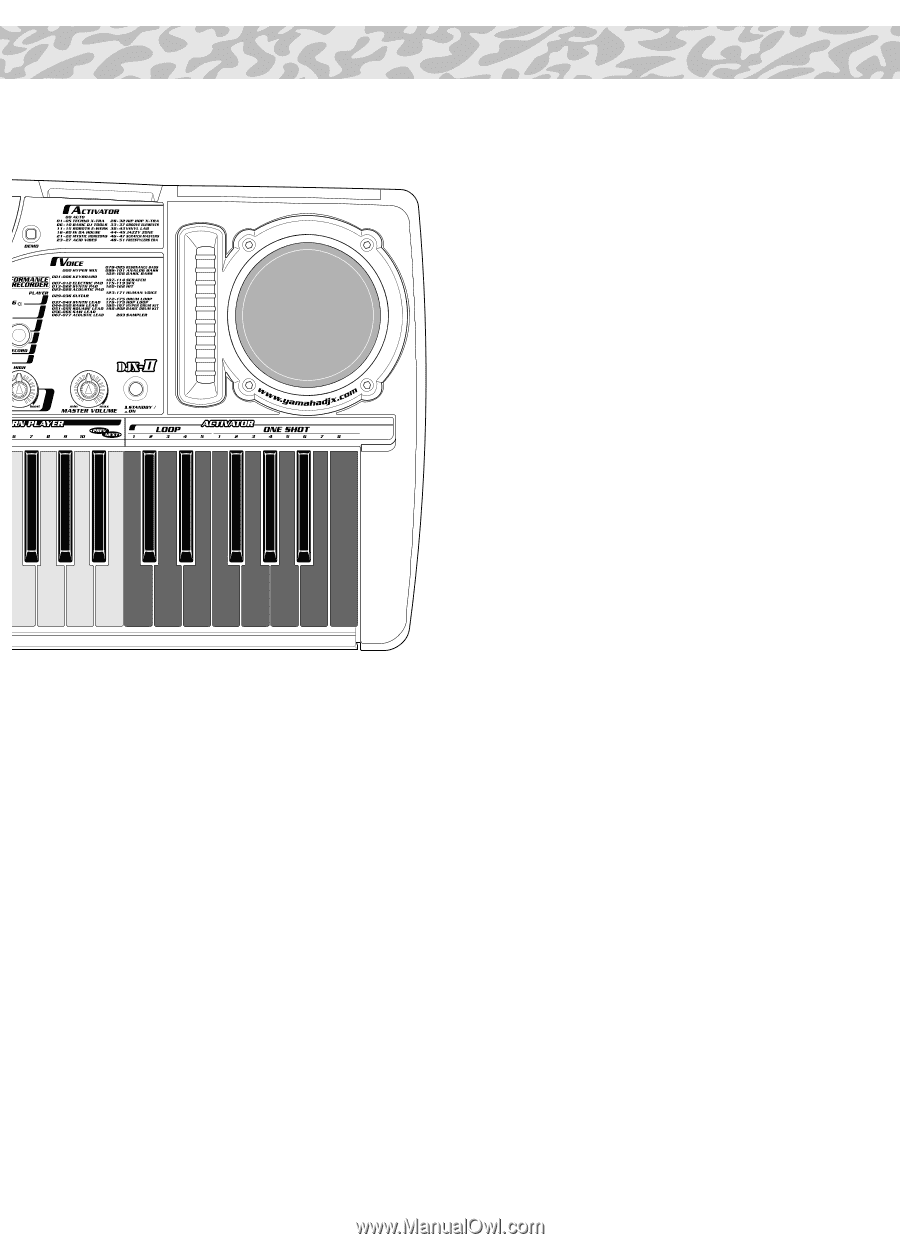
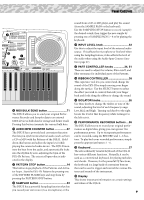
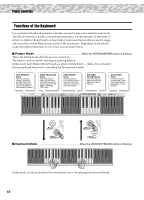
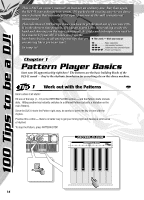
Panel Controls e !8 wq !0 MIDI BULK SEND button 71 The DJX-II allows you to send your original Performance Recorder and Sampler data to an external MIDI device as bulk data for storage and future recall. Pressing this button transmits the current bulk data. !1 AUDIO BPM COUNTER button 67 The DJX-II has a powerful and convenient function that lets you synchronize external audio (such as from a CD or MD) with the Patterns of the DJX-II. Hold down this button and adjust the input level while playing the connected audio device. The DJX-II monitors the beat from the audio, and automatically locks into the rhythm by auto-adjusting the bpm of the DJX-II's Pattern. The extracted bpm value is indicated in the display. !2 PATTERN STOP button 14 This button stops playback of the Patterns and Activator loops. Start the DJX-II's Patterns by pressing one of the PATTERN PLAYER keys and stop them by pressing the PATTERN STOP button. !3 SAMPLER button 53 The DJX-II has a powerful Sampling function that lets you record your own voice (via a microphone) or the sound from a CD or MD player, and play the sound (from the SAMPLE PADS or the keyboard). Use the SAMPLING/STOP button to record (sample) the desired sound, then trigger the new sample by pressing one of SAMPLE PADS 1 - 6 or by playing the keyboard. !4 INPUT LEVEL knob 53 Use this to adjust the input level of the external audio source. This affects the microphone or line level when using the Sampling feature; it also affects the level of the audio when using the Audio bpm Counter function (page 67). !5 PART CONTROLLER knobs 34, 51 These are used to adjust the volume, filter cutoff, and filter resonance for individual parts of the Patterns. !6 RIBBON CONTROLLER 38 This expressive tool lets you control and change the sound of the DJX-II by simply moving your finger along the surface. Use the SELECT button to select the effect you wish to control, then rub your finger back and forth along the ribbon to change the sound. !7 ISOLATOR knobs 26 Use these knobs to change the timbre or tone of the sound, adjusting the level of each frequency range: Low, Mid, and High. Turning each knob to the right boosts the level at that frequency, while turning it to the left cuts it. !8 PERFORMANCE RECORDER buttons ... 56 The DJX-II allows you to record your original performances as digital data, giving you even greater live performance power. Up to six separate performances can be recorded, using the RECORD and 1 - 6 buttons. To play back your recorded performance, simply press the appropriate button: 1 - 6. !9 Keyboard 27 The extraordinarily versatile keyboard of the DJX-II has various different functions. Naturally, it can be used as a conventional keyboard, for playing melodies and chords. However, for the powerful DJ functions, the keyboard is a large bank of convenient buttons that can be used to trigger and control the various Patterns and sounds of the instrument. @0 Display This shows important information on certain settings and values of the DJX-II. 9
-
 1
1 -
2
-
3
-
 4
4 -
 5
5 -
 6
6 -
 7
7 -
 8
8 -
 9
9 -
 10
10 -
 11
11 -
 12
12 -
 13
13 -
 14
14 -
15
-
16
-
17
-
18
-
19
-
20
-
21
-
22
-
23
-
24
-
25
-
26
-
27
-
28
-
29
-
30
-
31
-
32
-
33
-
34
-
35
-
36
-
37
-
38
-
39
-
40
-
41
-
42
-
43
-
44
-
45
-
46
-
47
-
48
-
49
-
50
-
51
-
52
-
53
-
54
-
55
-
56
-
57
-
58
-
59
-
60
-
61
-
62
-
63
-
64
-
65
-
66
-
67
-
68
-
69
-
70
-
71
-
72
-
73
-
74
-
75
-
76
-
77
-
78
-
79
-
80
-
81
-
82
-
83
-
84
-
85
-
86
-
87
-
88
-
89
-
90
-
91
-
92
-
93
-
94
-
95
-
96
-
97
-
98
-
99
-
100
 |
 |