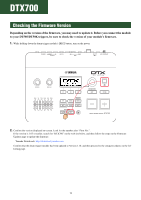
Yamaha DT50K Drum Trigger Module Setup Manual for DT50S/DT50K - Page 14
Storing Pad Types, 3. Selecting a Voice, 4. Storing Voices
 |
View all Yamaha DT50K manuals
Add to My Manuals
Save this manual to your list of manuals |
Page 14 highlights
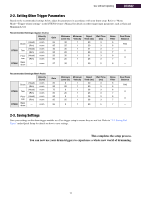
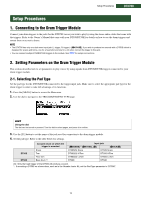
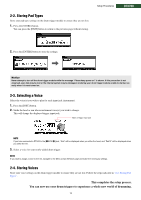
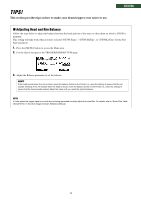
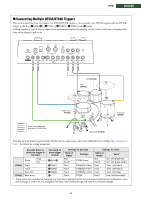
2-2. Storing Pad Types Store your pad type settings on the drum trigger module to ensure they are not lost. 1. Press the [STORE] button. You can press the [EXIT] button to return to the previous page without storing. Setup Procedures DTX700 2. Press the [ENTER] button to store the settings. Notice Never attempt to turn off the drum trigger module while the message "Please keep power on" is shown. If this precaution is not observed, user data may be lost or the internal system may be damaged, rendering your drum trigger module unable to startup normally when it is next turned on. 2-3. Selecting a Voice Select the voice(s) you wish to play for each input jack (instrument). 1. Press the [INST] button. 2. Strike the head or rim whose instrument voice(s) you wish to change. This will change the displayed trigger input jack. Name of trigger input jack NOTE If you have connected a DT50S to the [oKICK/!0] jack, "Kick" will be displayed when you strike the head, and "Pad10" will be displayed when you strike the rim. 3. Select a voice for your newly-added drum trigger. NOTE If you wish to assign a voice to the rim, navigate to the Menu area's Kit/Voice page and make the necessary settings. 2-4. Storing Voices Store your voice settings on the drum trigger module to ensure they are not lost. Follow the steps indicated in "2-2. Storing Pad Types". This completes the setup process. You can now use your drum triggers to experience a whole new world of drumming. 14
-
 1
1 -
2
-
3
-
4
-
5
-
6
-
7
-
8
-
 9
9 -
 10
10 -
 11
11 -
 12
12 -
 13
13 -
 14
14 -
 15
15 -
 16
16 -
 17
17 -
 18
18 -
 19
19 -
20
-
21
-
22
-
23
-
24
-
25
-
26
-
27
-
28
-
29
-
30
 |
 |
