Yamaha DVD-CX1 Owners Manual - Page 28
Video menu, Adjusting the screen position when using progressive output, Digital picture mode
 |
View all Yamaha DVD-CX1 manuals
Add to My Manuals
Save this manual to your list of manuals |
Page 28 highlights
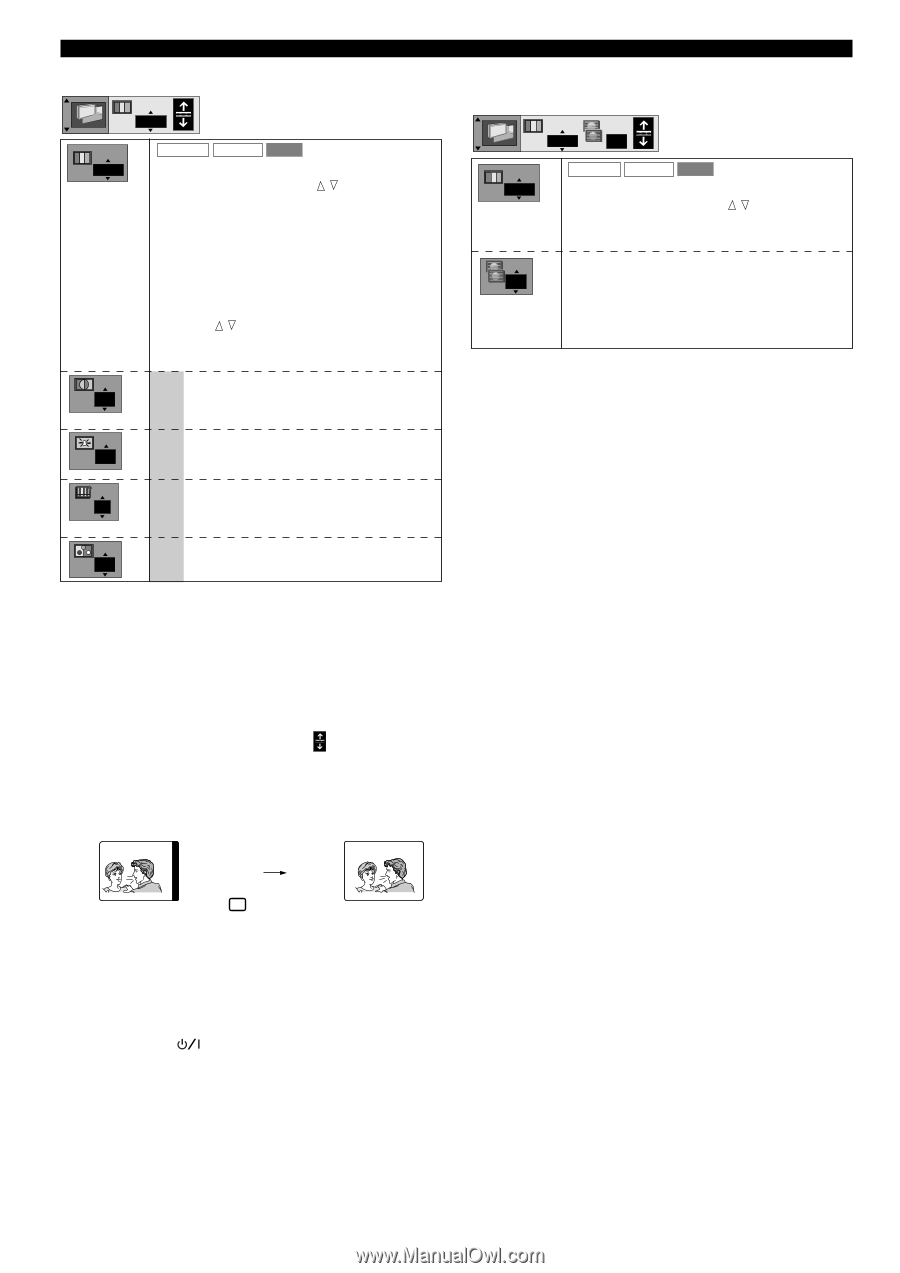
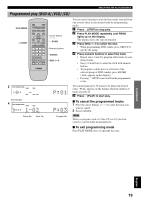
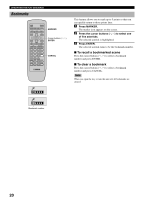
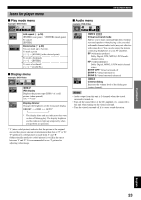
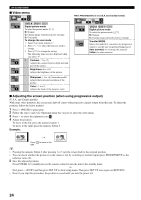
ON-SCREEN MENU I Video menu N DVD-A DVD-V VCD N Digital picture mode To select the picture mode: [ , ] N: Normal C: Cinema image (suited for movie viewing) U: User mode To change the user mode 1 Select User mode and press w. 2 Press (q, w) to select the item you wish to change. 3 Press ( , ) to change the setting. The following items are also displayed when you select 'U'. U Contrast (-7 to +7) 0 Adjusts the contrast between light and dark part of the picture. Brightness (0 to +15) 0 Adjusts the brightness of the picture. Sharpness (-6 to +6) (Australia model) 0 Adjusts the horizontal resolution of the picture. Color (-7 to +7) 0 Adjusts the shade of the picture's color. When PROGRESSIVE is on (U.S.A. and Canada models) N Auto DVD-A DVD-V VCD N Digital picture mode To select the picture mode: [ , ] N: Normal C: Cinema image (suited for movie viewing) Transfer MODE Auto Selects the method of conversion for progressive output to suit the type of material being played. Auto (normal): for viewing film material Video: for video material I Adjusting the screen position (when using progressive output) (U.S.A. and Canada models) With some video monitors, the screen may shift off center with progressive signals output from this unit. To adjust the position, follow the below method. 1 Press d (PAUSE) to pause play. 2 Follow the steps 1 and 2 on 'Operating menu bar' on p.21 to show the video menu. 3 Press w to select the rightmost icon ( ). 4 Adjust the position. To move to the left, press the numeric button 1. To move to the right, press the numeric button 3. Example: Press 3 to move to the right. y • Pressing the numeric button 2 after pressing 1 or 3 sets the screen back to the original position. • You can check whether the picture is in the center or not by switching to normal output (press PROGRESSIVE so the indicator turns off). 5 Save the adjusted position. Press POWER (standby/on) on the remote control to turn the unit to the standby mode. or First press a (STOP) and then press SET UP to show setup menu. Then press SET UP once again (or RETURN). • Even if you skip this procedure, the position is saved until you turn the power off. 24
-
 1
1 -
2
-
3
-
4
-
5
-
6
-
7
-
8
-
9
-
10
-
11
-
12
-
13
-
14
-
15
-
16
-
17
-
18
-
19
-
20
-
21
-
22
-
 23
23 -
 24
24 -
 25
25 -
 26
26 -
 27
27 -
 28
28 -
 29
29 -
 30
30 -
 31
31 -
 32
32 -
 33
33 -
34
-
35
-
36
 |
 |