Yamaha MCX-2000 MCXSP10 Manual - Page 29
Connecting External Devices, Connecting to the AC Power
 |
UPC - 027108922959
View all Yamaha MCX-2000 manuals
Add to My Manuals
Save this manual to your list of manuals |
Page 29 highlights
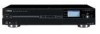
Connecting External Devices Connect all relevant devices referring to the section "Panel Descriptions" (page 7) and the setup illustration below. Make sure each device is turned off before making connections. VIDEO IN Video pin cable (supplied) Audio pin cable (supplied) W_LAN ANT VIDEO T S VIDEO VIDEO T CAUTION XM RISK OF ELECTRIC SHOCK DO NOT OPEN LINK/DATA 10/100 LAN IN REMOTE RS-232C FM ANT 75Ω UNBAL. IN OUT L IN OUT R OPTICAL AUDIO ANALOG T WE87930-U-1 MODEL NO. MCX-2000 MADE IN MALAYSIA THIS PRODUCT COMPLIES WITH DHHS RULES 21 CFR SUBCHAPTER J APPLICABLE AT DATE OF MANUFACTURE YAMAHA CORPORATION 10-1 NAKAZAWA-CHO, HAMAMATSU-SHI, SHIZUOKA-KEN, JAPAN MANUFACTURED BY YEM (M) MANUFACTURED: ® US THIS DEVICE COMPLIES WITH PART 15 OF THE FCC RULES. OPERATION IS SUBJECT TO THE FOLLOWING T WO CONDITIONS: ( 1 )THIS DEVICE MAY NOT CAUSE HARMFUL INTERFERENCE, AND ( 2 ) THIS DEVICE MUST ACCEPT ANY INTERFERENCE RECEIVED, INCLUDING INTERFERENCE THAT MAY CAUSE UNDESIRED OPERATION T YAMAHA MCX-2000 AC IN T FCC ID: A6RMCX2000A THE XM NAME AND RELATED LOGOS ARE REGISTERED TRADEMARKSOF XM SATELLITE RADIO INC. IN L R Power cable (should be connected last) AC plug and outlet for US model • The MCX-2000 is designed to connect to a TV monitor for easy operation. Though you can still operate the unit while viewing its front panel display, a large TV display offers more operation information at a time. • The MCX-2000 accepts a generic PS/2 keyboard. This enables faster, more convenient operation than the remote control or front-panel buttons, especially when you edit song information or other text data. • The MCX-2000 is designed to become active immediately after the power cable is connected to the AC power source. Make sure to connect to the AC power source only in the last step after all other devices are connected. Connecting to the AC Power When relevant external devices are all connected, turn on these devices first, and then connect the MCX-2000 power cable to the AC power source. AC plug and outlet for US model The front panel STANDBY/ON button indicator will light up in green. On the TV monitor, switch the video input source to the MCX-2000 video output (VIDEO or S-VIDEO). If the following screen is shown on the TV display, connection to the TV monitor has been successful. Initial display Top menu MCX-2000 Owner's Manual 13
-
 1
1 -
2
-
3
-
4
-
5
-
6
-
7
-
8
-
9
-
10
-
11
-
12
-
13
-
14
-
15
-
16
-
17
-
18
-
19
-
20
-
21
-
22
-
23
-
 24
24 -
 25
25 -
 26
26 -
 27
27 -
 28
28 -
 29
29 -
 30
30 -
 31
31 -
 32
32 -
 33
33 -
 34
34 -
35
-
36
-
37
-
38
-
39
-
40
-
41
-
42
-
43
-
44
-
45
-
46
-
47
-
48
-
49
-
50
-
51
-
52
-
53
-
54
-
55
-
56
-
57
-
58
-
59
-
60
-
61
-
62
-
63
-
64
-
65
-
66
-
67
-
68
-
69
-
70
-
71
-
72
-
73
-
74
-
75
-
76
-
77
-
78
-
79
-
80
-
81
-
82
-
83
-
84
-
85
-
86
-
87
-
88
-
89
-
90
-
91
-
92
-
93
-
94
-
95
-
96
-
97
-
98
-
99
-
100
-
101
-
102
-
103
-
104
-
105
-
106
-
107
-
108
-
109
-
110
-
111
-
112
-
113
-
114
-
115
-
116
-
117
-
118
-
119
-
120
-
121
-
122
-
123
-
124
-
125
-
126
-
127
-
128
-
129
-
130
-
131
-
132
 |
 |
