Yamaha P-520 P-520 OWNERS MANUAL - Page 5
completed.
 |
View all Yamaha P-520 manuals
Add to My Manuals
Save this manual to your list of manuals |
Page 5 highlights
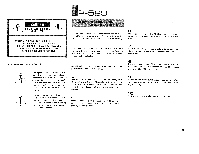
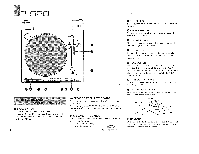
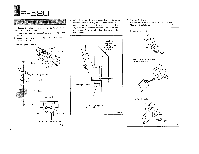
ASSEMBLING THE TliriNITABLE AND TONEARM r MOUNTING THE TURNTABLE PLATTER 1. Insert your fingers into the two holes in the turntable platter and then securely position it over the shaft. Check to make sure that the platter is securely positioned. 2. Place the rubber mat on top of the turntable platter. P-520 Be sure to unplug the power cord from AC power outlet until assembly has been completed. Rubber mat ACCESSOR I ES Turntable platter 45 adapter and 33-1/3 rpm record clamp In case of 33-1/3 rpm use it as disc clump. Headshell x 1 P-mount Headshell x 1 - Cartridge mounting parts x 1 Main weight x 1 YAW 45 adaptor and 33-1/3 rpm record clamp x 1 Dust cover hinges Center shaft * Once the assembly has been completed, be sure to depress the cut switch. Slo i Headshel l Tonearm *Be sure that the weight faces the right direction. Main weight Balance adjustment knob End of tonearm • MOUNTING THE MAIN WEIGHT 1. To mount the main weight rotate the Balance adjustment knob in the direction indicated by the arrow. 2. The grooves inside the main weight and the click stopper on the end of the tonearm interlock, thus when the Balance adjustment knob is rotated in a counterclockwise direction (as seen from the front of unit) the main weight will smoothly move forward. 4
-
 1
1 -
 2
2 -
 3
3 -
 4
4 -
 5
5 -
 6
6 -
 7
7 -
 8
8 -
 9
9 -
 10
10 -
 11
11 -
12
 |
 |
