Yamaha PSR-S950 Reference Manual - Page 28
Basic Procedure for creating a Style, Press the [FUNCTION] button, [F] DIGITAL REC MENU button - new
 |
View all Yamaha PSR-S950 manuals
Add to My Manuals
Save this manual to your list of manuals |
Page 28 highlights
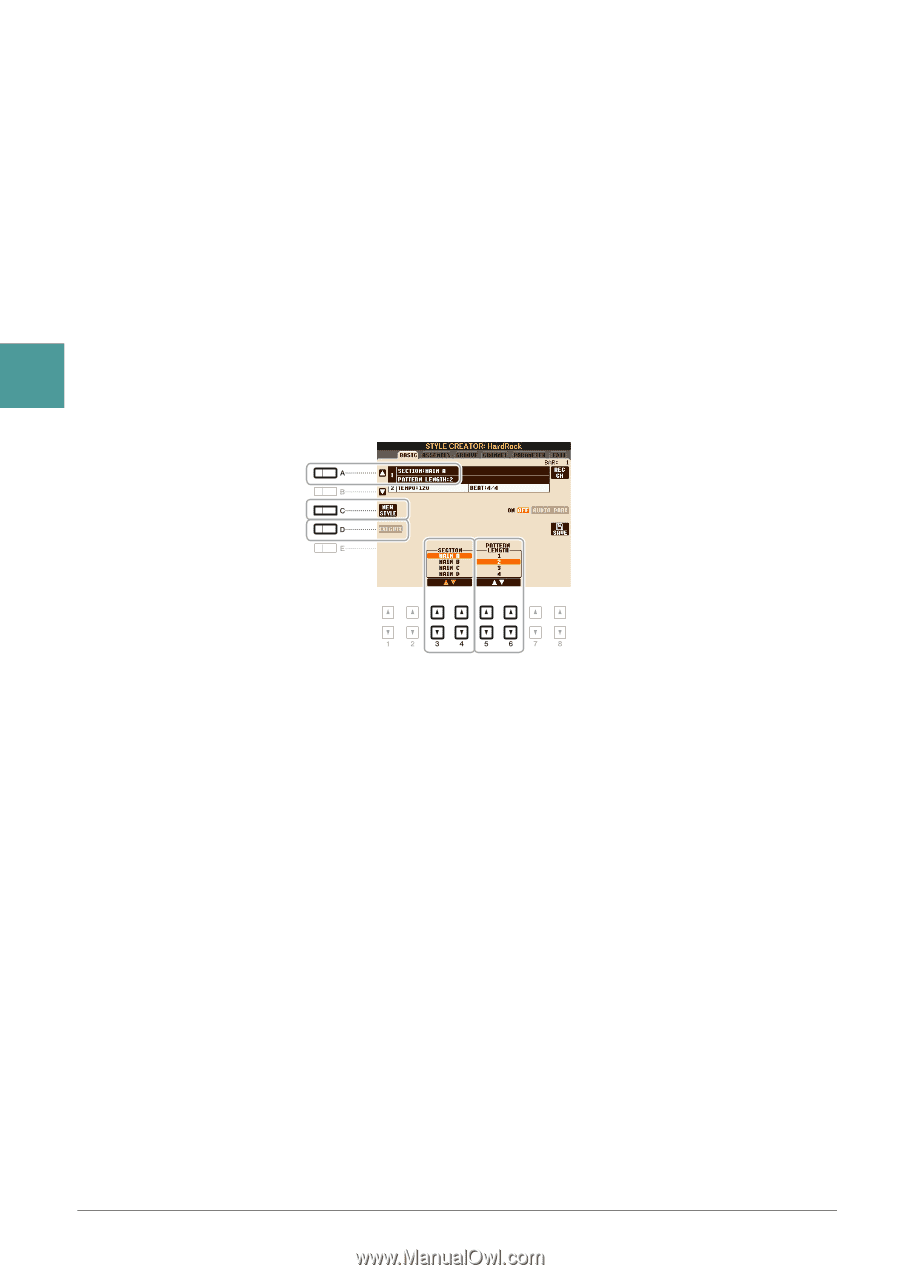
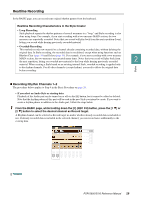
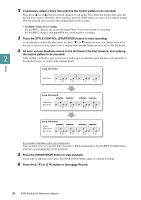
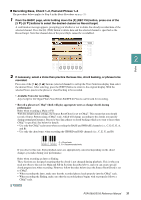
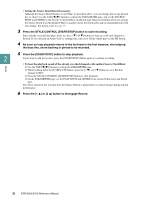
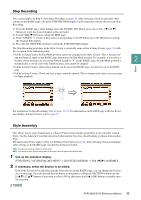
Basic Procedure for creating a Style 1 Select the desired Style as starting data. 2 Press the [FUNCTION] button, [F] (DIGITAL REC MENU) button, then [B] (STYLE CREATOR) button to call up the Style Creator display. 3 From the BASIC page, select a Section then make the other settings as necessary. • Select a Section to be edited or recorded. If the REC CHANNEL indication is shown in the lower half section of the display, press the [EXIT] button, press the [A] to select "1 SECTION," then use the [3 ]-[4 ] buttons to select a Section. • If you create a Style entirely from scratch, press the [C] (NEW STYLE) button to call up an empty new Style. • For the current Section, select the pattern length via the [5 ]-[6 ] buttons. After selecting, press the [D] (EXECUTE) button to actually enter the specified length. 2 Note that if an Audio Style is selected as starting data, changing the pattern length deletes the corresponding Audio part. • For the entire current Style, set the Tempo and Time Signature in the display called up via the [B] button. Styles 4 Create the Source Pattern for each channel. • Realtime Recording on the BASIC page (page 29) Lets you record the Style by simply playing the keyboard. • Step Recording on the EDIT page (page 33) Lets you enter each note individually. • Style Assembly on the ASSEMBLY page (page 33) Lets you copy various patterns from other preset Styles or Styles you have already created. 5 Edit the already recorded channel data. • Editing the channel data on the GROOVE (page 35), CHANNEL (page 37), and EDIT (page 33) pages Lets you change the rhythmic feel, quantizing and velocity, etc. • Editing the SFF parameters on the PARAMETER page (page 38) Lets you copy various patterns from another preset Styles or Styles you have already created. 6 Repeat steps 3-5 as desired. 7 Press the [J] (SAVE) button to save the created Style. For details, refer to "Basic Operations" in the Owner's Manual. 28 PSR-S950/S750 Reference Manual
-
 1
1 -
2
-
3
-
4
-
5
-
6
-
7
-
8
-
9
-
10
-
11
-
12
-
13
-
14
-
15
-
16
-
17
-
18
-
19
-
20
-
21
-
22
-
 23
23 -
 24
24 -
 25
25 -
 26
26 -
 27
27 -
 28
28 -
 29
29 -
 30
30 -
 31
31 -
 32
32 -
 33
33 -
34
-
35
-
36
-
37
-
38
-
39
-
40
-
41
-
42
-
43
-
44
-
45
-
46
-
47
-
48
-
49
-
50
-
51
-
52
-
53
-
54
-
55
-
56
-
57
-
58
-
59
-
60
-
61
-
62
-
63
-
64
-
65
-
66
-
67
-
68
-
69
-
70
-
71
-
72
-
73
-
74
-
75
-
76
-
77
-
78
-
79
-
80
-
81
-
82
-
83
-
84
-
85
-
86
-
87
-
88
-
89
-
90
-
91
-
92
-
93
-
94
-
95
-
96
-
97
-
98
-
99
-
100
-
101
-
102
-
103
-
104
-
105
-
106
-
107
-
108
-
109
-
110
-
111
-
112
-
113
-
114
-
115
-
116
-
117
-
118
 |
 |