Yamaha PSR-S950 Reference Manual - Page 82
Microphone (Vocal/Talk) Settings, Saving the Microphone Settings
 |
View all Yamaha PSR-S950 manuals
Add to My Manuals
Save this manual to your list of manuals |
Page 82 highlights
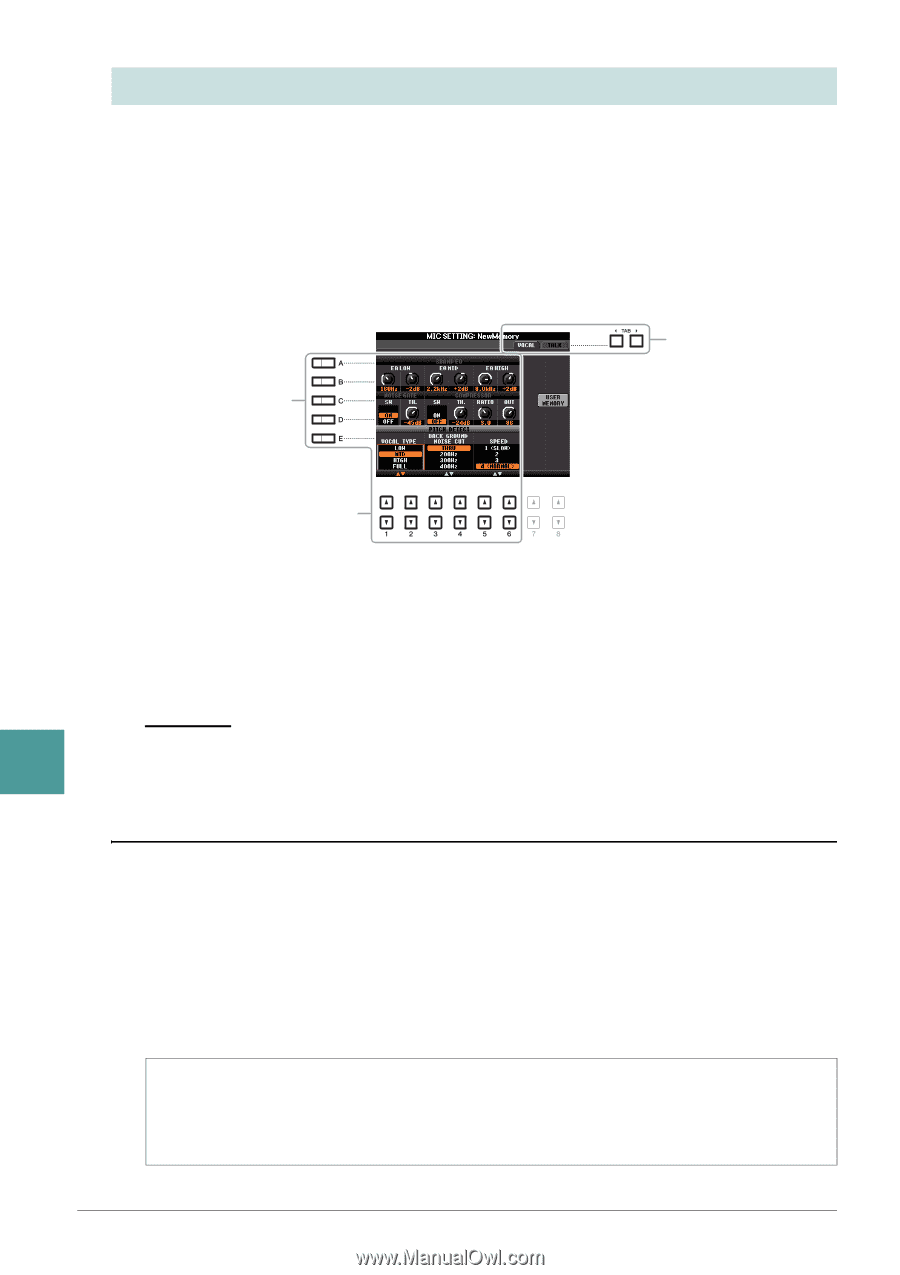
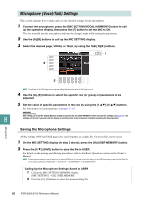
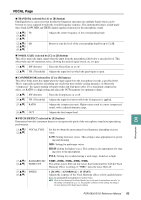
Microphone (Vocal/Talk) Settings This section explains how to make and save the detailed settings for the microphone. 1 Connect the microphone, press the [MIC SETTING/VOCAL HARMONY] button to call up the operation display, then press the [F] button to set the MIC to ON. This lets you talk into the microphone and hear the changes made while setting the parameters. 2 Use the [A]/[B] buttons to call up the MIC SETTING display. 3 Select the desired page, VOCAL or TALK, by using the TAB [E][F] buttons. 3 4 5 NOTE The settings on the TALK page are microphone settings that are active when the Talk function is on. 4 Use the [A]-[E] buttons to select the specific row (or group) of parameters to be adjusted. 5 Set the value of specific parameters in the row by using the [1 ]-[6 ] buttons. For information on each parameter, see pages 83-84. 8 NOTICE After setting, go to the Mic Setting Memory display by pressing the [H] (USER MEMORY) button and save the settings (see page 83). The settings will be lost if you exit from this display or turn the power to the instrument off without executing the Save operation. Microphone Saving the Microphone Settings All the settings (VOCAL/TALK pages) are saved together as a single file. Up to ten files can be saved. 1 On the MIC SETTING display (in step 3 above), press the [H] (USER MEMORY) button. 2 Press the [6 ] (SAVE) button to save the file to USER. For details on the naming and deleting procedures, refer to the Basic Operations section in the Owner's Manual. NOTE The microphone setting file can be saved only to internal USER drive. If you want to save this setting on the USB flash memory, save the User Effect file on the display called up via [FUNCTION] [I] (UTILITY) SYSTEM RESET [H] (USER EFFECT). Calling Up the Microphone Settings Saved to USER 1 Call up the MIC SETTING MEMORY display. [MIC SETTING] [H] USER MEMORY 2 Press the [A]-[J] buttons to select the desired setting file. 82 PSR-S950/S750 Reference Manual
-
 1
1 -
2
-
3
-
4
-
5
-
6
-
7
-
8
-
9
-
10
-
11
-
12
-
13
-
14
-
15
-
16
-
17
-
18
-
19
-
20
-
21
-
22
-
23
-
24
-
25
-
26
-
27
-
28
-
29
-
30
-
31
-
32
-
33
-
34
-
35
-
36
-
37
-
38
-
39
-
40
-
41
-
42
-
43
-
44
-
45
-
46
-
47
-
48
-
49
-
50
-
51
-
52
-
53
-
54
-
55
-
56
-
57
-
58
-
59
-
60
-
61
-
62
-
63
-
64
-
65
-
66
-
67
-
68
-
69
-
70
-
71
-
72
-
73
-
74
-
75
-
76
-
 77
77 -
 78
78 -
 79
79 -
 80
80 -
 81
81 -
 82
82 -
 83
83 -
 84
84 -
 85
85 -
 86
86 -
 87
87 -
88
-
89
-
90
-
91
-
92
-
93
-
94
-
95
-
96
-
97
-
98
-
99
-
100
-
101
-
102
-
103
-
104
-
105
-
106
-
107
-
108
-
109
-
110
-
111
-
112
-
113
-
114
-
115
-
116
-
117
-
118
 |
 |